




















1259H16 Whirlpool Range - Instructions
Keep searches simple. Use keywords, e.g. "leaking", "pump", "broken" or "fit".
Lower oven Igniter wouldn't heat up and fire the propane.
Called repair man and described the problem. He said I could do it myself. PartSelect had the part and a previous description on the PartSelect site told me how to do the repair. It was easy. Be careful when removing the igniter nuts. I used a very small amount of sewing machine oil so as not to strip the threads. works great.
Parts Used:

-
Michael from CHEWELAH, WA
-
Difficulty Level:Really Easy
-
Total Repair Time:15 - 30 mins
-
Tools:Screw drivers, Socket set
1 person
found this instruction helpful.
Was this instruction helpful to you?
Thank you for voting!
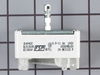
surface element out
Unplug from outlet and top remove back section of range and unplug wiring from switch, remove knob and unscrew two screws and remove old switch. Install new switch reinstall screws and plug switch plugs into new switch (will only go on the correct way). reattach back and plug into outlet. All done and surface element works perfectly.
Parts Used:
-
Edward from TAYLORS, SC
-
Difficulty Level:Really Easy
-
Total Repair Time:15 - 30 mins
-
Tools:Screw drivers
1 person
found this instruction helpful.
Was this instruction helpful to you?
Thank you for voting!
8" FRONT BURNER STAYED ON HIGH HEAT/WOULD NOT REDUCE TEMPERTURE
REMOVE BACK OF RANGE, REMOVE BURNER KNOB. REMOVE SWITCH CONTROL REMOVE WIRES. REPLACE WIRES ON NEW SWITCH. INSERTED ALL WIRES REPLACE NEW SWITCH RE REPLACE ALL SCREWS. CHECK SWITCH. TURN BRAKER BACK ON. CHECK SWITCH FUNCTION. ALL IS FINE. PUT BACK ON RANGE SCREW IT IN PLACE. MOVE RANGE BACK IN IT POSITION.
Parts Used:
-
RICHARD from DELTONA, FL
-
Difficulty Level:Really Easy
-
Total Repair Time:15 - 30 mins
-
Tools:Screw drivers
1 person
found this instruction helpful.
Was this instruction helpful to you?
Thank you for voting!
Right front burner would only stay on high
Turned off breaker, pulled stove from wall, took off knob, unscrewed and pull off backing from stove, unscrewed heat control part, unplugged wires, plugged into new part, installed part, replaced stove backing, replaced knob, pushed stove back in place and turned on breaker. It worked fine.
Parts Used:
-
Brian from YORK HAVEN, PA
-
Difficulty Level:Really Easy
-
Total Repair Time:15 - 30 mins
-
Tools:Screw drivers
1 person
found this instruction helpful.
Was this instruction helpful to you?
Thank you for voting!
replaced oven igniter
this was so simple.. attach with 2 screws and plug in and done.. less than a minute.. to be honest it took me longer to put the oven back together than installing the new part. lol
Parts Used:
-
Lynn from LEWISTON, MI
-
Difficulty Level:Very Easy
-
Total Repair Time:Less than 15 mins
-
Tools:Screw drivers
1 of 2 people
found this instruction helpful.
Was this instruction helpful to you?
Thank you for voting!
Element burned out
Element burned out, ordered from Sears. Took over 2 weeks to get, originally sent wrong burner then shipped second one to wrong address. When I installed element I found that switch was also burned out . I ordered it from Parts Select & it was in the stove in 24 hours from the time I ordered it on line. Be assured I know where I will order my parts from now on
Parts Used:
-
Francis E from Harwich, MA
-
Difficulty Level:Really Easy
-
Total Repair Time:Less than 15 mins
-
Tools:Screw drivers
Was this instruction helpful to you?
Thank you for voting!
Burner light was on all the time but burner was off.
-
Cliffford from Rochester, MN
-
Difficulty Level:Really Easy
-
Total Repair Time:Less than 15 mins
-
Tools:Pliers, Screw drivers
Was this instruction helpful to you?
Thank you for voting!
Burner control failure/unable to regulate temp.
Unplug range from 220VAC outlet. Remove screws on back of range control panel and lift cover exposing controllers and wiring. Remove burner controller mount screws. Measure old controller shaft length/new controller shaft length (per instructions). Adjust new burner controller shaft length. Remove wiring from old controller (one at a time) and place on new controller. Install new controller and secure with 2ea mount screws. Re-assemble cover/control panel. Plug range into 220VAC outlet. Have wife ops check....everyone's happy.
Parts Used:
-
ROBERT from SALCHA, AK
-
Difficulty Level:Really Easy
-
Total Repair Time:Less than 15 mins
-
Tools:Nutdriver, Screw drivers
Was this instruction helpful to you?
Thank you for voting!
burner would go red after a few mintes
put it off a week before i worked on it but if you can replace a plug on a excord you can do this less than 5 mins
Parts Used:
-
richard from pottsville, AR
-
Difficulty Level:Really Easy
-
Total Repair Time:Less than 15 mins
-
Tools:Nutdriver, Pliers, Screw drivers
Was this instruction helpful to you?
Thank you for voting!
The oven would not ignite
Removed the bottom drawer, oven racks, and the oven floor panel. With a #2 cross tip screw driver, I removed the old igniter, replaced it with the new one and tested the unit. When the new igniter began to glow I turned the unit off and reassembled the oven - JOB DONE less than 15 minutes.
Parts Used:
-
Richard from Boise, ID
-
Difficulty Level:Really Easy
-
Total Repair Time:Less than 15 mins
-
Tools:Screw drivers
Was this instruction helpful to you?
Thank you for voting!
Igniter in oven not working.
Pulled racks and covers out of oven. Moved stove away from wall. removed bolts holding igniter. Disconnected wiring harness. Reverse process to install new part.
Parts Used:
-
Rachel S from Dallas, GA
-
Difficulty Level:Easy
-
Total Repair Time:15 - 30 mins
-
Tools:Nutdriver
Was this instruction helpful to you?
Thank you for voting!
Burner would go on and then turn off, repeatedly.
Unplugged unit, removed plate behind control panel, removed 5 or 6 wire connectors, pulled off burner switch knob and removed 2 screws that holds switch in place. Reversed the procedure and was done.
Parts Used:
-
Robert from Tonawanda, NY
-
Difficulty Level:Really Easy
-
Total Repair Time:15 - 30 mins
-
Tools:Pliers, Screw drivers
Was this instruction helpful to you?
Thank you for voting!
The large burner sometimes stayed on high too long, burning food
My first approach was to try to find some help on the internet - Y-Tube or whatever. When I could not find anything, I was on my own. My first thought was that the best and easiest access to the switch was to somehow remove the top section of the range which held the switch. I was trying to avoid having to pull the range from the wall and cabinets. But not finding any way to do that, I then pulled the range from the wall, and removed the back panel (8 screws), which gave me easy access. Once that was done, the replacement went smoothly and quickly. So if replacing any switches on this range, FIRST pull it from the wall and THEN remove the back panel, and the rest is a piece of cake!
Parts Used:
-
Harry from Seminole, FL
-
Difficulty Level:Easy
-
Total Repair Time:15 - 30 mins
-
Tools:Pliers, Screw drivers
Was this instruction helpful to you?
Thank you for voting!
Front large burner stayed on high
i personally did not do the repair..one of my neighbors did it and he said it was super easy..he pulled stove out from wall, unplugged it from socket, removed defective part, shortened clip that knob attaches to, installed new part with no problems whatsoever...plugged stove back in, pushed it back in place...burner now works fine! i was super impressed with the delivery of this part...ordered it on a Monday nite, it was mailed out the next day (Tuesday), and i received it Wednesday around noontime.. :)
Parts Used:
-
Lynn C from Leesburg, FL
-
Difficulty Level:Really Easy
-
Total Repair Time:15 - 30 mins
-
Tools:Screw drivers
Was this instruction helpful to you?
Thank you for voting!
Burner goes full hot at any setting
First, I turned off the power at the switch box. Moved the stove out (That was a problem, because I am 80 years young) Removed the back panel, and moved the wires one at a time to the new switch. Removed the selector, then removed the 2 screws holding the switch in. Installed the new switch installed the dial selector, turned the power back on, and checked the burner. It works as advertised!!!!! Moved the stove back to its original position, and got a hug from my wife. PHEW!!! Now I think I'll take a nap.
Parts Used:
-
Ronald from Clinton, TN
-
Difficulty Level:Easy
-
Total Repair Time:15 - 30 mins
-
Tools:Screw drivers
Was this instruction helpful to you?
Thank you for voting!