




















1199038883 Kenmore Range - Instructions
Keep searches simple. Use keywords, e.g. "leaking", "pump", "broken" or "fit".
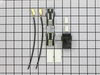
Original terminal degraded and faulty
Turn off power, remove heat coil assembly and drip pan. Unscrew the terminal assembly from the range top. Cut back 3 inches on each terminal wire and strip insulation 3/8 inch. Terminal assembly should be with the short side of the black block (from the side securement hubs) facing toward the coil stems. Slide the shrink wrap onto each wire and Twist each old with each new wire using the wire nuts and slide the shrink wrap Over each. Using a hair dryer, heat gun, or open flame carefully shrink the wrap. Secure the terminal back in place on the range.
Parts Used:
-
Robert from PRAIRIEVILLE, LA
-
Difficulty Level:Easy
-
Total Repair Time:15 - 30 mins
-
Tools:Screw drivers
2 of 2 people
found this instruction helpful.
Was this instruction helpful to you?
Thank you for voting!
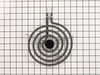
high power awful smell
-
jim from gorman, TX
-
Difficulty Level:Very Easy
-
Total Repair Time:Less than 15 mins
-
Tools:Screw drivers
2 of 3 people
found this instruction helpful.
Was this instruction helpful to you?
Thank you for voting!
Burner on stove stopped worker
I did as instructed on your video of how to install the terminal block, btw GREAT VIDEO!!
I'm a 66 year old female and if I can do it, anyone can.
Thanks, PartSelect
I'm a 66 year old female and if I can do it, anyone can.
Thanks, PartSelect
Parts Used:


-
Virginia from MT PROSPECT, IL
-
Difficulty Level:Very Easy
-
Total Repair Time:Less than 15 mins
-
Tools:Screw drivers
2 of 3 people
found this instruction helpful.
Was this instruction helpful to you?
Thank you for voting!
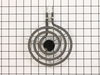
My burners were shot!
Pulled out the old, and replaced. Very simple for a 62 year old woman! I cook a lot, being from the country, and Imwas so excited to get my burners fixed! Should have done it years ago! Thanks!
Parts Used:
-
Karen from POPLARVILLE, MS
-
Difficulty Level:Very Easy
-
Total Repair Time:Less than 15 mins
2 of 3 people
found this instruction helpful.
Was this instruction helpful to you?
Thank you for voting!
Burner would cutoff intermittently
-
Joseph from FREDERICKSBRG, VA
-
Difficulty Level:Very Easy
-
Total Repair Time:Less than 15 mins
1 person
found this instruction helpful.
Was this instruction helpful to you?
Thank you for voting!
Left an appliance on surface element and melted paint onto the element
-
Kenneth from LANOKA HARBOR, NJ
-
Difficulty Level:Very Easy
-
Total Repair Time:Less than 15 mins
1 person
found this instruction helpful.
Was this instruction helpful to you?
Thank you for voting!
Drip bowls needed replacing
Removed the old ones and inserted the new ones.
Parts Used:
-
Doris from SUN CITY, AZ
-
Difficulty Level:Very Easy
-
Total Repair Time:Less than 15 mins
1 person
found this instruction helpful.
Was this instruction helpful to you?
Thank you for voting!
Old drip pans had turned to rusty lace.
Unplugged elements. Removed old pans. Wiped out holes. Inserted new pans, replaced elements.
Parts Used:
-
Helen from PAWLEYS ISL, SC
-
Difficulty Level:Very Easy
-
Total Repair Time:Less than 15 mins
1 person
found this instruction helpful.
Was this instruction helpful to you?
Thank you for voting!
needed new drip bowls and 2 new elements
pulled them out and replaced them
Parts Used:
-
kathy from DAVIS, CA
-
Difficulty Level:Very Easy
-
Total Repair Time:Less than 15 mins
1 person
found this instruction helpful.
Was this instruction helpful to you?
Thank you for voting!
Terminal block was bad.
-
Chuck from EVANSVILLE, IN
-
Difficulty Level:Very Easy
-
Total Repair Time:Less than 15 mins
-
Tools:Screw drivers
1 person
found this instruction helpful.
Was this instruction helpful to you?
Thank you for voting!
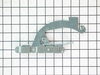
oven door hinges were worn out.
Removed the storage drawer to access the door springs.Removed the worn hinges and installed the new hinges,connected the springs. Removed the oven door before anything else was done.The could not have been any simpler .
Parts Used:
-
Gilbert from Claymont, DE
-
Difficulty Level:Really Easy
-
Total Repair Time:Less than 15 mins
-
Tools:Screw drivers
4 of 10 people
found this instruction helpful.
Was this instruction helpful to you?
Thank you for voting!
Rusted Drip Bowls
This range is probably 30+ years old. Still works great. Just needed to replace the Drip Bowls.
Parts Used:
-
Carolyn from OCEAN PARK, WA
-
Difficulty Level:Very Easy
-
Total Repair Time:Less than 15 mins
1 person
found this instruction helpful.
Was this instruction helpful to you?
Thank you for voting!
right hinge on oven door broke. door would no longer shut, losing much heat.
Remove drawer, remove oven door, remove hinge and pieces. Get the spring loose. Attache new hinge to frame, reconnect spring. Slide door back on hinges.
Parts Used:
-
Donna from ROANOKE, WV
-
Difficulty Level:Easy
-
Total Repair Time:30 - 60 mins
-
Tools:Pliers, Screw drivers
1 person
found this instruction helpful.
Was this instruction helpful to you?
Thank you for voting!
wrong part
my original part arrived and it did not fit. When I called to explain the problem I was told it was the wrong part. The big problem is... Frigidaire calls the receptacle a terminal block kit as well as a terminal block kit which is a totally different part. I tried to explain that to several different folks I spoke to at your company as well as Frigidaire but I'm not sure if I got that point across. Take a look at part # 530 393 5058 and part # 530 440 9888 and you will see that they both mention terminal block kit. Hopefully the part I am getting from Frigidaire is an OEM part and will fit.
Parts Used:
-
Barbara from WICKENBURG, AZ
-
Difficulty Level:Very Difficult
-
Total Repair Time:30 - 60 mins
2 of 4 people
found this instruction helpful.
Was this instruction helpful to you?
Thank you for voting!
replaced terminal block for element
-
Donna from UNION, OR
-
Difficulty Level:Really Easy
-
Total Repair Time:30 - 60 mins
-
Tools:Screw drivers
1 person
found this instruction helpful.
Was this instruction helpful to you?
Thank you for voting!