




















1109875279B Kenmore Washer Dryer Combo - Instructions
Keep searches simple. Use keywords, e.g. "leaking", "pump", "broken" or "fit".
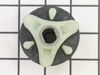
Agitator was locked up
I had a little difficulty at first, trying to remove the back of the unit. I then figured out that the repair was to be made by leaning the washer back and removing it from underneath. That became really easy as the bottom is open.I had to remove one nut and then the agitator from inside, then tilt the machine back, disconnect the two hoses from the pump, remove three bolts and lower the motor/ transmission assembly. Then I had to disconnect the motor from the pump ( with two snap on clips) and remove the broken plastic coupling. The new coupling had a metal insert that seems to make it stronger than the original piece.I then just reversed the procedure to put it together again and it worked fine. The part was shipped immediately and I got it sooner than I expected so I greatly appreciate that. Overall it went well, and by the way, it was my daughters washer and she was happy as well.Thanks, Roger
Parts Used:
-
Roger from Palmyra, IN
-
Difficulty Level:Easy
-
Total Repair Time:30 - 60 mins
-
Tools:Nutdriver, Pliers, Screw drivers, Socket set
24 of 28 people
found this instruction helpful.
Was this instruction helpful to you?
Thank you for voting!
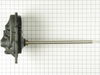
The spin gear was striped.
I had to take the motor and transmission out. They are one piece. Removed the clutch, take off trans. cover, remove a snap ring, take the striped gear off, and put the new one on. Then put put everything back on the way it came off.
Parts Used:
-
Aaron from Lake Mills, WI
-
Difficulty Level:A Bit Difficult
-
Total Repair Time:1- 2 hours
-
Tools:Pliers, Socket set
25 of 31 people
found this instruction helpful.
Was this instruction helpful to you?
Thank you for voting!
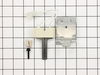
dryer stoped heating
the problem was not the igniter its was the thermal fuse I broke the igniter during inspection of the problem be careful its a very easy thing to break repairs complete thank you parts select for the quick shipping and low prices
Parts Used:
-
valerie from Elasmore, KS
-
Difficulty Level:Really Easy
-
Total Repair Time:15 - 30 mins
-
Tools:Nutdriver
23 of 26 people
found this instruction helpful.
Was this instruction helpful to you?
Thank you for voting!
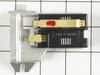
Dyer would not heat, flame would shut off within 10 seconds
I opened the panel, undid the plugs, detached the radiant sensor by undoing one screw and removed and replaced the part. Fairly simply.
Parts Used:
-
Christy from Riley, MI
-
Difficulty Level:Easy
-
Total Repair Time:Less than 15 mins
-
Tools:Screw drivers, Socket set
24 of 29 people
found this instruction helpful.
Was this instruction helpful to you?
Thank you for voting!
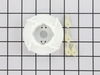
Motor was working and rotating lower portion of agitator, but the top was not spinning.
1. Remove the fabric softener receptacle
2. Remove the plastic dome shaped separator with a rubber o-ring around it (directly beneath fabris softener receptacle)
3. There is an 11mm bolt right in the center. Use socket wrench to remove bolt.
4. Remove agitator from washign machine.
5. Separate top half of agitator from bottom half (this was the most difficult part for me; unlike others who have described this repair, mine would not simply pull apart; I spent quite a while trying to pry up the white plastic clips extending from the bottom piece through the clear plastic piece that covers the "dog teeth" that make the top piece agitate)
6. Once apart, replace worn "dog teeth" with new dog teeth.
7. Put back together in reverse order.
2. Remove the plastic dome shaped separator with a rubber o-ring around it (directly beneath fabris softener receptacle)
3. There is an 11mm bolt right in the center. Use socket wrench to remove bolt.
4. Remove agitator from washign machine.
5. Separate top half of agitator from bottom half (this was the most difficult part for me; unlike others who have described this repair, mine would not simply pull apart; I spent quite a while trying to pry up the white plastic clips extending from the bottom piece through the clear plastic piece that covers the "dog teeth" that make the top piece agitate)
6. Once apart, replace worn "dog teeth" with new dog teeth.
7. Put back together in reverse order.
Parts Used:
-
Brad from Boise, ID
-
Difficulty Level:A Bit Difficult
-
Total Repair Time:30 - 60 mins
-
Tools:Socket set
22 of 24 people
found this instruction helpful.
Was this instruction helpful to you?
Thank you for voting!
In the spin cycle, drum would'nt spin unless assisted
First off unplug the machine then turned off H/C water supply and removed hoses, laid the machine on its side, removed 3 motor supp. bolts, loosened drum pulled out shaft and clutch assembly was right there. Also replaced coupling while it was apart. And to think, a svce company wanted 179.00 just to walk in my door and diagnose the pblm. Then, parts and labor were extra. Thanks for the help/advice, piece of cake!!!!!!!
Parts Used:

-
ANTHONY from NY, NY
-
Difficulty Level:Really Easy
-
Total Repair Time:30 - 60 mins
-
Tools:Nutdriver, Pliers, Screw drivers, Socket set
22 of 24 people
found this instruction helpful.
Was this instruction helpful to you?
Thank you for voting!
Cog stripped causing agitator to not turn
Removed top cap on agitator w/ flathead screwdriver. Removed protective cap over bolt and cog housing shaft. Used 7/16 deep socket w/ extension to remove bolt. Removed housing where stripped cogs were located. Cogs seated loosely in shaft housing no tools required to remove cogs. Replaced cogs in housing, made sure everything was lined correctly. re-inserted housing into shaft. ,screwed bolt, replaced caps and works like new.
Parts Used:

-
Vicki from Houston, TX
-
Difficulty Level:Easy
-
Total Repair Time:Less than 15 mins
-
Tools:Screw drivers, Wrench set
22 of 25 people
found this instruction helpful.
Was this instruction helpful to you?
Thank you for voting!
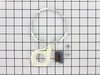
washer wouldnt agitate or spinn but would drain?
So i replaced the above parts pulled gearbox put new oil in all looked good but when i tryed it filled started spinning for a few sec.then quit again?was makeing a clicking sound so i layed on the floor and the drive coupling was spinning so i took the water pump off and it started agitating and spinning. found about a 6 in.thin piece of wire in it, dont know where it came from but installed a new pump and it works like a new one !!!
Parts Used:
-
lester from Belleville, WI
-
Difficulty Level:A Bit Difficult
-
Total Repair Time:30 - 60 mins
-
Tools:Nutdriver, Pliers, Screw drivers
20 of 20 people
found this instruction helpful.
Was this instruction helpful to you?
Thank you for voting!
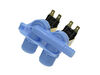
valves allowed water to overflow during the rinse cycle, sometimes took forever to fill.
I removed the screws holding the control unit down, removed a couple at the rear,
Disconnected the electrical clip that plugs into the top, under the control unit.
This allows enough slack to pivot it ( the control unit) upside down and get it out of the way enough to remove the spring clips that hold the top to the back.
Popped out the two clips that hold the back to the top.
Pulled the back out, up until the plastic soap dispenser , (which is attached to the back) hits under the lip of the top.
This does not allow enough room to get to the valves.
I finally figured out you have to lift the entire top up high enough to clear the back while pulling it ( the back) out.
Disconnected the hose clamp, electric connectors, installed the new valves into the supplied mounting plate replaced the valves .
Re -connected the hose and electric connectors and re assembled the back.
The only problem I had was when one of the spring retainers that hold the back to the top popped off and fell inside the unit, which forced me to remove everything including the back bottom screws, which caused the sides to pop off, the mounting ears , which are attached to the back,
Took some finesse but finally retrieved the spring clamp and finished everything back together.
It was a bit tricky keeping the plastic gaskets between the back and the sides from falling inside as I reassembled it.
But all is well, and would have been more difficult without the expierence written by others who posted, on the site.
Thank you to all, for the help.
I hope my efforts will help someone else.
Disconnected the electrical clip that plugs into the top, under the control unit.
This allows enough slack to pivot it ( the control unit) upside down and get it out of the way enough to remove the spring clips that hold the top to the back.
Popped out the two clips that hold the back to the top.
Pulled the back out, up until the plastic soap dispenser , (which is attached to the back) hits under the lip of the top.
This does not allow enough room to get to the valves.
I finally figured out you have to lift the entire top up high enough to clear the back while pulling it ( the back) out.
Disconnected the hose clamp, electric connectors, installed the new valves into the supplied mounting plate replaced the valves .
Re -connected the hose and electric connectors and re assembled the back.
The only problem I had was when one of the spring retainers that hold the back to the top popped off and fell inside the unit, which forced me to remove everything including the back bottom screws, which caused the sides to pop off, the mounting ears , which are attached to the back,
Took some finesse but finally retrieved the spring clamp and finished everything back together.
It was a bit tricky keeping the plastic gaskets between the back and the sides from falling inside as I reassembled it.
But all is well, and would have been more difficult without the expierence written by others who posted, on the site.
Thank you to all, for the help.
I hope my efforts will help someone else.
Parts Used:
-
Sam from Robertsville, MO
-
Difficulty Level:Really Easy
-
Total Repair Time:30 - 60 mins
-
Tools:Pliers, Screw drivers
22 of 26 people
found this instruction helpful.
Was this instruction helpful to you?
Thank you for voting!
Slipping Spin clutch due to leaking gear-case seal.
1. Unplug the machine.
2. Turn the water off.
3. Disconnect the supply and discharge hoses.
4. Open the cover and remove the cap/cover of the agitator. Use socket wrench to remove the bolt securing the agitator. Pull up on the agitator and remove it.
5. Lay washing machine down on it's front. Remove the inlet and outlet drain hoses from the discharge pump.
6. Remove the 2 "faston" connectors from the motor start capacitor (looks like a D cell flashlight battery). Rock the connectors back and forth and pull gently until they come off. Polarity doesn't matter but to be safe make note of the positions.
7. Press the release clip on the motor connector and pull to disconnect it. Move the wiring harness out of harms way.
8. Remove the 3 bolt securing the motor and transmission assembly to the bottom of the tub. Pull the drive assembly out of the machine and place it on a suitable work surface.
9. Examine the tub brake assembly (still on the bottom of the tub), the clutch assembly (on the motor/transmission assembly you just removed and everything else for wear or damage. Now if you decide to proceed with repair continue with the following steps. If not you're done.
10. Remove the inverted cup washer from the agitator shaft of the assembly. Remove the "U" clip from the shaft and remove the clutch mechanism from the drive assembly. Make a sketch of the position of each of the removed components to aid in reassembly.
11. Now you can see the gear case cover and it's seal. If it is leaking (as mine was) you will need to replace it.
12. With the assembly level remove the bolts around the cover and remove the cover. Place the cover on a flat surface and with a screwdriver or punch drive the old seal out of the cover from the outside in.
13. Clean the seal area and check for damage. Clean the cover and transmission housing surfaces of old gasket material. There is a factory sealant available for reassembly but I chose an automotive RTF @ $4 vs $24 and it worked OK.
14. Installing the seal requires some tools and experience to done successfully. The right size sockets or piece of pipe, coupled with an arbor press or vise will get the seal in. The cover is delicate so if in doubt find a machine shop.
15. Support the outside of the cover on a hard surface and with a socket or short pipe length, PRESS (don't hammer) the new seal into the gear case cover.
16. Make sure there is lubricant in the gear case. Not overflowing but maybe 1/2 full when view with cover off on a level surface.
17. Apply some RTV sealant to trhe cover and install it. Tighten bolts evenly. Light torque (1-2 ft-lb).
18. Reassemble washing machine and test for leaks and proper operation.
2. Turn the water off.
3. Disconnect the supply and discharge hoses.
4. Open the cover and remove the cap/cover of the agitator. Use socket wrench to remove the bolt securing the agitator. Pull up on the agitator and remove it.
5. Lay washing machine down on it's front. Remove the inlet and outlet drain hoses from the discharge pump.
6. Remove the 2 "faston" connectors from the motor start capacitor (looks like a D cell flashlight battery). Rock the connectors back and forth and pull gently until they come off. Polarity doesn't matter but to be safe make note of the positions.
7. Press the release clip on the motor connector and pull to disconnect it. Move the wiring harness out of harms way.
8. Remove the 3 bolt securing the motor and transmission assembly to the bottom of the tub. Pull the drive assembly out of the machine and place it on a suitable work surface.
9. Examine the tub brake assembly (still on the bottom of the tub), the clutch assembly (on the motor/transmission assembly you just removed and everything else for wear or damage. Now if you decide to proceed with repair continue with the following steps. If not you're done.
10. Remove the inverted cup washer from the agitator shaft of the assembly. Remove the "U" clip from the shaft and remove the clutch mechanism from the drive assembly. Make a sketch of the position of each of the removed components to aid in reassembly.
11. Now you can see the gear case cover and it's seal. If it is leaking (as mine was) you will need to replace it.
12. With the assembly level remove the bolts around the cover and remove the cover. Place the cover on a flat surface and with a screwdriver or punch drive the old seal out of the cover from the outside in.
13. Clean the seal area and check for damage. Clean the cover and transmission housing surfaces of old gasket material. There is a factory sealant available for reassembly but I chose an automotive RTF @ $4 vs $24 and it worked OK.
14. Installing the seal requires some tools and experience to done successfully. The right size sockets or piece of pipe, coupled with an arbor press or vise will get the seal in. The cover is delicate so if in doubt find a machine shop.
15. Support the outside of the cover on a hard surface and with a socket or short pipe length, PRESS (don't hammer) the new seal into the gear case cover.
16. Make sure there is lubricant in the gear case. Not overflowing but maybe 1/2 full when view with cover off on a level surface.
17. Apply some RTV sealant to trhe cover and install it. Tighten bolts evenly. Light torque (1-2 ft-lb).
18. Reassemble washing machine and test for leaks and proper operation.
Parts Used:

-
Thomas from Pascoag, RI
-
Difficulty Level:A Bit Difficult
-
Total Repair Time:1- 2 hours
-
Tools:Pliers, Screw drivers, Socket set
21 of 23 people
found this instruction helpful.
Was this instruction helpful to you?
Thank you for voting!
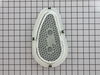
In the middle of changing loads there was snapping and sound and drum stopped turning.
I was hopeful it was the belt. But, I had no idea how to get to it. I used the model no. and looked on line for pats and schematics. That gave me a sense of what to do. I started at the rear and removed the back panel. It was like peeling an onion because then, I wasn't sure what to remove next. So I just kept removing nut head screws until eventually I had loosened the sides, removed the top and discovered the front lifted up and off (no screwed attachment.) There's grounding wire that must be detached. Don't forget to re-attach. Without proper grounding you could be electocuted! I was careful to remember how it was attached. To get to the pulley, which is on the front, I had to remove the drum. I found the snapped belt. The pulley is held in place by tension from the belt so, once the belt goes the pulley detaches. I tried to find the belt locally the following week but was unsuccessful. I found the part on-line and had it in four days. It was tricky getting the belt and pulley in place. I persevered.
The parts ( I replaced the fliter that needed replacement for years too) came with installation instructions. Its possible I did not have to disassemble as much as I did. Oh well! Although I'm fairly mechanical, I'm still pretty proud to have been able to do it and save the cost of a repairman.
The parts ( I replaced the fliter that needed replacement for years too) came with installation instructions. Its possible I did not have to disassemble as much as I did. Oh well! Although I'm fairly mechanical, I'm still pretty proud to have been able to do it and save the cost of a repairman.
Parts Used:

-
William from Glen Burnie, MD
-
Difficulty Level:A Bit Difficult
-
Total Repair Time:1- 2 hours
-
Tools:Socket set
24 of 32 people
found this instruction helpful.
Was this instruction helpful to you?
Thank you for voting!
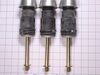
Tub was out of balance
went by the instution in the box with the part went very well thanks
Parts Used:

-
Delbert from Morgantown, IN
-
Difficulty Level:Really Easy
-
Total Repair Time:1- 2 hours
-
Tools:Nutdriver, Pliers, Screw drivers, Socket set
26 of 38 people
found this instruction helpful.
Was this instruction helpful to you?
Thank you for voting!
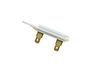
The Dryer Would Not Turn On
The dryer wouldn’t turn on at all. It was like it was unplugged from the wall. However, fixing it couldn't be easier. I simply removed the back panel, found the fuse, tested it with an Ohmmeter (to determine that this was the part that didn't work), ordered the part from this website, and replaced the part. The part arrived in about two days. The shipping was a little pricey, but overall the whole thing cost me $20 vs. whatever it would cost me to get someone else to repair it. The website helps to identify the problem, and it is helpful to read how other people fixed their problems. It was so easy and the service was so good, I will definitely use this website again and recommend it to others.
Parts Used:
-
Ribhe from Wildwood, MO
-
Difficulty Level:Really Easy
-
Total Repair Time:Less than 15 mins
-
Tools:Nutdriver, Screw drivers
19 of 19 people
found this instruction helpful.
Was this instruction helpful to you?
Thank you for voting!
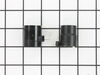
Would not heat sometimes
Pulled the big front panel by removing two screws near bottom of front and pulling out at bottom until the top pops loose. Vacuumed out all of the dust and checked for loose connections. Ran dryer - igniter would light, but no gas. Checked the two solenoids with a VOM. the one with the two leads would intermittently read Infinity (open). Super simple repair. Remove two screws on solenoid bracket on top of the gas valve, Replace solenoid and plug it back in with the easy push-on connector. NO PROBLEM - all fixed.
Parts Used:
-
Chris from Laguna Niguel, CA
-
Difficulty Level:Easy
-
Total Repair Time:15 - 30 mins
-
Tools:Screw drivers
21 of 26 people
found this instruction helpful.
Was this instruction helpful to you?
Thank you for voting!
No Heat, no ignition in burner
Our dryer would not heat and it seemed that no gas was coming from the regulator. The igniter was working fine but the burner never turned on. To check the problem, i followed the instructions to remove all body panels until I had access to the burner assembly. I dismantled both gas valve coils and tested each one for open or closed circuit using my multi-tester. I found that the three terminal gas valve coil was an open circuit and was not functioning so I ordered a new one from PartSelect and within just a couple days, had the drier back up and functioning. I also replaced the igniter due to a malfunctioning igniter that has been changed by the manufacture. I must say that PartSelect has the fastest shipping I have ever seen. One part I ordered was at my door in less than 24 hours and I only paid standard shipping...un real! OUTSTANDING....5 STAR SERVICE
Parts Used:
-
Russell from Santa Maria, CA
-
Difficulty Level:Easy
-
Total Repair Time:15 - 30 mins
-
Tools:Nutdriver, Screw drivers, Wrench (Adjustable)
21 of 26 people
found this instruction helpful.
Was this instruction helpful to you?
Thank you for voting!