




















11087983810 Kenmore Dryer - Instructions
Keep searches simple. Use keywords, e.g. "leaking", "pump", "broken" or "fit".
Dryer would not turn
My dryer starter squeaking in December 09 and the repairman told me that it would cost between $200-$500. I did not let him fix it as this machine is only 3 years old. When the part finally broke in April 10, I was ready to junk this and just buy a used dryer. My husband went on line and quickly figured out the part he would need to do the repairs. It cost under $20.00. Now my dryer is fixed and running and there are no squeaks. Thank you
Parts Used:
-
Kim K from Hurst, TX
-
Difficulty Level:Really Easy
-
Total Repair Time:15 - 30 mins
-
Tools:Screw drivers, Wrench (Adjustable)
15 of 18 people
found this instruction helpful.
Was this instruction helpful to you?
Thank you for voting!
Thermal fuse was bad.
Did an Ohm test on the old Thermal Fuse found it to be bad. Replaced it with a new and the dryer is back to working great. Your suggestions saved approximatley $150.
Thanks for the help.
Thanks for the help.
Parts Used:
-
Brad from Odessa, MO
-
Difficulty Level:Really Easy
-
Total Repair Time:30 - 60 mins
-
Tools:Screw drivers, Socket set
16 of 22 people
found this instruction helpful.
Was this instruction helpful to you?
Thank you for voting!
Dryer made a terrible screeching noise when tumbling.
I followed the repair Vedic and took the drum out and replaced the pulls and bracket. Very straightforward job. Dryer is now as quite as the first day we bought it.
Parts Used:

-
Richard from SAUGERTIES, NY
-
Difficulty Level:A Bit Difficult
-
Total Repair Time:30 - 60 mins
-
Tools:Nutdriver, Screw drivers, Socket set
13 of 14 people
found this instruction helpful.
Was this instruction helpful to you?
Thank you for voting!
Dryer gasket detached from screen
Received in two days, open box, installed part. Pretty easy, fast service. I'm a repeat customer and will use these guys in the future.
Parts Used:

-
Richard from Duarte, CA
-
Difficulty Level:Really Easy
-
Total Repair Time:Less than 15 mins
14 of 17 people
found this instruction helpful.
Was this instruction helpful to you?
Thank you for voting!
Lint has been bypassing the lint filter and building up in the fan (and duct)
I noticed that drying time was increasing. I took the covers off the dryer to reach the fan and discovered that the squirrel cage fan buckets were packed with lint, and therefore not moving the air as intended. This was because the original lint filter caught most of the lint, but some bypassed the lint filter and then built up in the fan wheel buckets. The lint bypassed the lint filter because there was no felt gasket on the original filter as far as I can tell. I replaced the lint filter...and the replacement filter includes the felt seal (and fits tightly in the slide). The original lint filter has a provision for the felt seal, but I don't recall ever seeing it (and I did not see remnants of it in the fan or duct). As a matter of fact, I was always suspicious of how loosely the lint filter fit in the slide. The felt seal is not available as a replacement part from Maytag. That said, felt material 3/16"x1/2"x10ft is available from McMaster-Carr...and it fits nicely in the original lint filter.
Parts Used:
-
David from PINETOWN, NC
-
Difficulty Level:Really Easy
-
Total Repair Time:Less than 15 mins
12 of 12 people
found this instruction helpful.
Was this instruction helpful to you?
Thank you for voting!
Door latch (female part) was broken.
I used a screwdriver to remove the old part and pushed the new part in with my fingers, it was very easy. If I could do it, anyone can. I was a lot cheaper then having a repair man come to house. I am very glad I found your site online, I will definitely be using your company again.
Parts Used:

-
JEANMARIE from BELLEROSE, NY
-
Difficulty Level:Really Easy
-
Total Repair Time:Less than 15 mins
-
Tools:Screw drivers
11 of 11 people
found this instruction helpful.
Was this instruction helpful to you?
Thank you for voting!
Rear dryer drum seal came out
Used my Whirlpool Dryer User Instructions Manual and followed instructions and used the Cabinet Parts page to see the diagrams.
Parts Used:
-
William from Pontiac, MO
-
Difficulty Level:Easy
-
Total Repair Time:More than 2 hours
-
Tools:Screw drivers, Socket set
17 of 29 people
found this instruction helpful.
Was this instruction helpful to you?
Thank you for voting!
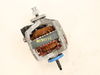
dryer would stall and the motor would hum before tripping circuit breaker
When the problem first came up, I took the dryer apart without first looking up any instructions. This wasn't difficult, but didn't realize when removing the fan from the motor, there is a square lug as part of the fan hidden by the rear clamp securing the motor. I was able to remove the fan by holding the motor shaft with a crescent wrench and removing the fan by hand, but was difficult and gloves were necessary in case the fan loosened quickly and my hand came in contact with the sheet metal (very sharp).
I took the motor out and attempted to clean it as it was loaded with dust as was the dryer internals. I tried to lube the motor bearings and appeared to free up, but the sight of metal shavings on the rear bearing seal had me concerned. This ultimely did not work and was trying to buy some time until the new motor arrived.
This is when I looked up the motor part number and found that Parts Select had the part number in stock. I ordered the motor on a Saturday afternoon and got a quick response acknowledging my order. The motor shipped that following Monday from Fresno and arrived on my Southern California doorstep Tuesday. These guys have their act together and are helpful in making the repairs. In my case I did not have to make any adjustments to the wiring or the pulley for my model and replaced the motor the following weekend in about 45 minutes. Since I had the unit apart several times before replacing the motor, the installation went quickly.
The dryer is again working fine for a unit 12 years old and my wife is once again happy that we didn't have to purchase a new dryer.
I took the motor out and attempted to clean it as it was loaded with dust as was the dryer internals. I tried to lube the motor bearings and appeared to free up, but the sight of metal shavings on the rear bearing seal had me concerned. This ultimely did not work and was trying to buy some time until the new motor arrived.
This is when I looked up the motor part number and found that Parts Select had the part number in stock. I ordered the motor on a Saturday afternoon and got a quick response acknowledging my order. The motor shipped that following Monday from Fresno and arrived on my Southern California doorstep Tuesday. These guys have their act together and are helpful in making the repairs. In my case I did not have to make any adjustments to the wiring or the pulley for my model and replaced the motor the following weekend in about 45 minutes. Since I had the unit apart several times before replacing the motor, the installation went quickly.
The dryer is again working fine for a unit 12 years old and my wife is once again happy that we didn't have to purchase a new dryer.
Parts Used:
-
Charles from Placentia, CA
-
Difficulty Level:Easy
-
Total Repair Time:30 - 60 mins
-
Tools:Screw drivers, Socket set, Wrench (Adjustable)
11 of 12 people
found this instruction helpful.
Was this instruction helpful to you?
Thank you for voting!
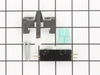
The Dryer stopped working completely.
I looked up the procedure to remove the switch in a repair book, removed the broken switch. Then I reconnected the wire leads, put the part in and closed everything up. The part arrived so quickly and there were even instructions with the part which made the repair go so easily.
Parts Used:
-
Elyse from Chicago, IL
-
Difficulty Level:Really Easy
-
Total Repair Time:15 - 30 mins
-
Tools:Pliers, Screw drivers
13 of 18 people
found this instruction helpful.
Was this instruction helpful to you?
Thank you for voting!
Idler pulley wore out
Removed the back panel and saw that the idler pulley was worn out. It only took me 5min. To replace, it was very easy to replace.
Parts Used:
-
Peter from HUEYTOWN, AL
-
Difficulty Level:Very Easy
-
Total Repair Time:15 - 30 mins
-
Tools:Screw drivers, Socket set
10 of 11 people
found this instruction helpful.
Was this instruction helpful to you?
Thank you for voting!
Dryer squeeching very loud
Took off back of dryer Undid belt from belt adjuster pulled and took off adjuster put new one on redid belt and put back on dryer. Done
Parts Used:
-
Michael from ENOLA, PA
-
Difficulty Level:Very Easy
-
Total Repair Time:15 - 30 mins
-
Tools:Nutdriver, Socket set
9 of 9 people
found this instruction helpful.
Was this instruction helpful to you?
Thank you for voting!
gasket came off lent filter
i could not find this part anywhere locally,so i found this web site which had this part.i ordered this part and am very glad i did.i received it in 2 days.thank you very much.if you need anything check this place first,you will be very satisfied.
Parts Used:
-
stephen from langley, KY
-
Difficulty Level:Really Easy
-
Total Repair Time:Less than 15 mins
11 of 15 people
found this instruction helpful.
Was this instruction helpful to you?
Thank you for voting!
my teenage son was messing around and got into the dryer and broke the door catch and bent the door.
removed the catch and the pin and replaced it. We were sent a couple different sizes so we tested the one that looked like the closest match. I think the pin was made with different thicknesses of metal. Worked great and saved us from having to get a new dryer!
Parts Used:
-
Dawn from Chesapeake City, MD
-
Difficulty Level:Really Easy
-
Total Repair Time:Less than 15 mins
13 of 21 people
found this instruction helpful.
Was this instruction helpful to you?
Thank you for voting!
Washer stopped working mid cycle restarts after resetting lid
Repair went well, but my switch only had one contact on the non common end. The new switch had two contacts. One is for operation with lid open and one for lid closed. Make sure to connect to the lid closed contact and the common on the other end and leave the lid open contact unused.
Parts Used:
-
Eric from West Chester, PA
-
Difficulty Level:Easy
-
Total Repair Time:15 - 30 mins
-
Tools:Screw drivers
11 of 16 people
found this instruction helpful.
Was this instruction helpful to you?
Thank you for voting!
Old motor was making noise and tripping after a few minutes
I disassembled the dryer once to clean the motor and compartment. After reasembly, the problem persistes. I ordered the motor and the second diasasssembly was accomplished in 10 minutes and the entire job took 45 minutes and the dryer was running like new. Tip- Leave the motor secured while removing the blower fan.
Parts Used:
-
John from Midland, TX
-
Difficulty Level:Easy
-
Total Repair Time:30 - 60 mins
-
Tools:Nutdriver, Pliers, Screw drivers
10 of 13 people
found this instruction helpful.
Was this instruction helpful to you?
Thank you for voting!