




















11082824101 Kenmore Dryer - Instructions
Keep searches simple. Use keywords, e.g. "leaking", "pump", "broken" or "fit".
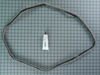
Broken Drum Belt
-
Garry from Garland, TX
-
Difficulty Level:Easy
-
Total Repair Time:15 - 30 mins
-
Tools:Nutdriver, Screw drivers, Socket set
4 of 4 people
found this instruction helpful.
Was this instruction helpful to you?
Thank you for voting!
Dryer drum turned hard because rollers were worn
Remove top, front and drum. Top is removed by sliding a putty knife under the front corners and pushing the tabs back. Front is held with screws. Disconnect two electrical connectors. Rollers are easily accessible and changed.
Parts Used:
-
Paul from STONE CREEK, OH
-
Difficulty Level:Easy
-
Total Repair Time:30 - 60 mins
-
Tools:Nutdriver, Pliers
4 of 4 people
found this instruction helpful.
Was this instruction helpful to you?
Thank you for voting!
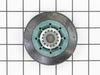
Dryer was squealing
Disconnected Power cord, removed vent pipe, removed back panel, had to slide top cover off to remove additional screw holding back on. Went down to where the Idler Pulley was, removed old piece by depressing on the spring loaded actuator and slid it off the belt and all. Replaced same as removal.
Parts Used:
-
Kevin from VALDOSTA, GA
-
Difficulty Level:Very Easy
-
Total Repair Time:30 - 60 mins
-
Tools:Nutdriver, Screw drivers
4 of 4 people
found this instruction helpful.
Was this instruction helpful to you?
Thank you for voting!
Idler pulley seized
The pulley is accessible from the back of the dryer. Disconnect the gas line. Remove all the screws. Also remove the small plate that secures the line cord. Lift the back up and out. I was able to avoid disconnecting the water line. Take a picture of the pulley so that you will have a record of the belt routing. Release the spring and remove and replace the pulley and bracket. Vacuum out the lint. Plug in the dryer to make sure that it works properly before reassembly.
Parts Used:
-
John from CREST HILL, IL
-
Difficulty Level:Easy
-
Total Repair Time:30 - 60 mins
-
Tools:Nutdriver, Pliers
4 of 4 people
found this instruction helpful.
Was this instruction helpful to you?
Thank you for voting!
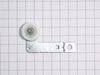
Unit not spent
Just replaced part
Parts Used:

-
Boonkham from SMYRNA, TN
-
Difficulty Level:Really Easy
-
Total Repair Time:30 - 60 mins
-
Tools:Nutdriver
4 of 4 people
found this instruction helpful.
Was this instruction helpful to you?
Thank you for voting!
Roller Berings were worn out - replaced both
Watched Video - very helpful in repair Maytag Dryer working like new now Thanks for your guidance in my repair
Parts Used:
-
Gregory from COCOA, FL
-
Difficulty Level:Easy
-
Total Repair Time:30 - 60 mins
-
Tools:Pliers, Screw drivers, Socket set
4 of 5 people
found this instruction helpful.
Was this instruction helpful to you?
Thank you for voting!
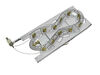
dryer was not heating up
take off front bottom panel. use ohm tester on the heater coil element, (It had broken in back) remove screw holding it in place and the two red wires leading to the element. Pull out and replace. reinstall in reverse. Done
Parts Used:
-
Michael from Rescue, CA
-
Difficulty Level:Really Easy
-
Total Repair Time:15 - 30 mins
-
Tools:Socket set
9 of 20 people
found this instruction helpful.
Was this instruction helpful to you?
Thank you for voting!
My idler pully was squealing
I removed the bottom access panel, with 2 hands i reached in behind the blower, i released the belt, i used a screwdriver to pop the retainer from the pully spindle, i removed and replaced the pully, i snapped the retainer back on and replaced the belt. I made sure the belt was on track and all was good. I put the bottom panel back on, it took all of 5 minutes. The hardest part was the retainer clip faces the rear of the dryer so you have to feel it. Also , the space is tight, use a smaller flathead screwdriver to get behind the clip, it will pop right off.
Parts Used:
-
Anthony from SAINT CLOUD, FL
-
Difficulty Level:Really Easy
-
Total Repair Time:Less than 15 mins
-
Tools:Screw drivers
4 of 5 people
found this instruction helpful.
Was this instruction helpful to you?
Thank you for voting!
Bent slide on pedestal
Note that the problem was with the pedestal, not the washing machine. In the process of attaching the two units together, the drawer in the pedestal is removed. When I tipped the assembly up, the slide slid out and locked horns with an object, bending the slide. The slide is an easy replacement. Just one screw holds it in place. A slot in the slide mates with a tab to hold the back side of the slide in place.
Parts Used:
-
Donald from Greenfield, WI
-
Difficulty Level:Really Easy
-
Total Repair Time:Less than 15 mins
-
Tools:Nutdriver
5 of 8 people
found this instruction helpful.
Was this instruction helpful to you?
Thank you for voting!
Plastic door handle broke off the dryer door.
I Googled a description of the repair, found a forum entry from another 'do-it-yourselfer'. They had posted instructions on which 8 screws needed to be removed. I followed the instructions and within 15 minutes, I was done.
Parts Used:
-
Zachary from Newton, MA
-
Difficulty Level:Easy
-
Total Repair Time:Less than 15 mins
-
Tools:Screw drivers
5 of 8 people
found this instruction helpful.
Was this instruction helpful to you?
Thank you for voting!
dryer would not turn on
turned off the power and removed the back cover, checked the thermal fuse had no continuity. ordered new part. very easy Installed the new thermal fuse,.replaced the cover, turned on the power and worked fine.
Parts Used:
-
donald from MANVILLE, NJ
-
Difficulty Level:Really Easy
-
Total Repair Time:Less than 15 mins
-
Tools:Nutdriver
3 of 3 people
found this instruction helpful.
Was this instruction helpful to you?
Thank you for voting!
not drying completely on the automatic settings
Not a handyman but this was an easy and cheap fix. Now the automatic settings are working and drying much faster. Unplug machine, front panel has 2 spring clips toward the edges that you stick a flat tool into and pull on the panel to open. Pull off the electrical connections from the old sensors by the right side of the lint screen. Needlenose pliers help with the one farther up there. Then just pull the old ones sensors out, stick the new ones in, reconnect the electrical and get ready to live the good life with dry clothes that don't smell musty.
Parts Used:

-
Jason from Colorado Springs, CO
-
Difficulty Level:Easy
-
Total Repair Time:Less than 15 mins
-
Tools:Pliers
3 of 3 people
found this instruction helpful.
Was this instruction helpful to you?
Thank you for voting!
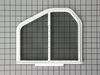
A hole in filter
-
Russ from Vernal, UT
-
Difficulty Level:Really Easy
-
Total Repair Time:Less than 15 mins
3 of 3 people
found this instruction helpful.
Was this instruction helpful to you?
Thank you for voting!
Door handle broke
Watch the video on the website. The instructions are spot-on. Thanks!
Parts Used:
-
Michael from SPRINGVILLE, UT
-
Difficulty Level:Really Easy
-
Total Repair Time:Less than 15 mins
-
Tools:Screw drivers
3 of 3 people
found this instruction helpful.
Was this instruction helpful to you?
Thank you for voting!
No heat from dryer.
1.Removed lower dryer cover - two screws. 2.Tested heating element circuit including high temp cutoff, - Heating element circuit was "open" so I first tested the heating element - "open" so I removed one screw on the side and removed the element - element broken. 3.Ordered the part - good price and the deliver was great, three days. 4. Cleaned any lint up and Installed the new heating element and front panel 5. Heated right up - probably saved myself a good $100 for less than thirty minutes of work!!!!
Parts Used:
-
Nelson from RAVENSWOOD, WV
-
Difficulty Level:Really Easy
-
Total Repair Time:15 - 30 mins
-
Tools:Nutdriver, Pliers
3 of 3 people
found this instruction helpful.
Was this instruction helpful to you?
Thank you for voting!