




















11076491600 Kenmore Dryer - Instructions
Keep searches simple. Use keywords, e.g. "leaking", "pump", "broken" or "fit".
Mother was frozen up
-
Dan from SYRACUSE, UT
-
Difficulty Level:Really Easy
-
Total Repair Time:30 - 60 mins
-
Tools:Nutdriver, Screw drivers, Socket set, Wrench (Adjustable)
3 of 3 people
found this instruction helpful.
Was this instruction helpful to you?
Thank you for voting!
Rear drum rollers were shot.
I followed the instructions on the video and it was simple. The hardest part was vacuuming out 32 years of lint from around the motor and igniter. I was lucky there was never a fire in the dryer.
Parts Used:
-
David from JOLIET, IL
-
Difficulty Level:Really Easy
-
Total Repair Time:30 - 60 mins
-
Tools:Nutdriver, Pliers, Screw drivers, Socket set
3 of 3 people
found this instruction helpful.
Was this instruction helpful to you?
Thank you for voting!
dryer motor quit working
i took the face off dryer and removed the belt and drum then removed the lint trap from back to clean and have access fan then removed the retaing clips holding the motor then with two adjustable wenches unscewed the motor from fan took out motor and replaced in reverse order all you needed was some common sence to do this i though it was easy to do greats parts fit perfect thanks tommy
Parts Used:

-
Tommy from BRUSH, CO
-
Difficulty Level:Really Easy
-
Total Repair Time:30 - 60 mins
-
Tools:Nutdriver, Screw drivers, Wrench (Adjustable)
3 of 3 people
found this instruction helpful.
Was this instruction helpful to you?
Thank you for voting!
Dryer was working erratically.
I followed the YouTube video. Took the back panel off, took the lint thing off and proceeded as indicated in the video excerpt I didn't take the top off.
Parts Used:
-
Alejandro from HOLLIS, NY
-
Difficulty Level:Really Easy
-
Total Repair Time:30 - 60 mins
-
Tools:Screw drivers, Socket set, Wrench (Adjustable)
3 of 3 people
found this instruction helpful.
Was this instruction helpful to you?
Thank you for voting!
the dryer would not turn on
The first step was to check the electrical supply to make sure I had power 120 volt. I unplugged the dryer and turned off the gas supply and turned the dryer around so I could have access to the back panel removed panel to access the wiring harness and safety thermostats. All switches and wire checked good with my ohmmeter .I pulled off the front kick panel and checked the electrical schematic and found the door switch was in the circuit to check it I had to lift up the top and pop out the front to access the door switch checked switch and found it defective. Replaced switch vacuumed out dryer and vent reassembled dryer and all worked good.
Parts Used:

-
Warren from PHILADELPHIA, PA
-
Difficulty Level:A Bit Difficult
-
Total Repair Time:30 - 60 mins
-
Tools:Nutdriver, Pliers, Screw drivers, Wrench (Adjustable), Wrench set
4 of 6 people
found this instruction helpful.
Was this instruction helpful to you?
Thank you for voting!
There dryer was not producing any heat
I unplugged the dryer from the electrical outlet, removed the back of the unit and checked the heating element for continuity. There was no reading. I then removed the housing and heating element and visually inspected it. The coiled wire was broken in two places.
I then did a Google search with the model number and found Parts Select. I placed my order Sunday afternoon and the part arrived the following Wednesday. That evening it took about 20 minutes to install the new element,put the back on the dryer and re-attach the exhaust tube.
The old dryer is as good as new again.
TJ in Boise
I then did a Google search with the model number and found Parts Select. I placed my order Sunday afternoon and the part arrived the following Wednesday. That evening it took about 20 minutes to install the new element,put the back on the dryer and re-attach the exhaust tube.
The old dryer is as good as new again.
TJ in Boise
Parts Used:

-
Terry from Boise, ID
-
Difficulty Level:Easy
-
Total Repair Time:1- 2 hours
-
Tools:Nutdriver, Screw drivers
3 of 3 people
found this instruction helpful.
Was this instruction helpful to you?
Thank you for voting!
Lint Filter wore out.
It required no tools, just take out the old torn filter and slip in the new one. I should have ordered it a year ago, with the ease of the website and the delivery via Fed Ex. super easy.
Parts Used:

-
Claude from Austin, TX
-
Difficulty Level:Really Easy
-
Total Repair Time:Less than 15 mins
4 of 6 people
found this instruction helpful.
Was this instruction helpful to you?
Thank you for voting!
Needed a new lint filter
-
Evelyn from JACKSONVILLE, FL
-
Difficulty Level:Very Easy
-
Total Repair Time:Less than 15 mins
3 of 3 people
found this instruction helpful.
Was this instruction helpful to you?
Thank you for voting!
Start and then kick out.
Two Phillips screws, and 2 5/16 bolts and the dryer is open for this repair. Remove the drum and note the placement of the drive belt. Then using a pipe wrench grab the rear plastic fan housing, at the rear of the motor shaft, and turn the front of the motor shaft CLOCKWISE. If the Fan is ceased (as it was in my case) you will need to use locking vice grips (at least 3 or 4 between the fan blades to stop the fan blades from turning on the rear shaft.) while your turning the front of the motor's shaft. If done properly, you should have about 25-30 turns before the motor is free for replacement.
Once this is accomplished, mounting the new motor back into the dryer is a simple matter of reversing your steps. But keep note of the belt placement and the motor wiring placement before starting.
Once this is accomplished, mounting the new motor back into the dryer is a simple matter of reversing your steps. But keep note of the belt placement and the motor wiring placement before starting.
Parts Used:
-
PHILLIP from AUSTIN, MN
-
Difficulty Level:A Bit Difficult
-
Total Repair Time:15 - 30 mins
-
Tools:Nutdriver, Screw drivers, Wrench (Adjustable), Wrench set
5 of 9 people
found this instruction helpful.
Was this instruction helpful to you?
Thank you for voting!
Dryer would not run
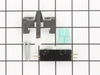
There are two screws that hold the switch in place. And two wires connected to the switch. The most difficult part of replacement is to place the new switch and hold it in place to reinstall the mounting screws. The space to work in is limited unless you remove the front panel from the dryer, which I opted not to do.
Parts Used:
-
james from york, PA
-
Difficulty Level:A Bit Difficult
-
Total Repair Time:15 - 30 mins
-
Tools:Nutdriver, Pliers, Screw drivers
4 of 6 people
found this instruction helpful.
Was this instruction helpful to you?
Thank you for voting!
Dryer drum wouldn't turn and motor would shut off
First I was told by the maytag repair man that the motor was shot and it would be 467 dollars to repair. Since I didn't have that kind of money I decided to take it apart to see if I could replace the motor myself. Once I had it apart I saw the part that held the motor in place was broken off and the motor was out of place causing it too shut itself off. Once I figured it all out it took about 2 minutes to replace the less than 6 dollar part! Thanks partSelect!!!
Parts Used:

-
Cynthia M from Westfield, MA
-
Difficulty Level:Easy
-
Total Repair Time:More than 2 hours
-
Tools:Screw drivers
3 of 4 people
found this instruction helpful.
Was this instruction helpful to you?
Thank you for voting!
Dryer making a screeching noise. Diagnosed by removing idler pulley first, then turning the motor and learning that it was the motor that was squeaking or the blower fan.
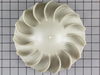
Ordered the motor with pulley and blower wheel in case the wheel did not come free from the motor.
Took out the lint screen, took off the top and disconnected the wires for the door switch, took off the front.
Remove the idler poi and the belt and then removed the drum.
I read in other repair YouTube videos, the blower wheel sometimes is so seized onto the motor axle that you have to remove the wheel by cutting it off.
Yes, ours seized!
Cut off the motor axle with a hacksaw and then the motor and the wheel were free. This was not an issue since I had purchased both the motor and the wheel which I recommend doing anyway. Our dryer over 25 years old and it does not have many electrical components, which I love. We removed the parts put in the new parts. Follow the wiring diagram to get the new motor hooked up.
Then I replaced the drum support rollers, which were a snap and then we put it all back together.
We added an extra step because we had to takeoff the back of the dryer to gain access to the blower. It turned out to be a good thing since years of lint have been trapped at the bottom of the lint chute.
I cleaned everything, washed everything and put it all back together and it purrs like a kitten.
Took us about 2 1/2 hours total since we are very cautious and slow as we didn’t want to break things.
I am very happy with the end result and hopefully it will last another 25 years!
Parts were spot on and worked perfectly.
Much more economical than buying a new dryer for $750-$1000.
Took out the lint screen, took off the top and disconnected the wires for the door switch, took off the front.
Remove the idler poi and the belt and then removed the drum.
I read in other repair YouTube videos, the blower wheel sometimes is so seized onto the motor axle that you have to remove the wheel by cutting it off.
Yes, ours seized!
Cut off the motor axle with a hacksaw and then the motor and the wheel were free. This was not an issue since I had purchased both the motor and the wheel which I recommend doing anyway. Our dryer over 25 years old and it does not have many electrical components, which I love. We removed the parts put in the new parts. Follow the wiring diagram to get the new motor hooked up.
Then I replaced the drum support rollers, which were a snap and then we put it all back together.
We added an extra step because we had to takeoff the back of the dryer to gain access to the blower. It turned out to be a good thing since years of lint have been trapped at the bottom of the lint chute.
I cleaned everything, washed everything and put it all back together and it purrs like a kitten.
Took us about 2 1/2 hours total since we are very cautious and slow as we didn’t want to break things.
I am very happy with the end result and hopefully it will last another 25 years!
Parts were spot on and worked perfectly.
Much more economical than buying a new dryer for $750-$1000.
Parts Used:
-
Linda from GIBSONIA, PA
-
Difficulty Level:Easy
-
Total Repair Time:More than 2 hours
-
Tools:Nutdriver, Pliers, Screw drivers, Socket set, Wrench (Adjustable)
3 of 4 people
found this instruction helpful.
Was this instruction helpful to you?
Thank you for voting!
Motor failure
Followed the video instructions to replace motor, belt, and rollers (belt and rollers looked to be in ok shape, but as long as I had the thing open I figured I might as well). Fairly straightforward procedure. Trickiest parts were getting the rear roller clips in place and re-attaching the rear motor spring clip. Probably could've found a used dryer of comparable quality for less, but this was easier and more satisfying than moving dryers in and out of the basement.
Parts Used:
-
Sam from MINNEAPOLIS, MN
-
Difficulty Level:Easy
-
Total Repair Time:30 - 60 mins
-
Tools:Pliers, Screw drivers, Socket set, Wrench (Adjustable)
3 of 4 people
found this instruction helpful.
Was this instruction helpful to you?
Thank you for voting!
Dryer heating up but clothes not drying
Removed back and then removed lint slide.
Vacuumed all of the cabinet and and washed lint chute.
Blower seal and lint seals were crumbling since dryer is 24
years old. Part Select diagrams and repair videos are extremely helpful in showing the process. Dryer now working like new.
Vacuumed all of the cabinet and and washed lint chute.
Blower seal and lint seals were crumbling since dryer is 24
years old. Part Select diagrams and repair videos are extremely helpful in showing the process. Dryer now working like new.
Parts Used:


-
Donald from Knoxville, TN
-
Difficulty Level:Really Easy
-
Total Repair Time:30 - 60 mins
-
Tools:Nutdriver
3 of 4 people
found this instruction helpful.
Was this instruction helpful to you?
Thank you for voting!
Broken Drum Roller Support
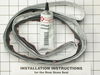
After reading about repairs to the drum rollers, it was suggested to change the rear drum seal at the same time. The drum rollers were very easy to change and took no time at all. The rear seal was a different story. The instructions in the packet could have been more explicit. The seal has to be streched around the drum at first. Then and only then can you install the seal on the drum edge. You should also have several clamps available to hold the seal in place as you glue the outside flap. Leave the clamps in place until the glue dries, then re-install the drum.
Parts Used:
-
Lawrence from Cedar Grove, NJ
-
Difficulty Level:A Bit Difficult
-
Total Repair Time:30 - 60 mins
-
Tools:Nutdriver, Screw drivers
3 of 4 people
found this instruction helpful.
Was this instruction helpful to you?
Thank you for voting!