




















11066132410 Kenmore Dryer - Instructions
Keep searches simple. Use keywords, e.g. "leaking", "pump", "broken" or "fit".
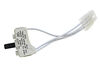
The dryer wouldn't stop when I opened the door.
I Picked up the two front corners up, after removing the 2 screws from the vent and the 2 screws that hold the door switch in place, then I disconnected the old switch and put in the new one. Just the opposite of how I took it apart. Very simple and it works great!! Thanks
Parts Used:
-
Jean from PORT ST LUCIE, FL
-
Difficulty Level:Very Easy
-
Total Repair Time:15 - 30 mins
-
Tools:Screw drivers
3 of 3 people
found this instruction helpful.
Was this instruction helpful to you?
Thank you for voting!
replace dryer door gasket
Take the door off of the dryer. Lay it on a towel. Remove old gasket. Clean the channel the door gasket fits into with glue remover. Squeeze high temperature glue into the channel, let the glue set up. Put the new gasket into the channel, tape it down in a few places. Let it sit 24 hours for the glue to set up. Put the door back on. You can put the door on immediately as long as you don't use the dryer for 24 hours. Easy.
Parts Used:

-
Kenneth from N RIDGEVILLE, OH
-
Difficulty Level:Really Easy
-
Total Repair Time:30 - 60 mins
-
Tools:Screw drivers
3 of 3 people
found this instruction helpful.
Was this instruction helpful to you?
Thank you for voting!
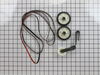
Drum would not turn. Broken Belt
Removed top cover. Removed front cover. Removed Drum. Located the broken belt. Found that there was no tensioner in the unit. Replaced drum rollers. Put in new tensioner. Repaced Drum with belt around it. Installed belt through tensioner and onto drive pully of motor. Supported Drum with wood block. Turned on dryer to insure drum turned without any problems. Removed wood block. Replaced front cover and top cover. Repair compete.
Parts Used:
-
Ray from Boulder Creek, CA
-
Difficulty Level:Really Easy
-
Total Repair Time:30 - 60 mins
-
Tools:Nutdriver, Screw drivers
5 of 10 people
found this instruction helpful.
Was this instruction helpful to you?
Thank you for voting!
Loud rumble and finally the drum stopped because the belt broke
I opened the top and front of the dryer. 1st I pulled out the drum and cleaned up the lint and mess from the busted support roller. Next it was a matter of looking at the enclosed drawing and instructions. I could not believe it was that easy.
Parts Used:
-
William from Rocky Mount, VA
-
Difficulty Level:Easy
-
Total Repair Time:30 - 60 mins
-
Tools:Screw drivers, Socket set
3 of 5 people
found this instruction helpful.
Was this instruction helpful to you?
Thank you for voting!
Bad door gasket
Removed old seal and replaced with new one. Save yourself time and get some acetone to remove old glue works great!
Parts Used:
-
Joseph from NEOSHO, MO
-
Difficulty Level:Very Easy
-
Total Repair Time:30 - 60 mins
-
Tools:Pliers, Screw drivers
2 of 2 people
found this instruction helpful.
Was this instruction helpful to you?
Thank you for voting!
Dryer would not operate
I removed the two screws underneath the lent trap the removed the two screws that held the dryer switch assembly. I then lifted up the top and disconnected the door switch assembly. Removing the door switch assembly was the toughest part, and it was not difficult. Simply grab a pair of pliers and pull. I the attatched the new door switch assembly and the four screws and my dryerwas as good as new. I paid around $20.00 including shipping and saved myself a couple of hundred dollars
Parts Used:
-
Joseph from Winterville, NC
-
Difficulty Level:Really Easy
-
Total Repair Time:15 - 30 mins
-
Tools:Screw drivers
2 of 2 people
found this instruction helpful.
Was this instruction helpful to you?
Thank you for voting!
broken door switch light would not turn on and dryer kept running when door was opened.
First removed lint screen, then removed screws holding lint screen housing.Pushed on back of machine a little so that top could be pried up. Then replaced switch and put everything back together. Helps to have two people so one can push on back of top piece while top of machine is being pried up.
Parts Used:
-
Pam from PLANT CITY, FL
-
Difficulty Level:Easy
-
Total Repair Time:15 - 30 mins
-
Tools:Screw drivers
2 of 2 people
found this instruction helpful.
Was this instruction helpful to you?
Thank you for voting!
Making all types of squealing noises
I changed the belt, tension pully and rollers. Runs like new now. I also took the opportunity to clean it out real good while I had it apart.
Parts Used:
-
Kevin from White Haven, PA
-
Difficulty Level:Easy
-
Total Repair Time:30 - 60 mins
-
Tools:Pliers, Screw drivers, Socket set
3 of 5 people
found this instruction helpful.
Was this instruction helpful to you?
Thank you for voting!
Dryer did NOTHING.
Removed old door switch and tested with ohms meter. It registered as charged, but when black button was pushed it did not cut off (go to zero). Replaced the part just like the video showed. Only problem i had was dropping my screwdriver down into the dryer well. It was doing no harm so i left it there since i tried retrieving from the back but was not able to get entire back off!
Parts Used:
-
Shari from Mabank, TX
-
Difficulty Level:Easy
-
Total Repair Time:15 - 30 mins
-
Tools:Screw drivers
4 of 8 people
found this instruction helpful.
Was this instruction helpful to you?
Thank you for voting!
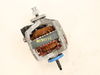
The original motor stopped working
Had to replace the rear felt seal and the motor. It was no problem to find videos on how to do both of these repairs. Took apart the appliance. When the parts came first replaced the drum rear felt seal and waited for the motor to be delivered. Then replaced the motor as per online instructions. Also went to Home Depot to buy a new flexible dryer tube since the old one had a few holes. It works perfectly again.
Parts Used:
-
Robert from PFLUGERVILLE, TX
-
Difficulty Level:A Bit Difficult
-
Total Repair Time:More than 2 hours
-
Tools:Nutdriver, Pliers, Screw drivers, Socket set, Wrench (Adjustable)
2 of 2 people
found this instruction helpful.
Was this instruction helpful to you?
Thank you for voting!
Bad Motor, Would not start.
First unplug appliance, Remove dryer top and front. remove drum and belt. Two clamps hold motor in place. remove them and lint chute housing in rear, exposing the fan. Use vice grips to hold motor shaft behind belt pulley flat spot. Remove fan, it's reverse threads. A large adjustable wrench on plastic fan nut and spray lubricant if very tight. Place new motor next to old and switch wires over, crimp on new 1/8'' connectors. Remember the green ground wire may need an allen wrench. Put back drum,belt, lube the rollers and replace back cover, front, top.
Parts Used:
-
Steve from S LAKE TAHOE, CA
-
Difficulty Level:A Bit Difficult
-
Total Repair Time:More than 2 hours
-
Tools:Nutdriver, Pliers, Screw drivers, Socket set, Wrench (Adjustable), Wrench set
3 of 5 people
found this instruction helpful.
Was this instruction helpful to you?
Thank you for voting!
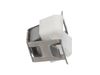
door catch had crackedt
took out old ,twisted in the new one it was nice to have the right part the first time!! thank-you
Parts Used:
-
stephen from tewksbury, MA
-
Difficulty Level:Really Easy
-
Total Repair Time:Less than 15 mins
-
Tools:Screw drivers
2 of 2 people
found this instruction helpful.
Was this instruction helpful to you?
Thank you for voting!
door catch broke
Remove the protective cover on door with screwdriver, pop out the old catch, snap new catch in place, replace protective cover
Parts Used:
-
Debra from BLASDELL, NY
-
Difficulty Level:Really Easy
-
Total Repair Time:Less than 15 mins
-
Tools:Screw drivers
2 of 2 people
found this instruction helpful.
Was this instruction helpful to you?
Thank you for voting!
Door would not stay closed.
Replaced door catch on dryer door. Followed video on Whirlpool website and it took less than 10 minutes. The dryer works great.
Parts Used:
-
Wanda from SHELBYVILLE, KY
-
Difficulty Level:Very Easy
-
Total Repair Time:Less than 15 mins
-
Tools:Screw drivers
2 of 2 people
found this instruction helpful.
Was this instruction helpful to you?
Thank you for voting!
the metal plate connecting the door catch was broken, so I ordered the part
I pushed one end of the catch on upper side the hole and when locked, I pushed the other end of the catch to the lower side to get locked. To complete, the white cover was inserted on top of the catch and done.
Parts Used:
-
Cris from GLENDALE, CA
-
Difficulty Level:Really Easy
-
Total Repair Time:Less than 15 mins
2 of 2 people
found this instruction helpful.
Was this instruction helpful to you?
Thank you for voting!