




















11066102500 Kenmore Dryer - Instructions
Keep searches simple. Use keywords, e.g. "leaking", "pump", "broken" or "fit".
Dryer would not stop when you opened the door but it would stop if it went through the cycle.
First thing was to unplug the dryer. Then pull out the lint collector and removed the two screws. Then used a small putty knife and insert it in between the top portion of the dryer and the lower portion about an inch and a half in from each end and depressed the tab inside. Next lift up the top section. Open the dryer door remove the two screws that hold the switch in place. disconnect the switch from the harness reconnect the new switch to the harness and put the switch back threw the hole then put the two screws back in to hold the switch in place. Lower the top portion of the dryer and put the screws back in put the lint collector back and it should be good to go...
Parts Used:

-
Dion from MILFORD, DE
-
Difficulty Level:Really Easy
-
Total Repair Time:Less than 15 mins
-
Tools:Screw drivers
7 of 8 people
found this instruction helpful.
Was this instruction helpful to you?
Thank you for voting!
the dryer would run for about two mints and shut off
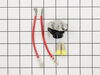
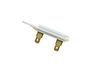
removed the back of the dryer and the thermal fuse and the dryer cycling thermostat were right next replace them and the dryer work like new my dryer is 40 years old and saved a ton of money fixing it myself
Parts Used:
-
Albert A Little from brookfield, MA
-
Difficulty Level:Really Easy
-
Total Repair Time:30 - 60 mins
-
Tools:Nutdriver, Screw drivers
7 of 8 people
found this instruction helpful.
Was this instruction helpful to you?
Thank you for voting!
Dryer air would not heat
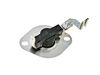
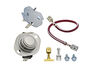
Boyfriend stated it was simple, he removed the back and replaced the part using a few everyday tools.
Parts Used:
-
Jacqulyn from ANDERSON, CA
-
Difficulty Level:Really Easy
-
Total Repair Time:30 - 60 mins
-
Tools:Screw drivers, Socket set
7 of 8 people
found this instruction helpful.
Was this instruction helpful to you?
Thank you for voting!
broken rib belt
Followed instructions from video, just removed lint collector, dryer top and front panel, removed broken belt and old idler pulley. Vacuumed and cleaned up inside dryer.installed new pulley and rib belt according to printed instructions,installed new dryer duct and new clamps. Saved myself huge service call or having to buy new dryer.Will be checking with this site on any future repairs instead of calling a repair service. Your video made it real easy to repair.and I am 77 years old.. Bob
Parts Used:


-
Robert from PEABODY, MA
-
Difficulty Level:Really Easy
-
Total Repair Time:15 - 30 mins
-
Tools:Nutdriver, Screw drivers
6 of 6 people
found this instruction helpful.
Was this instruction helpful to you?
Thank you for voting!
couldn't get the wire connection anywhere after we bought the heating element.
we received the two heating element wires in 3 days and connected the heating element with no problem works great.
Parts Used:
-
Betty from Erie, PA
-
Difficulty Level:Really Easy
-
Total Repair Time:15 - 30 mins
-
Tools:Socket set
6 of 6 people
found this instruction helpful.
Was this instruction helpful to you?
Thank you for voting!
Dryer made a terrible squealing noise
Took a bit to first figure out how to get the front of the dryer off in order to access the motor, wheels, and belt, but found a "how-to" online. Once I had that, the rest was easy.
Lubricated motor and guide wheels but squealing still there. Then noticed the "idler pulley assembly" (the part that keeps the belt tight against the drum) looked a bit old and worn. Ordered a replacement part on this site because it was much much cheaper than a service call, installed it.... and NO SQUEAL!!!
Lubricated motor and guide wheels but squealing still there. Then noticed the "idler pulley assembly" (the part that keeps the belt tight against the drum) looked a bit old and worn. Ordered a replacement part on this site because it was much much cheaper than a service call, installed it.... and NO SQUEAL!!!
Parts Used:
-
Will from Charlotte, NC
-
Difficulty Level:A Bit Difficult
-
Total Repair Time:15 - 30 mins
-
Tools:Screw drivers, Socket set
7 of 9 people
found this instruction helpful.
Was this instruction helpful to you?
Thank you for voting!
No heat
Unplug Dryer.
Disconnect dryer vent line from rear of machine.
Removed 8 screws holding back cover on.
Removed back cover.
Disconnect 2 quick connect wires from dryer heating element tube on right side of the machine.
Remove 2 screws holding element cover in place.
Remove cover and element.
Remove thermostat from unit and connect to new unit.
Re install parts in reverse order of above.
Disconnect dryer vent line from rear of machine.
Removed 8 screws holding back cover on.
Removed back cover.
Disconnect 2 quick connect wires from dryer heating element tube on right side of the machine.
Remove 2 screws holding element cover in place.
Remove cover and element.
Remove thermostat from unit and connect to new unit.
Re install parts in reverse order of above.
Parts Used:
-
John from Boynton Beach, FL
-
Difficulty Level:Easy
-
Total Repair Time:30 - 60 mins
-
Tools:Nutdriver, Pliers
7 of 9 people
found this instruction helpful.
Was this instruction helpful to you?
Thank you for voting!
My dryer conked. Would not turn on, but before that happened it was taking way too long to dry the clothes and the dryer would stop in the middle of a cycle.
Went on this website and found a story that was similar. I ordered the parts which arrived quickly and I replaced the Thermal Fuse and heating element and it was fixed! The whole repair cost me $24.88! Way cheaper than calling a repair man.
Heater thing was part # 3387134
and the fuse was 3392519
Heater thing was part # 3387134
and the fuse was 3392519
Parts Used:
-
brenda from Newman Lake, WA
-
Difficulty Level:Really Easy
-
Total Repair Time:15 - 30 mins
-
Tools:Screw drivers, Wrench (Adjustable)
7 of 9 people
found this instruction helpful.
Was this instruction helpful to you?
Thank you for voting!
Needed to repair and replace dryer motor pulley and pully
this was very was very easy. But I deviated from the You Tube instructions. One to release the motor pulley. I needed to use 2 adjustable wrenches for a longer lever. I needed to use a hammer to help release pulley. Second to remove the dryer cable I needed to use a small screw driver to aid in the release. ---- the part from the company was a perfect fit.
Parts Used:
-
Rob from GAITHERSBURG, MD
-
Difficulty Level:Really Easy
-
Total Repair Time:30 - 60 mins
-
Tools:Wrench (Adjustable)
6 of 6 people
found this instruction helpful.
Was this instruction helpful to you?
Thank you for voting!
damp clothes after drying....
repair was fairly cut and dry...if you have any handyman experience....the hard part was partselect web page...starts out easy to locate part if you have the correct model number....however after that it can be confusing as to what you are looking for part wise and if you have located the correct part....diagrams are helpful if you could see them and/or understand them or what you are looking for....as a novice can be fustrateing....even after calling partselect for help/explaination....other wise it went well for a repair and hopeful will get another 10yrs out of this dryer.....
Parts Used:
-
John from San Antonio, TX
-
Difficulty Level:Easy
-
Total Repair Time:30 - 60 mins
-
Tools:Socket set
6 of 6 people
found this instruction helpful.
Was this instruction helpful to you?
Thank you for voting!
Loud Noise While Drying
Followed simple instructions to replace two pulleys and belt. The Virtual Repairman helped me identify the cause in minutes. Took another 5 minutes to place the order and the part arrived two days later. Saved $125 at least. Thank you!
john
john
Parts Used:
-
John from Metamora, OH
-
Difficulty Level:Easy
-
Total Repair Time:30 - 60 mins
-
Tools:Nutdriver, Screw drivers, Socket set
7 of 9 people
found this instruction helpful.
Was this instruction helpful to you?
Thank you for voting!
Dryer would not start.
Unplug dryer from mains. Remove the back of the dryer. Thermal fuse is located on the left hand side near the bottom as you face the back of the dryer. Remove fuse and connect new fuse. Never repaired an appliance before and this was so easy!
Parts Used:
-
Rebecca from Scarsdale, NY
-
Difficulty Level:Really Easy
-
Total Repair Time:15 - 30 mins
-
Tools:Screw drivers
7 of 10 people
found this instruction helpful.
Was this instruction helpful to you?
Thank you for voting!
Dryer stopped heating
(Always unplug dryer before making any repairs) I opened the dryer and checked the heating element. Making sure that the connection was good and nothing was damaged, I determined the problem was overheated wires. They melted and lots connection. I replaced them with the heating element wire connection kit. Easy to install and simple to get right. I cleaned the dryer again with a vaccum cleaner, removing all the lint, and checked the vents, making sure they were clear...I turned the breaker on (it was tripped when the dryer overheated)and everything worked great.
Parts Used:
-
Joseph from Austin, TX
-
Difficulty Level:Really Easy
-
Total Repair Time:15 - 30 mins
-
Tools:Screw drivers, Socket set
6 of 7 people
found this instruction helpful.
Was this instruction helpful to you?
Thank you for voting!
drum stopped rotating - broken belt
Super easy to repair...I had to idea how to get started; but after watching the video from your site it was a breeze. Thanks for having "how to repair" videos on your site.
Repair kit came in 2 days..fantastic..thank you so much....with new rollers, belt and tension roller she works like new
Repair kit came in 2 days..fantastic..thank you so much....with new rollers, belt and tension roller she works like new
Parts Used:
-
lisa from manteca, CA
-
Difficulty Level:Easy
-
Total Repair Time:15 - 30 mins
-
Tools:Nutdriver, Pliers, Screw drivers
7 of 10 people
found this instruction helpful.
Was this instruction helpful to you?
Thank you for voting!
Dryer was not heating
We pulled the back off the dryer and we weren't sure where the problem was exactly. So we pulled off the heating element and the thermostat. The heating element seemed to be burnt out, so we ordered that and the thermostat. We got the parts very quickly, so we put them in and found that the dryer still didn't heat. There was another thermostat (trip thermostat) that we decided to order and try...bingo...that was it. Now it works like a charm.
Parts Used:
-
Teresa from Gilroy, CA
-
Difficulty Level:Easy
-
Total Repair Time:15 - 30 mins
-
Tools:Pliers, Screw drivers, Socket set
7 of 10 people
found this instruction helpful.
Was this instruction helpful to you?
Thank you for voting!