




















11016101691 Kenmore Washer - Instructions
Keep searches simple. Use keywords, e.g. "leaking", "pump", "broken" or "fit".
The washer would fill with water and wash,but would not drain and spinn out .
Followed direction that was sent to my e-mail. My washer timer would not advance. I' am so happy for the directions sent to me from this site and being able to get the part that I, needed from this site. I, didn't have and business doing the job myself, because I'm a ill 66 year old female. There's no special instructions that I, have to add. !! Thanks !! Lewis
Parts Used:
-
Susie from BRANDON, MS
-
Difficulty Level:Easy
-
Total Repair Time:1- 2 hours
-
Tools:Nutdriver, Pliers, Screw drivers, Socket set
6 of 7 people
found this instruction helpful.
Was this instruction helpful to you?
Thank you for voting!
loud noise during spin cycle, then not spinning at all
Watching videos identified what parts to purchase.
Once identified - WATCH EACH PARTS VIDEO (again).
Lessons learned:
1) better to NOT tilt the washer
2) watch (more than once) and learn from the videos
3) must difficult step was loosening the tub retaining nut without having a spanner wrench (used a hammer and a short / wide blade screwdriver)
4) ended up being the tub support was not sitting properly in the suspension plate
5) cleaned and changed parts while apart
6) running as good as new
Thanks!!
Once identified - WATCH EACH PARTS VIDEO (again).
Lessons learned:
1) better to NOT tilt the washer
2) watch (more than once) and learn from the videos
3) must difficult step was loosening the tub retaining nut without having a spanner wrench (used a hammer and a short / wide blade screwdriver)
4) ended up being the tub support was not sitting properly in the suspension plate
5) cleaned and changed parts while apart
6) running as good as new
Thanks!!
Parts Used:

-
William from CHESHIRE, CT
-
Difficulty Level:Really Easy
-
Total Repair Time:1- 2 hours
-
Tools:Pliers, Screw drivers, Wrench set
6 of 7 people
found this instruction helpful.
Was this instruction helpful to you?
Thank you for voting!
tub would not spin....burning smell
Unplugged washer. Pulled the washer away from the wall & leaned it back against the wall to access the underneath side of the washer. Disconnected water hoses to the pump with water pump pliers. Have drain pan handy to catch the water, approximately 1 qt. Remember which hose goes to the proper place. Removed two retaining screws/straps allowing the motor to be seperated from the transmission. There is enough slack in the wiring to allow you to drop the motor without disconnecting. You do not need to remove the water pump. Removed old coupling & replaced with the new one. Make sure you use the "new style" replacement coupler or you will be doing this repair again very soon! Schematics are available online.
Parts Used:
-
John from Elm Mott, AL
-
Difficulty Level:Easy
-
Total Repair Time:Less than 15 mins
-
Tools:Nutdriver, Pliers
6 of 8 people
found this instruction helpful.
Was this instruction helpful to you?
Thank you for voting!
washing machine stuck on drain cycle
Siphon break kit keeps washing machine from continuing to siphon after rinse/cycle -- like emptying a pool with a hose. Fixed the problem of the tub never filling due to siphon draining out water as it's being put in.
Parts Used:

-
Matthew from Wauwatosa, WI
-
Difficulty Level:Easy
-
Total Repair Time:15 - 30 mins
-
Tools:Screw drivers
17 of 41 people
found this instruction helpful.
Was this instruction helpful to you?
Thank you for voting!
Loud Screeching noise when draining water
On this model, no need to tip washer on back. Tilt console back and disconnect lid switch. Remove two clips holding back to top of washer (under console). Then remove top and front as directed in the video. The pump is accessible from the front of the unit, just below the tub. Hose clamps are easy to remove/replace. Took more time to wipe inside of washer clean than to remove/replace the water pump. Total time was just over 30 minutes.
Parts Used:

-
Steven from Port Saint Lucie, FL
-
Difficulty Level:Easy
-
Total Repair Time:15 - 30 mins
-
Tools:Pliers, Screw drivers
5 of 5 people
found this instruction helpful.
Was this instruction helpful to you?
Thank you for voting!
Tub would fill and then go through the wash cycle. When the rinse spin cycles came on nothing happened. Everything was dead.
Unplugged the AC cord and turned off the two water lines. Removed the control panel on top of the machine by removing four screws. Removed two clips that fastened the top of the machine to the rear panel. Tilted the cabinet forward a little bit and unplugged the switch. Removed the switch with the two philips screws and installed the new switch and plugged in the plug on the end of the wiring harness. Then reassembled everything. Cleaned the mess and plugged in the AC cord. turned the water on and everything worked perfect.
Parts Used:
-
Earl from Hillsboro, TX
-
Difficulty Level:Easy
-
Total Repair Time:15 - 30 mins
-
Tools:Nutdriver, Screw drivers
5 of 5 people
found this instruction helpful.
Was this instruction helpful to you?
Thank you for voting!
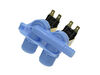
Replacing water inlet valve with new one
The instructional video that was attached with the part I purchased was spot on with very simple instructions. The inlet valve came with a metal bracket that was not needed for my model, so just tossed it. Was completed with replacement in about 30 minutes with help from my aspiring handywoman wife (would have taken 15 minutes without her)
Parts Used:
-
David from HENRY, VA
-
Difficulty Level:Really Easy
-
Total Repair Time:15 - 30 mins
-
Tools:Nutdriver, Pliers, Screw drivers
5 of 5 people
found this instruction helpful.
Was this instruction helpful to you?
Thank you for voting!
Washer would not fill with water...
Watched the video on the website... and did what it said to do. It was VERY helpful... It did not fix the problem... so now I'm on to the next possible solution. Also, provided by the website. The valve was the problem 85% of the time. The water level switch is the problem 10% of the time. The water level switch is what I ordered next.
Ordering is EASY and delivery is fast with available tracking of the shipment. Very nice...! -Eddie Campbell
Ordering is EASY and delivery is fast with available tracking of the shipment. Very nice...! -Eddie Campbell
Parts Used:
-
Eddie from Charlotte, NC
-
Difficulty Level:Really Easy
-
Total Repair Time:15 - 30 mins
-
Tools:Pliers, Screw drivers
5 of 5 people
found this instruction helpful.
Was this instruction helpful to you?
Thank you for voting!
Water was leaking out to floor after each load
Replaced the springs after watching the video's from this site and problem has been solved.
Parts Used:
-
James from MILWAUKEE, WI
-
Difficulty Level:Easy
-
Total Repair Time:30 - 60 mins
-
Tools:Nutdriver, Pliers, Screw drivers, Socket set
6 of 8 people
found this instruction helpful.
Was this instruction helpful to you?
Thank you for voting!
lid switch failure
Pretty much like shown in the video tutorial however I didn't disconnect the water hoses. I unplugged the machine and pulled it forward 6 inches. Took it apart like in the video but because of space restrictions I took the cabinet into another room to replace the switch and then re-assembled. The hardest part was getting the cabinet to re-seat as before. It took several attempts but it's all done and the machine is working like a champ. I listed a magnet because I use them to keep the nuts and screws from getting lost
Parts Used:
-
David from BREEDING, KY
-
Difficulty Level:Easy
-
Total Repair Time:30 - 60 mins
-
Tools:Nutdriver, Screw drivers
5 of 5 people
found this instruction helpful.
Was this instruction helpful to you?
Thank you for voting!
Cracked drain tube.
Removed old tube and replaced with new version. Replacement slightly different than original since the new part included a feature that appears to prevent the problem. New part still fit and is operating well so far.
Parts Used:

-
Eric from Grand Haven, MI
-
Difficulty Level:A Bit Difficult
-
Total Repair Time:1- 2 hours
-
Tools:Pliers, Screw drivers
6 of 8 people
found this instruction helpful.
Was this instruction helpful to you?
Thank you for voting!
washer motor burned out
1. Watch a video on installation, there are many on the internet.
(unplug the washer)
2. remove the screws on the back of the control panel to lift the control panel out of the way.
3. use a flat head screwdriver to remove the clips that hold the cabinet to the back panel.
4. disconnect the lid switch from the control panel by removing the clip that connects them at the top of the cabinet.
5. tilt the cabinet forward to remove it.
6. use a flat head screw driver to remove the two clips that hold the water pump to the motor and swing the water pump out of the way.
7. use a nut driver to remove the shipping screw that holds the clips on to the motor.
8. disconnect the wiring harness from the motor
9. remove the two clips from the motor with a flat head screwdriver and remove the motor
remove the three prong coupler and rubber gasket from the old motor and put them on the shaft of the new motor
10. remove the 4 rubber pads from the old motor and slide them onto the new motor.
11. insert the new motor into the washer aligning the prongs of the coupler.
12 reassemble the washer in reverse order of disassembly
(the shipping screw does not need to be reinserted into the spring clip that holds the motor)
(unplug the washer)
2. remove the screws on the back of the control panel to lift the control panel out of the way.
3. use a flat head screwdriver to remove the clips that hold the cabinet to the back panel.
4. disconnect the lid switch from the control panel by removing the clip that connects them at the top of the cabinet.
5. tilt the cabinet forward to remove it.
6. use a flat head screw driver to remove the two clips that hold the water pump to the motor and swing the water pump out of the way.
7. use a nut driver to remove the shipping screw that holds the clips on to the motor.
8. disconnect the wiring harness from the motor
9. remove the two clips from the motor with a flat head screwdriver and remove the motor
remove the three prong coupler and rubber gasket from the old motor and put them on the shaft of the new motor
10. remove the 4 rubber pads from the old motor and slide them onto the new motor.
11. insert the new motor into the washer aligning the prongs of the coupler.
12 reassemble the washer in reverse order of disassembly
(the shipping screw does not need to be reinserted into the spring clip that holds the motor)
Parts Used:

-
Joseph from SANFORD, NC
-
Difficulty Level:Really Easy
-
Total Repair Time:30 - 60 mins
-
Tools:Nutdriver, Screw drivers
6 of 8 people
found this instruction helpful.
Was this instruction helpful to you?
Thank you for voting!
washer would not spin to extract vwater
will not go over step by step here as there are already a multitude of stories on site with exact situation as mine who have already done so.. What I will say is that PartSelect is easily the absolutely best site on the net for a complete problem diagnosis to finished repair experience. Just input your model # and describe the problem and you get instant diagnosis probabilities along with access to a long list of customer Q & A and reviews, along with step by step videos on diagnosing, dis- assembling, and re-assembling along with links to all parts needed and also some secondary tips along the way. The prices are fabulous (example: I got a clutch assembly kit with several parts and 2 additional parts as a just in case for $55 shpg incl, while my local appliance parts place wanted $59 plus tax for just the main part in my assembly kit with a no return policy and no part guarantee, plus it was only 1 day more to have PartSelect pkg arrive than I would have gotten part from local store). This site is FABULOUS !!!
Parts Used:

-
Richard from WEEKI WACHEE, FL
-
Difficulty Level:Very Easy
-
Total Repair Time:30 - 60 mins
-
Tools:Pliers, Screw drivers, Socket set
5 of 5 people
found this instruction helpful.
Was this instruction helpful to you?
Thank you for voting!
1. No hot water and cold water filled very slowly. 2. Washing machine severely vibrated and was very noisy.
EXACTLY as your video demonstrated.
Parts Used:
-
Janice from BLUE SPRINGS, MO
-
Difficulty Level:Very Easy
-
Total Repair Time:30 - 60 mins
-
Tools:Pliers, Screw drivers, Socket set
5 of 5 people
found this instruction helpful.
Was this instruction helpful to you?
Thank you for voting!
drum SLAMMING into the back of the washer when sipnning
I just replaced the spring just like the vid show me.it run's like a new one-I bought it used about 5 yr's ago
Parts Used:
-
WILLIAM from DAYTON, KY
-
Difficulty Level:Really Easy
-
Total Repair Time:15 - 30 mins
-
Tools:Screw drivers, Socket set
5 of 6 people
found this instruction helpful.
Was this instruction helpful to you?
Thank you for voting!