




















10670212410 Kenmore Refrigerator - Instructions
Keep searches simple. Use keywords, e.g. "leaking", "pump", "broken" or "fit".
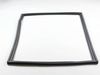
replacing the freezer door gasket
Definitely need to watch a youtube video on how to do it. No instructions come with the gasket so you need some instructions. Once I managed to get it started it went fairly quickly. Difficult to get it started but once it is started it is not too difficult
Parts Used:
-
Larry from STOW, OH
-
Difficulty Level:A Bit Difficult
-
Total Repair Time:30 - 60 mins
-
Tools:Nutdriver, Socket set
5 of 6 people
found this instruction helpful.
Was this instruction helpful to you?
Thank you for voting!
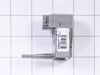
Refrigerator and freezer not cooling
It was easy to replace the start and run capacitors. But did not fix my problem, also replaced the evaporator fan still not fixed. Pulled refrigerator out of RV and ordered a new one.
Parts Used:
-
Tom from FENTON, MO
-
Difficulty Level:Easy
-
Total Repair Time:30 - 60 mins
-
Tools:Pliers
5 of 6 people
found this instruction helpful.
Was this instruction helpful to you?
Thank you for voting!
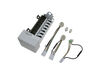
water was leaking under the frig ,wasnt sure what the problem
decided to take a chance and replace the ice maker,so far no water leaking.feels nice to know the problem is fixed.thanks for the video on how to replace it, thanks again very easy repair
Parts Used:
-
stephen from ROCKLEDGE, PA
-
Difficulty Level:Really Easy
-
Total Repair Time:30 - 60 mins
-
Tools:Nutdriver, Screw drivers
4 of 4 people
found this instruction helpful.
Was this instruction helpful to you?
Thank you for voting!
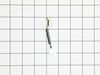
No Defrost Mode After Heating Element Replacement
Super simple job. Unplug freezer. Have a hair dryer handy to defrost while you have unit open. Remove food from the bottom two shelves and floor of freezer. Remove mid plastic cover removing three screws. (All screws are same so mixing them is no big deal.) Use drill-driver or screw driver to spin out six screws on lower back plate. Remove plate. Thermistor is on left side of the cooling tubing. Use hair dryer to melt ice if necessary. Un-clip thermistor power connection, and unsnap it from tubing. snap new thermistor on cooling tube and hook up wiring. Ensure plug fits together correctly and snugly. If heavy icing exists, use hair dryer to melt ice on coils and through fan. Ensure water drains out of drain pan under coils. Wipe up as much ice melt as possible to prvent re-frosting upon start-up. Replace lower panel and six screws. Replace mid-panel cover and three screws and replace shelves. Done! Plug freezer back in and expect 30 second delay before unit will start up.
Parts Used:
-
Ray M from Cave Creek, AZ
-
Difficulty Level:Really Easy
-
Total Repair Time:Less than 15 mins
-
Tools:Screw drivers
5 of 7 people
found this instruction helpful.
Was this instruction helpful to you?
Thank you for voting!
Ice maker was leaking
This is an incredibly easy repair.
1) Remove the three screws holding the old icemaker
2) Disconnect the electrical connection (I used a spoon to get in and undo the connector clip
Do the opposite to install the new icemaker.
Total elapsed time was about 5 minutes.
1) Remove the three screws holding the old icemaker
2) Disconnect the electrical connection (I used a spoon to get in and undo the connector clip
Do the opposite to install the new icemaker.
Total elapsed time was about 5 minutes.
Parts Used:
-
Thomas from San Diego, CA
-
Difficulty Level:Really Easy
-
Total Repair Time:Less than 15 mins
-
Tools:Screw drivers
6 of 10 people
found this instruction helpful.
Was this instruction helpful to you?
Thank you for voting!
Refrigerator light would not stay on
Removed the 2 screws holding the light bulb shield, then the 4 uolding the metal panel. Unplugged the olw door switch and replaced.
reassembled the pieces.
reassembled the pieces.
Parts Used:

-
Dave from Manchester Center, VT
-
Difficulty Level:Easy
-
Total Repair Time:15 - 30 mins
-
Tools:Nutdriver, Socket set
4 of 4 people
found this instruction helpful.
Was this instruction helpful to you?
Thank you for voting!
Needed new theromistors. Plug in parts
Followed online instructions. UnPlug and Plug in new part
Parts Used:
-
Albert from SWEET HOME, OR
-
Difficulty Level:Really Easy
-
Total Repair Time:30 - 60 mins
4 of 4 people
found this instruction helpful.
Was this instruction helpful to you?
Thank you for voting!
Ice maker did not work
Took the old one out and plug the new one in, simply as 1 2 3. Order the part one morning,it was here the next afternoon, the ice maker was fixed in less than a half hour. we will order from you the next time.
Parts Used:
-
Judy from Galveston, IN
-
Difficulty Level:Easy
-
Total Repair Time:Less than 15 mins
-
Tools:Nutdriver
4 of 5 people
found this instruction helpful.
Was this instruction helpful to you?
Thank you for voting!
Ice maker not working
take out Ice maker tray, remove three screws holding the ice maker, unplug electrical connector. Replace with new Ice maker,Ice started to fill the tray. ENJOY!!
THANKS.
THANKS.
Parts Used:
-
Raoul from Thousand Oaks, CA
-
Difficulty Level:Really Easy
-
Total Repair Time:15 - 30 mins
-
Tools:Screw drivers, Socket set
6 of 11 people
found this instruction helpful.
Was this instruction helpful to you?
Thank you for voting!
Freezer cold, refrigerator warm
Simply cut wires from old bi metal and joined to new part with wire nuts. Simple repair, but it did not correct the problem.
Parts Used:

-
Larry from LEWISBURG, KY
-
Difficulty Level:Really Easy
-
Total Repair Time:Less than 15 mins
5 of 8 people
found this instruction helpful.
Was this instruction helpful to you?
Thank you for voting!
Ice Maker didn't produce ice cubes.
It was not complicated but it took more squeezing and reaching into the narrow space than actually removing three screws and unplugging the electrical harness. But that was all that was necessary, to install, three screws held the unit in place and re-connect the electrical harness. It saved me about $100 in labor and the inconvenience of scheduling a service call and waiting for a week or so. The best part was that I ordered the unit on line on Tuesday eveining and it was at my home by Friday afternoon with no extra shipping charges. Great service!.
Parts Used:
-
Michael from Long Valley, NJ
-
Difficulty Level:Easy
-
Total Repair Time:30 - 60 mins
-
Tools:Nutdriver
4 of 5 people
found this instruction helpful.
Was this instruction helpful to you?
Thank you for voting!
freezing everything
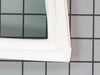
Removed old gasket. Wiped everything down. Popped in new gasket.
It was a little tedious, but it went in easy enough. Some reviews said the new gasket was kinked and bent. Mine I am happy to say was smooth. Some things are still getting quite cold like vegetables and ginger ale.(almost freezing). But it is way better than it was. Saved us from having to purchase another refrigerator. The fellow who helped me made it easy to order and everything went smoothly. I appreciate the help and patience you provided.
I
It was a little tedious, but it went in easy enough. Some reviews said the new gasket was kinked and bent. Mine I am happy to say was smooth. Some things are still getting quite cold like vegetables and ginger ale.(almost freezing). But it is way better than it was. Saved us from having to purchase another refrigerator. The fellow who helped me made it easy to order and everything went smoothly. I appreciate the help and patience you provided.
I
Parts Used:
-
Darcie from VINELAND, NJ
-
Difficulty Level:Difficult
-
Total Repair Time:30 - 60 mins
3 of 3 people
found this instruction helpful.
Was this instruction helpful to you?
Thank you for voting!
gasket was cut and ripped
rippped the old one off and carfully put the new one on with a flat head screwdriver at an angle as not to rip the new one
Parts Used:
-
Herbert from NIAGARA FALLS, NY
-
Difficulty Level:Really Easy
-
Total Repair Time:30 - 60 mins
-
Tools:Screw drivers
3 of 3 people
found this instruction helpful.
Was this instruction helpful to you?
Thank you for voting!
Track was broken on both front and rear mount
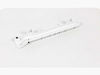
1)Removed the drawer
2) used a 8mm nut driver to unscrew the 2 mounting bolt.
3) clean /disinfect the bottom layer of the refrigerator
4) mount the track and installed the 2 #8 hex head mounting screw
5) slide back the drawer
2) used a 8mm nut driver to unscrew the 2 mounting bolt.
3) clean /disinfect the bottom layer of the refrigerator
4) mount the track and installed the 2 #8 hex head mounting screw
5) slide back the drawer
Parts Used:
-
George from POWAY, CA
-
Difficulty Level:Really Easy
-
Total Repair Time:Less than 15 mins
-
Tools:Nutdriver
3 of 3 people
found this instruction helpful.
Was this instruction helpful to you?
Thank you for voting!
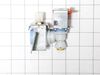
Ice maker not working. Motor working, not getting water to icemaker.
-
Robert G from AIKEN, SC
-
Difficulty Level:Really Easy
-
Total Repair Time:15 - 30 mins
-
Tools:Nutdriver, Wrench (Adjustable)
4 of 6 people
found this instruction helpful.
Was this instruction helpful to you?
Thank you for voting!