




















10667972801 Kenmore Refrigerator - Instructions
Keep searches simple. Use keywords, e.g. "leaking", "pump", "broken" or "fit".
Clear Dairy Door Broken
It was simply placing the clear $60.00 door in place. It was a very simple fix, but expensive!
Parts Used:

-
Robert from Hemet, CA
-
Difficulty Level:Really Easy
-
Total Repair Time:Less than 15 mins
3 of 5 people
found this instruction helpful.
Was this instruction helpful to you?
Thank you for voting!
Door light switch disintegrated
Very simple fix, remove 3 screws, two connectors to the old switch
Parts Used:

-
Thomas from Roseville, CA
-
Difficulty Level:Really Easy
-
Total Repair Time:Less than 15 mins
-
Tools:Screw drivers
2 of 2 people
found this instruction helpful.
Was this instruction helpful to you?
Thank you for voting!
fridge door switch did not work
I removed the switch housing (4 screws), replacing the switch in the housing was a snap. It took 5 minutes, cost $8 and light works like new!
Why didn't I order this part and do the repair earlier? Very simple.
Why didn't I order this part and do the repair earlier? Very simple.
Parts Used:
-
stu from richmond, VA
-
Difficulty Level:Easy
-
Total Repair Time:Less than 15 mins
-
Tools:Socket set
2 of 2 people
found this instruction helpful.
Was this instruction helpful to you?
Thank you for voting!
Drawer cracked/split
I just slipped the new drawer into place. So easy, even a woman can do it! ( I am female!)
Parts Used:
-
Yvonne from Fredericksburg, VA
-
Difficulty Level:Really Easy
-
Total Repair Time:Less than 15 mins
4 of 9 people
found this instruction helpful.
Was this instruction helpful to you?
Thank you for voting!
Original drawer handle had cracked and the crack spread down to the body of the crisper unit.
Took out the old, cracked, crisper unit and removed the white trim piece on the handle so that we could re-use it on the new crisper unit (which, in spite of the $90+ price tag did not come with new trim). The whole thing took 3 minutes to do.
Parts Used:
-
Scott from JAY, VT
-
Difficulty Level:Very Easy
-
Total Repair Time:Less than 15 mins
2 of 3 people
found this instruction helpful.
Was this instruction helpful to you?
Thank you for voting!
Broke light switch while cleaning
use kitchen knife to pry out. replaced switch assemble and pressed back into place. Could not have done this with out help from previous customers. Thanks
Parts Used:
-
Gail from Golden, CO
-
Difficulty Level:Really Easy
-
Total Repair Time:Less than 15 mins
2 of 3 people
found this instruction helpful.
Was this instruction helpful to you?
Thank you for voting!
Screws are a bit small and short for the job

-
Sheryll Lawrence from BRONX, NY
-
Difficulty Level:Really Easy
-
Total Repair Time:30 - 60 mins
-
Tools:Screw drivers
2 of 3 people
found this instruction helpful.
Was this instruction helpful to you?
Thank you for voting!
freezer (later fridge too) wouldn't stay cold~
****Make are you order Capacitor & Starter relay too (we ordered separtely so had to pay shipping twice)**** Super easy just open access panel on back near compressor and remove retention clip with fingers, remove & replace both capacitor & starter, put clip and access panel back on, plug in and allow 8 hours to cool! Works like new again! Hope it goes another 10 years
Parts Used:

-
David from MARYLAND HTS, MO
-
Difficulty Level:Very Easy
-
Total Repair Time:30 - 60 mins
-
Tools:Nutdriver
2 of 3 people
found this instruction helpful.
Was this instruction helpful to you?
Thank you for voting!
Motor sounded like a small little airplane under my fridge, very loud.
Unplugged the fridge first then took the bottom panel off with a 1/4 inch nut driver. Disconnected the wiring & used my ratchet to reach the 3 screws that held the motor. Took me longer to clean the bottom of the fridge then the installation.
Parts Used:
-
guadalupe from RIALTO, CA
-
Difficulty Level:Really Easy
-
Total Repair Time:30 - 60 mins
-
Tools:Nutdriver, Socket set
1 person
found this instruction helpful.
Was this instruction helpful to you?
Thank you for voting!
Replacing Condenser Fan
I was anticipating that the fan would be facing the back of the refrigerator. It actually was perpendicular to the back. There was some difficulty removing the bolts of the fan. I persevered and was victorious.
Parts Used:
-
William from RALEIGH, NC
-
Difficulty Level:Very Difficult
-
Total Repair Time:1- 2 hours
-
Tools:Nutdriver, Screw drivers, Socket set
1 person
found this instruction helpful.
Was this instruction helpful to you?
Thank you for voting!
gasket sagging at the bottom and was not airtight.
I followed the instructions on the video you provided with my order. Removed the freezer door and used the putty knife to loosen the old gasket and installed the new one. I'm a 77 year old female and if I can do it, so can you.
Parts Used:

-
Joyce from GALESBURG, IL
-
Difficulty Level:Really Easy
-
Total Repair Time:30 - 60 mins
-
Tools:Socket set
1 person
found this instruction helpful.
Was this instruction helpful to you?
Thank you for voting!
Broken grille on front of refrigerator.
Got on floor, pulled broken parts off front of refrigerator. Clipped in new grille. Looks great!
Parts Used:
-
Kathleen from EUGENE, OR
-
Difficulty Level:Really Easy
-
Total Repair Time:30 - 60 mins
1 person
found this instruction helpful.
Was this instruction helpful to you?
Thank you for voting!
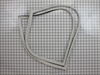
Gasket had several tears in it at the corners and was leaking air into the fresh food compartment
Removed the old gasket and ran the hard edged lip into the opening behind the door liner. Concerned that the gasket does not seem to be attaching itself to the door well. First put it on the side of the refigerator and it would not adhere enough to support itself. While it closes it just doesn't seem to attach with the magnets in the gasket. These magnetic strips have a weak magnet side and a strong magnet side. I wonder if they put the wrong side facing the door when they assembled it. Counter this with a new gasket for an upright freezer which was twice the length and attached itself firmly to the side wall of the freezer and did not slide down.
Parts Used:
-
James from BATON ROUGE, LA
-
Difficulty Level:A Bit Difficult
-
Total Repair Time:30 - 60 mins
-
Tools:Screw drivers
1 person
found this instruction helpful.
Was this instruction helpful to you?
Thank you for voting!
loud griding noise
stopped the fan and noise stopped ordered fan motor and fan with interface cable. Using 1/4 inch nut driver to remove screws from motor bracket installed new motor and runs like new.
Parts Used:
-
David from BLACKLICK, OH
-
Difficulty Level:Easy
-
Total Repair Time:30 - 60 mins
-
Tools:Nutdriver
1 person
found this instruction helpful.
Was this instruction helpful to you?
Thank you for voting!
Noisy condenser fan
I suggest following video supplied with order confirmation perfect fit
Parts Used:
-
Tom from BULLHEAD CITY, AZ
-
Difficulty Level:Easy
-
Total Repair Time:30 - 60 mins
-
Tools:Nutdriver
1 person
found this instruction helpful.
Was this instruction helpful to you?
Thank you for voting!