




















10661182901 Kenmore Refrigerator - Instructions
Keep searches simple. Use keywords, e.g. "leaking", "pump", "broken" or "fit".
installed ice maker
From the time I started to finish I worked 3 hours, this included installing the new ice maker, cutting into the cold water line in the basement and installing a t with a 6inch piece of pipe with a compression valve to connect to the small cooper tube, this is worth your time to do it this way, its a lot better connection than the small pierce valves that come with the kit, they will leak over time. I installed the filter in the waterline in the basement for easy access
Parts Used:

-
Dennis from Spring Valley, MN
-
Difficulty Level:Easy
-
Total Repair Time:15 - 30 mins
-
Tools:Nutdriver, Pliers, Screw drivers, Wrench set
13 of 19 people
found this instruction helpful.
Was this instruction helpful to you?
Thank you for voting!
Freezer not coolling properly. Lower temp. 2 degrees upper temp. 60 degrees.
Take bottom racks and baskets out of freezer. Remove back sheet metal panel, 8 screws. Remove motor and bracket, 2 screws. Umplug wires on motor. Remove two more screws to take mounting bracket off motor. Install in reverse order. Simple job. Maybe 20 minutes. Besure to shut freezer off before startin work.
Parts Used:

-
John from Blairsville, GA
-
Difficulty Level:Really Easy
-
Total Repair Time:15 - 30 mins
-
Tools:Nutdriver
10 of 12 people
found this instruction helpful.
Was this instruction helpful to you?
Thank you for voting!
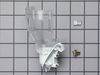
socket melted with bulb in it.
-
martin l. from JACKSONVILLE,, IL
-
Difficulty Level:Really Easy
-
Total Repair Time:Less than 15 mins
12 of 18 people
found this instruction helpful.
Was this instruction helpful to you?
Thank you for voting!
There was no light on in refrig area
Just replaced the switch, but unfortunately that was not the problem; nor was it the bulb....so I am back to square one.
But Parts Select is a great place to order from. Thank you.
But Parts Select is a great place to order from. Thank you.
Parts Used:

-
Lori from Chuluota, FL
-
Difficulty Level:Easy
-
Total Repair Time:Less than 15 mins
-
Tools:Screw drivers
12 of 19 people
found this instruction helpful.
Was this instruction helpful to you?
Thank you for voting!
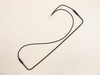
water collecting under the vegatable drawers
I replaced the bi-metal thermostat. Very easy fix. It took a couple of days and the water stopped collecting at the bottom.I am very pleased with the web site.
Parts Used:
-
Gary from BILLERICA, MA
-
Difficulty Level:Very Easy
-
Total Repair Time:30 - 60 mins
-
Tools:Screw drivers
9 of 10 people
found this instruction helpful.
Was this instruction helpful to you?
Thank you for voting!
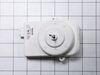
Front bearing had worn so that the fan vibrated causing the noise.
I removed the cardboard back then using a nut driver removed the three mounting screws, removed the old fan/motor and installed the new one, installing the three screws and replacing the cardboard cover.
My big problem was getting the right parts. Don't ever order refrigerator parts using the refrigerator model number. I did and got the wrong part, sent it back and talked to the parts lady and ordered again describing the error, the needed parts shape etc and she sent me the exact part I had sent back. I sent it back and removed the fan motor to get the part number, called and ordered by number and got the right one. Hallelujah!
My big problem was getting the right parts. Don't ever order refrigerator parts using the refrigerator model number. I did and got the wrong part, sent it back and talked to the parts lady and ordered again describing the error, the needed parts shape etc and she sent me the exact part I had sent back. I sent it back and removed the fan motor to get the part number, called and ordered by number and got the right one. Hallelujah!
Parts Used:
-
Earl from PIMA, AZ
-
Difficulty Level:Easy
-
Total Repair Time:30 - 60 mins
-
Tools:Nutdriver, Pliers
7 of 7 people
found this instruction helpful.
Was this instruction helpful to you?
Thank you for voting!
The Freezer defrosted and everything on the top and the bottom spoiled
i had used your web site before and i read several problems that your readers had. i went to the back of the unit, removed the bottom cover and right there the i found the run capacitor and i chaged it. since i had only ordered this part to save money i went back and ordered the Start Device which when i took it off it was completely burned. the replacement part came labeled with 2 different compressor #, so i picked the one that i had and unpluged each wire. the part may differ from the one that it's in the unit but it worked when i pluged everything back on. it also helps to take a picture of everything before removing the wires in case you have to leave it and come back later. i hope to use this refrigerator another 10 years. thank you all for your help.
Parts Used:

-
Jorge from Miami, FL
-
Difficulty Level:Easy
-
Total Repair Time:15 - 30 mins
-
Tools:Nutdriver
10 of 16 people
found this instruction helpful.
Was this instruction helpful to you?
Thank you for voting!
broken end cap
Simple....snapped it right on...the important thing is that we ordered it for a reasonable price, and it arrived quickly...within 3 days. thanks!!!
Parts Used:

-
Stefanie from Sycamore, IL
-
Difficulty Level:Really Easy
-
Total Repair Time:Less than 15 mins
10 of 17 people
found this instruction helpful.
Was this instruction helpful to you?
Thank you for voting!
light not working in fridge
It was so easy!
Thanks for the rush to my home on the part.
I just unscrewed the plate that locks in the light switch (screwdriver) and unplugged the old faulty part and plugged in the new switch, screwed the cover back on and I was done!
Easy!
And I am not Mr. Fix-it!
Thanks for the rush to my home on the part.
I just unscrewed the plate that locks in the light switch (screwdriver) and unplugged the old faulty part and plugged in the new switch, screwed the cover back on and I was done!
Easy!
And I am not Mr. Fix-it!
Parts Used:
-
Michael from East Meadow, NY
-
Difficulty Level:Really Easy
-
Total Repair Time:Less than 15 mins
-
Tools:Screw drivers
7 of 8 people
found this instruction helpful.
Was this instruction helpful to you?
Thank you for voting!
Shelf on top of frig had no bar to hold items in shelf
replaced clip on side of frig and put in new bar for shelf.
Parts Used:

-
Gregory from CORAOPOLIS, PA
-
Difficulty Level:Very Easy
-
Total Repair Time:Less than 15 mins
7 of 9 people
found this instruction helpful.
Was this instruction helpful to you?
Thank you for voting!
The old motor has built in wire harness. The new motor has connectors on it.
Remove and clean out everything from the freezer and unplug the refrigerator. Take out the wire shelf in the freezer. (The fan motor is behind the back wall of the freezer, SO YOU CAN KEEP THE REFRIGERATOR CLOSED). Pop off the little cover on the center of the plastic shroud. Remove the little screw and carefully remove the plastic shroud. Remove the plastic cover for the optional ice maker on the upper left corner of the back wall. Take out the two screws in the upper corners on the back wall of the freezer and the last two screws holding the fan motor. The fan motor won't drop, remove the back wall and you will see two screws holding the motor mount. Remover those two screws, and pop the bracket out and separate.Take the two rubber motor mounts off the ends of the old motor and install them on the new motor. (Now you will have to cut the wires off the old motor), unplug the little wire harness, strip the ends and crimp on wire connectors to plug them onto your new motor. Its an AC motor so it shouldn't matter which hot goes on which of the two terminals. JUST MAKE SURE THE GROUND IS CORRECT! (After reinstalling the motor, plug in the refrigerator, turn it on before installing the shroud and make sure the fan is blowing outward. If all is correct, turn the refrigerator off, unplug and finish assembling the freezer. I found the new motor seems to run more efficiently than the old one.
Parts Used:
-
Leo from EAGLE, WI
-
Difficulty Level:A Bit Difficult
-
Total Repair Time:30 - 60 mins
-
Tools:Nutdriver, Pliers, Screw drivers
6 of 6 people
found this instruction helpful.
Was this instruction helpful to you?
Thank you for voting!
Refrigerator would not cool down. Evaporator fan inop.
Unplug, then remove shelving and rear panel. Remove fan motor, swap wired and install new motor. Reinstall in reverse order. Plug back in and verify the fan is running. Easy and nothing special. Only thing I would caution is they use a foam runner to the refrigerator that may be iced up. Carefully clean the ice out before reinstalling everything. A follow up note. If the fan has not been running, Ice will build up in the drain tube. When you start up the refrigerator, you will see water dripping into the lower shelf. This is easy to fix. Unplug refrigerator and disassemble to where you can see the coils. There will be ice on the bottom covering the drain line hole. You will need to carefully chip away the ice, then use a hair dryer to melt the ice. Carefully use a pointed tool to push in the drain tube until the water drains. Go slow and be patient. Heat is your friend when doing this.
Parts Used:
-
David from SHARPSBURG, GA
-
Difficulty Level:Really Easy
-
Total Repair Time:15 - 30 mins
-
Tools:Nutdriver, Screw drivers
6 of 7 people
found this instruction helpful.
Was this instruction helpful to you?
Thank you for voting!
All three lights are not working...lights are off but refrigerator still cooling. Also, the control box not lit up to show the temparture for freezer and refrigerator
Used a screw driver to pull old switch. Pulled one wire at a time, only two wires. After wires instlled to new switch push new one back in place where the old one was.
Parts Used:
-
Antonio from San Antonio, TX
-
Difficulty Level:Really Easy
-
Total Repair Time:Less than 15 mins
-
Tools:Screw drivers
7 of 10 people
found this instruction helpful.
Was this instruction helpful to you?
Thank you for voting!
The Switch Broke...Absolutely Fell Apart.
I simply removed the old switch using 2 small screwdrivers and the old switch case popped out. I then upluged the wires from the old switch and reversed the process. Didn't take longer than 5 minutes begining to end! Thank you for the great service! Duncan quaid
Parts Used:
-
Duncan from Metairie, LA
-
Difficulty Level:Really Easy
-
Total Repair Time:Less than 15 mins
-
Tools:Screw drivers
5 of 5 people
found this instruction helpful.
Was this instruction helpful to you?
Thank you for voting!
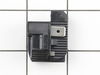
fridge ouit cooling
where the wires crossed at the start relay, 20 years of vibration allowed them to short out and burn out the start relay ..since i have 2 identical fridges i switched the run capacitor to determine it was'nt bad too...ordered a start relay wednesday nite and got it friday morning...cold fridge by noon...good service and the part was exactly the same as the original....
Parts Used:
-
danny from adelanto, CA
-
Difficulty Level:A Bit Difficult
-
Total Repair Time:30 - 60 mins
-
Tools:Nutdriver
9 of 17 people
found this instruction helpful.
Was this instruction helpful to you?
Thank you for voting!