




















10660212410 Kenmore Refrigerator - Instructions
Keep searches simple. Use keywords, e.g. "leaking", "pump", "broken" or "fit".
Door light switch disintegrated
Very simple fix, remove 3 screws, two connectors to the old switch
Parts Used:

-
Thomas from Roseville, CA
-
Difficulty Level:Really Easy
-
Total Repair Time:Less than 15 mins
-
Tools:Screw drivers
2 of 2 people
found this instruction helpful.
Was this instruction helpful to you?
Thank you for voting!
fridge door switch did not work
I removed the switch housing (4 screws), replacing the switch in the housing was a snap. It took 5 minutes, cost $8 and light works like new!
Why didn't I order this part and do the repair earlier? Very simple.
Why didn't I order this part and do the repair earlier? Very simple.
Parts Used:
-
stu from richmond, VA
-
Difficulty Level:Easy
-
Total Repair Time:Less than 15 mins
-
Tools:Socket set
2 of 2 people
found this instruction helpful.
Was this instruction helpful to you?
Thank you for voting!
Defrost drain clogged with ice
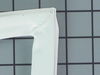
Replaced gaskets on both doors. Followed the online video link that came with emailed receipt. Worked exactly like demonstrated in the video.
Parts Used:
-
Michael from CHICAGO, IL
-
Difficulty Level:Easy
-
Total Repair Time:30 - 60 mins
-
Tools:Nutdriver
2 of 2 people
found this instruction helpful.
Was this instruction helpful to you?
Thank you for voting!
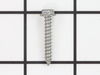
Screws are a bit small and short for the job

-
Sheryll Lawrence from BRONX, NY
-
Difficulty Level:Really Easy
-
Total Repair Time:30 - 60 mins
-
Tools:Screw drivers
2 of 3 people
found this instruction helpful.
Was this instruction helpful to you?
Thank you for voting!
Did not have ice maker

-
Marisa from TEMPE, AZ
-
Difficulty Level:Very Easy
-
Total Repair Time:1- 2 hours
-
Tools:Nutdriver
3 of 6 people
found this instruction helpful.
Was this instruction helpful to you?
Thank you for voting!
Refrigerator light would not turn on.
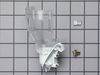
I first replaced the switch and had no results, I then ordered the Light Socket Kit, and because I had the experience of removing the panel to replace the switch, it took a few minutes to remove the two screws behind the panel, removing the temperature control knobs and then releasing the face plate which is secured by tabs at the bottom. The kit came with extra connectors in case they were needed, but they were not in my case and so I pulled off the wires, pushed the old socket out and the new one in. Attaching the wires to the correct pins, I screwed in the light bulb to be sure that the fix was correct and determining that, I replaced the screws that held the panel in place. Voila, I'm a happy camper who found some outdated jars in the back corners of the newly lighted shelves.
Parts Used:
-
Suzanne from STERLING HTS, MI
-
Difficulty Level:Really Easy
-
Total Repair Time:Less than 15 mins
-
Tools:Nutdriver
3 of 6 people
found this instruction helpful.
Was this instruction helpful to you?
Thank you for voting!
freezer (later fridge too) wouldn't stay cold~
****Make are you order Capacitor & Starter relay too (we ordered separtely so had to pay shipping twice)**** Super easy just open access panel on back near compressor and remove retention clip with fingers, remove & replace both capacitor & starter, put clip and access panel back on, plug in and allow 8 hours to cool! Works like new again! Hope it goes another 10 years
Parts Used:

-
David from MARYLAND HTS, MO
-
Difficulty Level:Very Easy
-
Total Repair Time:30 - 60 mins
-
Tools:Nutdriver
2 of 3 people
found this instruction helpful.
Was this instruction helpful to you?
Thank you for voting!
Broke light switch while cleaning
use kitchen knife to pry out. replaced switch assemble and pressed back into place. Could not have done this with out help from previous customers. Thanks
Parts Used:
-
Gail from Golden, CO
-
Difficulty Level:Really Easy
-
Total Repair Time:Less than 15 mins
2 of 3 people
found this instruction helpful.
Was this instruction helpful to you?
Thank you for voting!
Rerigerator was leaving a lot of condensation on top shelf in refrigerator.
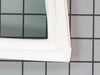
Removal of the door gasket went quite fast. First i needed a 8mm wrench. That what I didn't have. Got the socket set, not the wrench. Tried adjustable wrench, went slow. I slowly got the bolts out. Putting the gasket on was slow. Then I get to the last corner, was awful for me. I finally get it on. Putting the freezer door back on 1st went crazy. I finally looked on top of refrigerator, saw (3) bolts, removed them, installment went easy from there.
Parts Used:
-
James from MEMPHIS, TN
-
Difficulty Level:A Bit Difficult
-
Total Repair Time:More than 2 hours
-
Tools:Pliers, Socket set, Wrench (Adjustable)
1 person
found this instruction helpful.
Was this instruction helpful to you?
Thank you for voting!
Plugged it in.
Not so good that was not the problem. Fan is not seized and all the lights work and display is not on but lights up as well. No start once plugged back in after 15 minutes of being unplugged. Nothing same no change.
Parts Used:
-
Adam from GLOVERSVILLE, NY
-
Difficulty Level:Really Easy
-
Total Repair Time:Less than 15 mins
-
Tools:Nutdriver
1 person
found this instruction helpful.
Was this instruction helpful to you?
Thank you for voting!
handle broke off when my wife used it to brake a fall
Installled handle using existing screws tightening all after all screws were inserted. Part of the problem was that I weakened the original handle because I didn't know about the shield over the single screw on the front of the door. I purchased the unit at the Sacramento outlet and didn't get an instruction packet upon delivery.
Parts Used:

-
Lawrence from FAIRFIELD, CA
-
Difficulty Level:Very Easy
-
Total Repair Time:15 - 30 mins
1 person
found this instruction helpful.
Was this instruction helpful to you?
Thank you for voting!
the bracket that holds the crisper drawer broke
I screwed the bracket in. How ever the placement of the screw made it impossible to use a small wrench. I had to manually tighten it. Having a screw head would have been better
Parts Used:
-
Gerhard from SPRINGFIELD, NJ
-
Difficulty Level:Really Easy
-
Total Repair Time:30 - 60 mins
1 person
found this instruction helpful.
Was this instruction helpful to you?
Thank you for voting!
handle broken
1. unscrew the two screws on the top of the broken handle and remove.
2. position the new handle into place by positioning the screw midway down the fridge into the groove thingy of the new handle
3 rescrew those screws in
4 tell your kid to stop slamming the fridge door shut
2. position the new handle into place by positioning the screw midway down the fridge into the groove thingy of the new handle
3 rescrew those screws in
4 tell your kid to stop slamming the fridge door shut
Parts Used:
-
Laura from LAS VEGAS, NV
-
Difficulty Level:Really Easy
-
Total Repair Time:Less than 15 mins
-
Tools:Screw drivers
1 person
found this instruction helpful.
Was this instruction helpful to you?
Thank you for voting!
freezer became frosty but refrigerator's camera didn'thave any coll at all.
After describing my problem PartSelect consultant emmidiately diagnost the problem and I ordered Evaporator Fan Motor. Along with purches order confirmation I got video how to install a new motor.
The hardest part was to connectthe ground wire becase space in that area was verylimited. Otherwise it was just like a walk in the park.
As soon as I installed motor and turned on the refrigirator, everything start working properly.
Thank you PartSelect, you sved me hundreds of dollars.
The hardest part was to connectthe ground wire becase space in that area was verylimited. Otherwise it was just like a walk in the park.
As soon as I installed motor and turned on the refrigirator, everything start working properly.
Thank you PartSelect, you sved me hundreds of dollars.
Parts Used:

-
Yakov from BROOKLYN, NY
-
Difficulty Level:Really Easy
-
Total Repair Time:30 - 60 mins
-
Tools:Screw drivers, Socket set
1 person
found this instruction helpful.
Was this instruction helpful to you?
Thank you for voting!
No cold
-
Jacqueline from LEXINGTON PK, MD
-
Difficulty Level:Very Easy
-
Total Repair Time:Less than 15 mins
-
Tools:Nutdriver, Pliers
1 person
found this instruction helpful.
Was this instruction helpful to you?
Thank you for voting!