




















10660212410 Kenmore Refrigerator - Instructions
Keep searches simple. Use keywords, e.g. "leaking", "pump", "broken" or "fit".
Lower Light Socket removed and Wires capped with wire nuts
My tenants moved out of my rental property and abandoned their refrigerator there. The freezer door would not close properly because someone had previously removed the lower door support bracket and failed to replace the lower bracket shim that positions the lower part of the freezer door properly out from the refrigerator cabinet causing the door gasket seal to bind before the freezer door was fully closed. I removed and replaced this lower door bracket with a new shim made up of serveral thicknesses of cardboard to achieve this spacing and freezer door now closes and seals properly. They had never connected a water supply to the refrigerator although this model is equiped with an ice maker and in door ice and cold water dispenser. The access panel on the back of the unit had been previously removed and discarded. I made up a new access panel from cardboard and connected the water line to the solenoid valve. Valve was so old it would barely open when valve energized and water flow was too slow to make proper sized ice cubes and fill a water glass. I purchased a new water solenoid valve and replaced ther original valve and cured that problem. Replacing the access panel cured an improper cooling problem because with panel removed, most of the air flow bypasses the condenser coils. Lastly I replaced the upper tubular light bulb and the lower light socket I purchased here and installed a 40 watt bulb in the new light socket. Presto! I was able to turn non working abandoned refrigerator into a workable unit.
Parts Used:
-
Wayne from Arlington, TX
-
Difficulty Level:A Bit Difficult
-
Total Repair Time:Less than 15 mins
6 of 9 people
found this instruction helpful.
Was this instruction helpful to you?
Thank you for voting!
Refrigerator and freezer not cooling
It was easy to replace the start and run capacitors. But did not fix my problem, also replaced the evaporator fan still not fixed. Pulled refrigerator out of RV and ordered a new one.
Parts Used:
-
Tom from FENTON, MO
-
Difficulty Level:Easy
-
Total Repair Time:30 - 60 mins
-
Tools:Pliers
5 of 6 people
found this instruction helpful.
Was this instruction helpful to you?
Thank you for voting!
Raise side of fridge and slide 2x4 under side with broken wheel.
Remove back side cardboard access cover. About 6 dcrews need to be removed. Remove 9/16” bolt and lower compressor tray frame down to slide out wheel axel. Place wheel in slot and replace axel. Lift compressor tray and replace 9/16” bolt. Replace cardboard cover. Remove 2x4.
Parts Used:

-
Hans from OGDEN, UT
-
Difficulty Level:Really Easy
-
Total Repair Time:Less than 15 mins
-
Tools:Socket set
5 of 6 people
found this instruction helpful.
Was this instruction helpful to you?
Thank you for voting!
replacing the freezer door gasket
Definitely need to watch a youtube video on how to do it. No instructions come with the gasket so you need some instructions. Once I managed to get it started it went fairly quickly. Difficult to get it started but once it is started it is not too difficult
Parts Used:
-
Larry from STOW, OH
-
Difficulty Level:A Bit Difficult
-
Total Repair Time:30 - 60 mins
-
Tools:Nutdriver, Socket set
5 of 6 people
found this instruction helpful.
Was this instruction helpful to you?
Thank you for voting!
The door light socket was broken and hanging down
The refrigerator light in our Kenmore fridge has been flaky for a number of years. The slightest bump would knock it out of the hole it fits into leaving the bulb dangling. Usually since we were used to it, we could avoid bumping it so it was no real problem, but a recent visitor bumped it and it once again was hanging. I decided this time, to take a serious look at it and fix the problem for real. I had options, duct tape, hot glue gun, goop...or a new part! A quick search on the internet, and I found www.PartSelect.com I entered my model # , quickly found the correct part number. The part came 1 1/2 days after I ordered it. The repair was very simple, I unplugged the fridge, removed the wires from the spade connectors on the old light socket, and attached them to the new socket. I then pushed the socket into the hole, and with new spring clips, it snapped snuggly into place. The socket came with extra wire connectors which I didn't need, the socket fits multiple brands of appliances. It also came with a bulb protector, but that wasn't needed for my fridge either. I was very pleased with the speed and ease of the repair. No more dangling light bulbs!
Parts Used:
-
David from Roanoke, VA
-
Difficulty Level:Really Easy
-
Total Repair Time:Less than 15 mins
6 of 9 people
found this instruction helpful.
Was this instruction helpful to you?
Thank you for voting!
Refrigerator light would not stay on
Removed the 2 screws holding the light bulb shield, then the 4 uolding the metal panel. Unplugged the olw door switch and replaced.
reassembled the pieces.
reassembled the pieces.
Parts Used:

-
Dave from Manchester Center, VT
-
Difficulty Level:Easy
-
Total Repair Time:15 - 30 mins
-
Tools:Nutdriver, Socket set
4 of 4 people
found this instruction helpful.
Was this instruction helpful to you?
Thank you for voting!
Freezer cold, refrigerator warm
Simply cut wires from old bi metal and joined to new part with wire nuts. Simple repair, but it did not correct the problem.
Parts Used:

-
Larry from LEWISBURG, KY
-
Difficulty Level:Really Easy
-
Total Repair Time:Less than 15 mins
5 of 8 people
found this instruction helpful.
Was this instruction helpful to you?
Thank you for voting!
Track was broken on both front and rear mount
1)Removed the drawer
2) used a 8mm nut driver to unscrew the 2 mounting bolt.
3) clean /disinfect the bottom layer of the refrigerator
4) mount the track and installed the 2 #8 hex head mounting screw
5) slide back the drawer
2) used a 8mm nut driver to unscrew the 2 mounting bolt.
3) clean /disinfect the bottom layer of the refrigerator
4) mount the track and installed the 2 #8 hex head mounting screw
5) slide back the drawer
Parts Used:
-
George from POWAY, CA
-
Difficulty Level:Really Easy
-
Total Repair Time:Less than 15 mins
-
Tools:Nutdriver
3 of 3 people
found this instruction helpful.
Was this instruction helpful to you?
Thank you for voting!
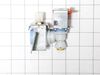
Ice maker not working. Motor working, not getting water to icemaker.
-
Robert G from AIKEN, SC
-
Difficulty Level:Really Easy
-
Total Repair Time:15 - 30 mins
-
Tools:Nutdriver, Wrench (Adjustable)
4 of 6 people
found this instruction helpful.
Was this instruction helpful to you?
Thank you for voting!
freezing everything
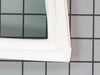
Removed old gasket. Wiped everything down. Popped in new gasket.
It was a little tedious, but it went in easy enough. Some reviews said the new gasket was kinked and bent. Mine I am happy to say was smooth. Some things are still getting quite cold like vegetables and ginger ale.(almost freezing). But it is way better than it was. Saved us from having to purchase another refrigerator. The fellow who helped me made it easy to order and everything went smoothly. I appreciate the help and patience you provided.
I
It was a little tedious, but it went in easy enough. Some reviews said the new gasket was kinked and bent. Mine I am happy to say was smooth. Some things are still getting quite cold like vegetables and ginger ale.(almost freezing). But it is way better than it was. Saved us from having to purchase another refrigerator. The fellow who helped me made it easy to order and everything went smoothly. I appreciate the help and patience you provided.
I
Parts Used:
-
Darcie from VINELAND, NJ
-
Difficulty Level:Difficult
-
Total Repair Time:30 - 60 mins
3 of 3 people
found this instruction helpful.
Was this instruction helpful to you?
Thank you for voting!
Fan motor died
First, made sure new fan worked then Placed back in bracket with bushings-only goes in one way, pushed fan back on. screwed bracket to back of freezer and ran the wires to their original place, plugged in the two plugs, put the back piece up attaching ground and pulling ice maker plug thru, screwed back on. Plugged in ice maker, mounted ice maker on freezer wall. Plugged it in. Exact reversal of how it was removed. Not a lot parts to get confused.
Parts Used:

-
Michael from TROY, IL
-
Difficulty Level:Very Easy
-
Total Repair Time:15 - 30 mins
-
Tools:Screw drivers, Socket set
3 of 3 people
found this instruction helpful.
Was this instruction helpful to you?
Thank you for voting!
lights wouldn't come on/work in refrigerator
Referencing the info/schematics you have on your website, I unscrewed/unattached top-front panel (carefully), from behind the panel you have to detach the wires (2) from the switch, pushed "in" the switch to remove, put in new switch and attach wires to test BEFORE remounting panel. Tada!! Thank you PartSelect! You saved me at least $80...would have been at least $100 to have a repair person come to the house!
Parts Used:
-
Jane from Albuquerque, NM
-
Difficulty Level:Easy
-
Total Repair Time:15 - 30 mins
-
Tools:Pliers, Screw drivers, Socket set
4 of 6 people
found this instruction helpful.
Was this instruction helpful to you?
Thank you for voting!
Freezer not cold
YouTube helped ,diagnosed problem ,found defective part removed and replaced with new part.
Is a little job on your knees
Is a little job on your knees
Parts Used:

-
Darryl from PELHAM, NY
-
Difficulty Level:Really Easy
-
Total Repair Time:15 - 30 mins
-
Tools:Nutdriver, Pliers, Socket set
3 of 3 people
found this instruction helpful.
Was this instruction helpful to you?
Thank you for voting!
Raplaced switch
Repair went well,took about five to ten minutes to disconnect the power from the fridge removed the defective switch installed the new one ,reconnected the power,,,and Let there be light and there was light!
Parts Used:
-
Winston A from Brooklyn, NY
-
Difficulty Level:Really Easy
-
Total Repair Time:Less than 15 mins
-
Tools:Pliers
5 of 9 people
found this instruction helpful.
Was this instruction helpful to you?
Thank you for voting!
gasket was cut and ripped
rippped the old one off and carfully put the new one on with a flat head screwdriver at an angle as not to rip the new one
Parts Used:
-
Herbert from NIAGARA FALLS, NY
-
Difficulty Level:Really Easy
-
Total Repair Time:30 - 60 mins
-
Tools:Screw drivers
3 of 3 people
found this instruction helpful.
Was this instruction helpful to you?
Thank you for voting!