




















10656824601 Kenmore Refrigerator - Instructions
Keep searches simple. Use keywords, e.g. "leaking", "pump", "broken" or "fit".
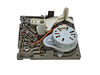
ice dispenser broken
ridiculous how a tiny plastic broken part required a full motor assembly replacement. that being said, i went online, found this website and easily identified the part i needed to order. i was impressed when it arrived within a couple of days. removing the old motor and replacing the new was a piece of cake...and i am NOT mechanically inclined,
Parts Used:
-
sandra from mechanicsville, VA
-
Difficulty Level:Really Easy
-
Total Repair Time:Less than 15 mins
-
Tools:Pliers, Screw drivers
17 of 26 people
found this instruction helpful.
Was this instruction helpful to you?
Thank you for voting!
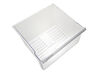
Cracked Crisper Drawer
This company is WONDERFUL! I ordered the wrong drawer the first time, but their return process was a snap and the correct drawer arrived the next day. It's great to know that there is someone out there with just about every part you'll need for about any appliance that is truly customer friendly.
Parts Used:
-
Jennifer from Salvisa, KY
-
Difficulty Level:Really Easy
-
Total Repair Time:Less than 15 mins
13 of 15 people
found this instruction helpful.
Was this instruction helpful to you?
Thank you for voting!
Broken cup water fill on ice maker
I called the local Amana repair man, wanted $150 for a new ice maker because they could not get the part I needed. Found Partsselect.com and the part cost $17 with shipping. They saved me over $100. The repair was very easy too, just removed a couple of screws.
Thanks,
Matt
Thanks,
Matt
Parts Used:

-
Matthew from Aurora, CO
-
Difficulty Level:Easy
-
Total Repair Time:15 - 30 mins
-
Tools:Nutdriver, Screw drivers
13 of 15 people
found this instruction helpful.
Was this instruction helpful to you?
Thank you for voting!
The water dispenser flow was very slow and the housing leaked when the filter was removed.
Removed front plastic grill and screws holding the filter in place. Also removed lower back cardboard panel to access water lines. Video on this website told me how to remove water lines from filter, you must depress a collar around the water line while pulling out the water line. Then install the new Water Filter Housing and water lines. The only problems I had was the tight space to work in and one of the water lines was leaking, but pushing the water line in further solved the problem.
Parts Used:
-
Daniel from CAROL STREAM, IL
-
Difficulty Level:Easy
-
Total Repair Time:30 - 60 mins
-
Tools:Nutdriver, Screw drivers, Socket set
12 of 13 people
found this instruction helpful.
Was this instruction helpful to you?
Thank you for voting!
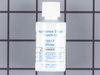
Scratches in Surface
This product comes in a bottle with a brush like Liquid Paper. It goes on incredibly easy. A second coat might be needed. I wanted to prevent rust from setting in so I covered the scratches and dings. The paint is a little brighter since my washer is 10 years old but it still looks great.
Parts Used:
-
Michelle from Richardson, TX
-
Difficulty Level:Really Easy
-
Total Repair Time:Less than 15 mins
83 of 227 people
found this instruction helpful.
Was this instruction helpful to you?
Thank you for voting!
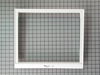
Cover Pan Crisper(bottom glass shelf and frame) were broken
-
anthony from ormond beach, FL
-
Difficulty Level:Really Easy
-
Total Repair Time:Less than 15 mins
13 of 18 people
found this instruction helpful.
Was this instruction helpful to you?
Thank you for voting!
Refrigerator and freezer was not "working " ,ice machine not working.
Removing the panels inside the freezer section was the most difficult ,because it is narrow,hard to fit your body inside compartment, in order to cut wires and to splice Bi-metal Defrost Thermostat wires (2 ) Watch the videos on the web site so you know where to start. First time I ever "repaired " a large appliance, saved me over $ 600.00 (that's what the people I bought the Refrigerator from wanted to charge me.) My parts cost 65.00 !!!!! My younger brother turned me onto the web site... , I'll be returning to the site and telling my friends about it. It's a total "rip off" what service organizations charge the general public these days from Car Dealer ships to the stores we purchase our appliances from. !!! Glad I still have my health and faculties to repair the essentials we have around our homes. !!!!
Parts Used:


-
Guy from MUNSTER, IN
-
Difficulty Level:Easy
-
Total Repair Time:30 - 60 mins
-
Tools:Pliers, Screw drivers, Socket set
11 of 12 people
found this instruction helpful.
Was this instruction helpful to you?
Thank you for voting!
'Frig door made a popping sound when opening and closing.
Removed upper hinge cover and hinge, lifted door from lower hinge socket, removed lower cam from 'frig hinge, and replaced with new. I had a helper hold the 'frig door while I removed old upper cam, and replaced with new. Piece of cake and works like new! This must be a design problem..
Parts Used:


-
Lance from Richardson, TX
-
Difficulty Level:Really Easy
-
Total Repair Time:15 - 30 mins
-
Tools:Socket set
11 of 12 people
found this instruction helpful.
Was this instruction helpful to you?
Thank you for voting!
It was just time to replace the water filter.
We took out the old filter and put in the new one. Ran out a few gallons of water then it was ready to use.
Parts Used:
-
Denise from Hoschton, GA
-
Difficulty Level:Really Easy
-
Total Repair Time:Less than 15 mins
15 of 25 people
found this instruction helpful.
Was this instruction helpful to you?
Thank you for voting!
Ice Door Leaking
Remove the unit cover by unsnapping from the bottom. Remove the face plate on the switches. The ice door simply snaps off the closing mechanism. The problem I have is that the original door included a heat trace element (keeps the back of the door warm to limit condensation). The new part was simply a new seal. I clipped the leads to the het trace (turn off the fridge before you do that) and put in the new door. When the heat ids on in the house there is no problem with condensation but on warmer days its pretty bad. I cannot find a replacement part with the heating element and have contacted Whirpool. THey haven't responded as of yet.
Parts Used:

-
Steve from Metairie, LA
-
Difficulty Level:Easy
-
Total Repair Time:15 - 30 mins
-
Tools:Nutdriver, Screw drivers
13 of 19 people
found this instruction helpful.
Was this instruction helpful to you?
Thank you for voting!
drive shaft for ice maker rounded edges
removed the drive shaft (6 sided) with seals and replaced it. They last for about 5 years and have to be rotated (flipped over) to continue to use. The shaft metal is a little softer than the drive socket on the motor which, over time will cause the six-sided (12 inch) shaft to round the edges due to torque and pressure on the mixing shaft inside the ice bucket the the door of the freezer.
Parts Used:

-
JOHN from BARDSTOWN, KY
-
Difficulty Level:Really Easy
-
Total Repair Time:30 - 60 mins
-
Tools:Nutdriver
10 of 10 people
found this instruction helpful.
Was this instruction helpful to you?
Thank you for voting!
Crisper Pan Side Reales Had Cracked
I just slid the new pan in , partselect has the correct part all the time , I repalced my ice maker once and it took 15 min no problem
Parts Used:
-
LEVY from HOUSTON, TX
-
Difficulty Level:Easy
-
Total Repair Time:30 - 60 mins
10 of 11 people
found this instruction helpful.
Was this instruction helpful to you?
Thank you for voting!
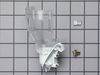
socket melted with bulb in it.
-
martin l. from JACKSONVILLE,, IL
-
Difficulty Level:Really Easy
-
Total Repair Time:Less than 15 mins
12 of 18 people
found this instruction helpful.
Was this instruction helpful to you?
Thank you for voting!
Broken tray
Remove old tray, replace with new tray.
Simple & easy.
Best part is I ordered on Monday & received on Tuesday!
Simple & easy.
Best part is I ordered on Monday & received on Tuesday!
Parts Used:
-
Brian from Los Angeles, CA
-
Difficulty Level:Really Easy
-
Total Repair Time:Less than 15 mins
11 of 15 people
found this instruction helpful.
Was this instruction helpful to you?
Thank you for voting!
door was making a poping sound upon opening and closing
First I removed all contents from inside refrigerator door.Then I removed (1) 10mil screw,which holds cover for top hinge.Next I removed the (3) hinge screws,and lifted door off of bottom hinge.Pulled off plastic closure cam from bottom metal hinge post.I cleaned metal post ,applied a small amount of vaseline to post, slid on new plastic cam,installed door, replaced screws.Very easy,10 to 15 min tops.
Parts Used:
-
Tony from Mesquite, NV
-
Difficulty Level:Really Easy
-
Total Repair Time:Less than 15 mins
-
Tools:Nutdriver, Socket set
10 of 12 people
found this instruction helpful.
Was this instruction helpful to you?
Thank you for voting!