




















10656823605 Kenmore Refrigerator - Instructions
Keep searches simple. Use keywords, e.g. "leaking", "pump", "broken" or "fit".
Ice maker stopped producing ice
Emiter blinking red; ice maker stopped working. Called appliance repair, said electronic control boards needed to be replaced. Quoted me $275, including parts. Ordered part at partselect.com, installed in 15 min and ice maker started producing ice. Also discovered on other online forums that this part is a common failure on these model refrigerators. Very easy to swap out, plug & play. Make sure to unplug appliance before performing repair due to shock risk.
Parts Used:

-
Matthew from Austin, TX
-
Difficulty Level:Easy
-
Total Repair Time:Less than 15 mins
-
Tools:Screw drivers
17 of 18 people
found this instruction helpful.
Was this instruction helpful to you?
Thank you for voting!
water leak
It was easy, I followed the instructions on the paper and it went well.
Parts Used:
-
Dean from Clermont, FL
-
Difficulty Level:Easy
-
Total Repair Time:30 - 60 mins
-
Tools:Screw drivers, Socket set
23 of 37 people
found this instruction helpful.
Was this instruction helpful to you?
Thank you for voting!
Ice maker not working
Well I changed out the optical boards which I thought were the problem and the ice maker is still not making any ice. I can see the ice makers fingers rotating but there is no water entering through the tube. I jumped the water manifold in the back and water comes out but I cant figure out what is not telling it to run water and fill the ice tray. Any ideas would be appreciated I guess i'll replace the ice maker next. Thanks in advance.
Parts Used:
-
Lisa from Stuart, FL
-
Difficulty Level:Really Easy
-
Total Repair Time:Less than 15 mins
-
Tools:Screw drivers
20 of 28 people
found this instruction helpful.
Was this instruction helpful to you?
Thank you for voting!
Broken Drawers
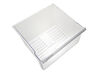
I replaced the Crisper Pan with no problem. The snack Crisper Drawer doesn't come with the white trim, so you have to take it off the broken drawer and put it on the new one. I think removing the trim & putting it on the new drawer was the most difficult part since it is such a snug fit! Still, it only too a couple of minutes. Now I am wondering why I waited so long to order new drawers!! Thanks Parts Select!
Parts Used:

-
Fiona from Newman, CA
-
Difficulty Level:Really Easy
-
Total Repair Time:Less than 15 mins
21 of 31 people
found this instruction helpful.
Was this instruction helpful to you?
Thank you for voting!
compressor didnt turn on

-
gerardo from el monte, CA
-
Difficulty Level:Really Easy
-
Total Repair Time:Less than 15 mins
-
Tools:Screw drivers
24 of 41 people
found this instruction helpful.
Was this instruction helpful to you?
Thank you for voting!
It was not coming out of defrost cycle
First I installed a defrost timer, (the old timer had burnt out contacts in it) It seemed to work for a few days, then went back to not comng out of defrost cycle, I then installed a defrost thermostat. It seems to be working better than before. I found out that maybe I wasn't running it cold enough. So I turned it up colder. Now it works ok for 2 - 3 days, then I check the Temp in the freezer and its up to 6o. So I manually reset the timer and it works for 2 - 3 days. Don't know what to do now to fix it.
Parts Used:

-
Dale from Flemingsburg, KY
-
Difficulty Level:Easy
-
Total Repair Time:30 - 60 mins
-
Tools:Nutdriver, Screw drivers
25 of 45 people
found this instruction helpful.
Was this instruction helpful to you?
Thank you for voting!
Door would not auto close
I removed the screws on the upper hinge and removed the door. I removed the lower cam in about 2 minutes and had it replaced. The upper cam was a tight fit in the door and I resorted to vise-grips to remove it. Total time to replace cams and put the door back on was 30 minutes. This saved me $100.
Thanks
Thanks
Parts Used:


-
James from Hampton, NH
-
Difficulty Level:Really Easy
-
Total Repair Time:15 - 30 mins
-
Tools:Pliers, Screw drivers, Socket set
18 of 25 people
found this instruction helpful.
Was this instruction helpful to you?
Thank you for voting!
water filter needed replacing
-
Debbie from Tyler, TX
-
Difficulty Level:Really Easy
-
Total Repair Time:Less than 15 mins
21 of 34 people
found this instruction helpful.
Was this instruction helpful to you?
Thank you for voting!
Filter and Cap were missing
Easy as pie, I followed the directions on the box that the replacement filter came in, and installed it and the cap simply and easily.
Parts Used:

-
David from Reston, VA
-
Difficulty Level:Really Easy
-
Total Repair Time:Less than 15 mins
17 of 23 people
found this instruction helpful.
Was this instruction helpful to you?
Thank you for voting!
The edges of the Meat pan slide were broken.
I removed the glides under the edges of the meat pan, remove the old pan, put the new pan in and replaced the glides. I was very pleased with PartSelect. I ordered my part, and it arrived the very next day. I will definitely order my next replacement part thru PartSelect.
Parts Used:
-
Michael from Bakersfield, CA
-
Difficulty Level:Really Easy
-
Total Repair Time:Less than 15 mins
-
Tools:Screw drivers
15 of 18 people
found this instruction helpful.
Was this instruction helpful to you?
Thank you for voting!
plastic ice cube guide installed
Mine is a simple tale of the missing ice cube dispensor guide. When we moved, the guide was missing so when I built our new home with a kitchen in the basement I wanted to hook up the ice dispensor but when I did, the ice cubes always fell off to one side. I decided to order the misssing part on-line. I ordered it paid for it and then received it the next day-wonderful. Within ten minutes, I was ready to go. Thanks for great service. Rick Davis, Bloomington, IL.
Parts Used:

-
Richard from Bloomington, IL
-
Difficulty Level:Easy
-
Total Repair Time:Less than 15 mins
15 of 18 people
found this instruction helpful.
Was this instruction helpful to you?
Thank you for voting!
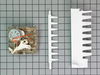
Old motor was not resetting back to proper position halting ice production.
Removed the three motor screws pulled off old motor put new motor in place replaced screws and re-installed. It was producing ice three hours later. I originally tried to obtian these parts directly from Whirlpool in which twice they shipped me the wrong parts. Finally gave up on them and entered the whilrpool part number which crossreferenced to new part number which was correct the first try. Thank you!
Parts Used:
-
Kevin from Spring, TX
-
Difficulty Level:Really Easy
-
Total Repair Time:Less than 15 mins
-
Tools:Nutdriver, Screw drivers
13 of 14 people
found this instruction helpful.
Was this instruction helpful to you?
Thank you for voting!
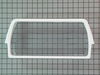
Not enough door storage
Excellent fit and installation. The door bins slid right in and created the extra space needed on the shelves.
Parts Used:
-
Dennis from Owings, MD
-
Difficulty Level:Really Easy
-
Total Repair Time:Less than 15 mins
13 of 14 people
found this instruction helpful.
Was this instruction helpful to you?
Thank you for voting!
Cracked Crisper Drawer
This company is WONDERFUL! I ordered the wrong drawer the first time, but their return process was a snap and the correct drawer arrived the next day. It's great to know that there is someone out there with just about every part you'll need for about any appliance that is truly customer friendly.
Parts Used:
-
Jennifer from Salvisa, KY
-
Difficulty Level:Really Easy
-
Total Repair Time:Less than 15 mins
13 of 15 people
found this instruction helpful.
Was this instruction helpful to you?
Thank you for voting!
The water dispenser flow was very slow and the housing leaked when the filter was removed.
Removed front plastic grill and screws holding the filter in place. Also removed lower back cardboard panel to access water lines. Video on this website told me how to remove water lines from filter, you must depress a collar around the water line while pulling out the water line. Then install the new Water Filter Housing and water lines. The only problems I had was the tight space to work in and one of the water lines was leaking, but pushing the water line in further solved the problem.
Parts Used:
-
Daniel from CAROL STREAM, IL
-
Difficulty Level:Easy
-
Total Repair Time:30 - 60 mins
-
Tools:Nutdriver, Screw drivers, Socket set
12 of 13 people
found this instruction helpful.
Was this instruction helpful to you?
Thank you for voting!