




















10651183110 Kenmore Refrigerator - Instructions
Keep searches simple. Use keywords, e.g. "leaking", "pump", "broken" or "fit".
Ice Maker Motor Broke (Plastic Cogs)
1) Turn off the power to the refrigerator 2) Remove the top shelf and ice maker door 3)Remove three hex screws holding the ice maker in place, 4) Unplug the electrical cables and remove the ice maker 5) Remove the plastic cover to the motor module 6) Remove three screws from the motor module and seperate from the housing 7) Remove two mounting screws for the motor module 8) Seperate the motor module from the ice tray 9) Remove and replace the plastic ice stripper and rake10) Reassemble in reverse order. Note: Be patient after re-installing the ice maker. It might take an hour or two before its cold enough to kick back on and make ice.
Parts Used:
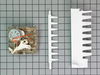
-
Robert from Austin, TX
-
Difficulty Level:Easy
-
Total Repair Time:15 - 30 mins
-
Tools:Screw drivers, Socket set
1 of 2 people
found this instruction helpful.
Was this instruction helpful to you?
Thank you for voting!
ice maker not working
Thought I was going to have to replace entire ice bin but went on this website and saw I only needed to replace a coupling. Even had video on how to do it. Easy greasy!!
Parts Used:

-
brett from birmingham, AL
-
Difficulty Level:Really Easy
-
Total Repair Time:Less than 15 mins
-
Tools:Screw drivers
1 of 3 people
found this instruction helpful.
Was this instruction helpful to you?
Thank you for voting!
ice make just stopped making ice
i first removed the ice maker and took the motor assembley off. Right away i saw the problem. The wheel which drives the arm broke.
Once i get the new motor modl i just replaced it (it just pops into place with 1 or 2 screws).
put ice maker back in freezer and wola. Starting cranking out ice within 15 minutes.
Once i get the new motor modl i just replaced it (it just pops into place with 1 or 2 screws).
put ice maker back in freezer and wola. Starting cranking out ice within 15 minutes.
Parts Used:
-
Ryan from Midlothian, VA
-
Difficulty Level:Easy
-
Total Repair Time:15 - 30 mins
-
Tools:Screw drivers, Socket set
1 of 3 people
found this instruction helpful.
Was this instruction helpful to you?
Thank you for voting!
Ice Maker Stopped Working
Tough part was diagnosing the problem: bad water inlet solenoid, frozen inlet line, bad ice maker motor, or door opening sensor? Went to a parts shop & discussed the problem with the serviceman. He said you just need to sequentially replace each part. No way say I, that could cost $300 with a no-part return option.
I decided to replace the motor...Eureka!! It worked.
The underside of the ice maker cartridge has a plastic snap clip on either side of the cartridge. You need push each up, pull the left side of the cartridge out part way & disconnect the electrical connector on the right side(left..you facing the refrig.) With the cartridge out simply remove the 5 screws from the motor plate of the left side & replace with the new one.
Very simple. Slide the cartridge back in the frig. until the 2 snap clips click. Voila...you done! Cost $86..not $300. Apparently the motor is too weak to do the job & burns out quickly. Manufacturer should correct this defect.
I decided to replace the motor...Eureka!! It worked.
The underside of the ice maker cartridge has a plastic snap clip on either side of the cartridge. You need push each up, pull the left side of the cartridge out part way & disconnect the electrical connector on the right side(left..you facing the refrig.) With the cartridge out simply remove the 5 screws from the motor plate of the left side & replace with the new one.
Very simple. Slide the cartridge back in the frig. until the 2 snap clips click. Voila...you done! Cost $86..not $300. Apparently the motor is too weak to do the job & burns out quickly. Manufacturer should correct this defect.
Parts Used:
-
Joe from Omaha, NE
-
Difficulty Level:Really Easy
-
Total Repair Time:15 - 30 mins
-
Tools:Screw drivers
1 of 3 people
found this instruction helpful.
Was this instruction helpful to you?
Thank you for voting!
Light in my refrigerator didn't work.
At first I went to a local part supplier and they didn't have it in stock but could order it for me for $55.00 plus $10.00 to ship it. I told them I would have to think about it. I went home and got on the computer and found your web site and was I shocked when I saw the same part listed for $6.98 and $7.00 to ship it. You guys saved me $50.00. The part arrived in two day and took 5 min. to install. I now have light in my refrigerator. Thank you.
Parts Used:

-
Joseph from Byron Center, MI
-
Difficulty Level:Really Easy
-
Total Repair Time:Less than 15 mins
-
Tools:Screw drivers
1 of 3 people
found this instruction helpful.
Was this instruction helpful to you?
Thank you for voting!
you have to turn it off and on to run.
Just like the video showed me.It still does not work. Have to turn it off and on to make it start up.I also replaced thermostat in freezer. Does not work.
Parts Used:

-
chris from woodland hills, CA
-
Difficulty Level:Really Easy
-
Total Repair Time:Less than 15 mins
-
Tools:Nutdriver
0 of 1 people
found this instruction helpful.
Was this instruction helpful to you?
Thank you for voting!
Door Light switch cracked Mounting
I noticed that the refrigerator was having trouble maintaining temperature. Thought it might be time for new one until I found out that a new frig was $5k to $7K. Just happened to notice that the light switch didn't look quite right (was not sitting sqaure to the door). Once I pressed it it came loose. I then realized the the lights were staying on (50 watts of heating). Replaced the switch and the frig started working like new.
Parts Used:
-
Paul from Hinsdale, IL
-
Difficulty Level:Really Easy
-
Total Repair Time:Less than 15 mins
-
Tools:Screw drivers
0 of 1 people
found this instruction helpful.
Was this instruction helpful to you?
Thank you for voting!
Internal light did not come on each time the door was opened.
After disconnecting the electricity. I followed the instructions as indicated in the "HOW TO" article on the website. I used a steel putty knife and pried the light switch out of its retaining hole. I worked the right side the most since this is the side with the retaining clip. After I removed the switch I transferred the two electrical outlets to the new switch and easily snapped it into place. Engaged the electric power and tested the switch.
Parts Used:
-
John from Jefferson Hills, PA
-
Difficulty Level:Really Easy
-
Total Repair Time:Less than 15 mins
0 of 1 people
found this instruction helpful.
Was this instruction helpful to you?
Thank you for voting!
rocker switch broke off
disconnected el. power to fridge. pried out broken switch with small screwdriner and pulled out w/water pump pliers. installed new switch and pressed into opening.
Parts Used:
-
STANLEY from OAKLAND, NJ
-
Difficulty Level:Really Easy
-
Total Repair Time:Less than 15 mins
-
Tools:Screw drivers
0 of 1 people
found this instruction helpful.
Was this instruction helpful to you?
Thank you for voting!
ice cubes were all stuck together
First I lifted the ice bucket out of the refrigerator, the broken coupling fell out in three pieces. I ordered a new coupling {$14 including shipping) It arrived 4 days later. I removed the phillips screw and installed the new coupling along with the flat washer that had fallen out. The repair took 5 minutes and saved a lot of money.
Parts Used:
-
ALAN from SHELBY TWP, MI
-
Difficulty Level:Really Easy
-
Total Repair Time:Less than 15 mins
-
Tools:Screw drivers
0 of 1 people
found this instruction helpful.
Was this instruction helpful to you?
Thank you for voting!
Ice dispenser stopped dispensing
The ice dispenser stopped turning for crushed/cubed ice out the chute. Turned out it was this little $10 metal coupling part that broke apart. I'm guessing its not an unusual problem because the partSelect part was redesigned to be thicker than the original part to help prevent it from happening. I was very impressed with the superiour quality of the replacement part.
Parts Used:
-
William from Clovis, CA
-
Difficulty Level:Really Easy
-
Total Repair Time:Less than 15 mins
-
Tools:Nutdriver
0 of 1 people
found this instruction helpful.
Was this instruction helpful to you?
Thank you for voting!
Broken light switch
Part was easy to order, delivered quickly, installation very easy. Just unplug the unit, pop out the old swich using a screwdriver, disconnect and reconnect leads and pop switch back in. Definitely recommend that you can do it too.
Parts Used:
-
George from North Scituate, RI
-
Difficulty Level:Really Easy
-
Total Repair Time:Less than 15 mins
-
Tools:Screw drivers
0 of 1 people
found this instruction helpful.
Was this instruction helpful to you?
Thank you for voting!
19 year old light switch broke
Great service. Unpluged old switch and pluged in new one. Works great
Parts Used:
-
Fred from Watertown, NY
-
Difficulty Level:Really Easy
-
Total Repair Time:Less than 15 mins
0 of 1 people
found this instruction helpful.
Was this instruction helpful to you?
Thank you for voting!
A small part broke that dispensed ice out the door
Removed the screw at the base of the ice bin unit. Replaced the coupling that had broken teeth and screwed in the new one. Was very simple. With service call with part near $150 the repair was made for less than $20.
Parts Used:
-
Beatrice from Safety Harbor, FL
-
Difficulty Level:Really Easy
-
Total Repair Time:Less than 15 mins
-
Tools:Screw drivers
0 of 1 people
found this instruction helpful.
Was this instruction helpful to you?
Thank you for voting!
Lights didn't always come on when was opened
Used a screwdriver to pry loose the old switch, swapped wires to the new switch and pushed it into the opening. Took about 2 minutes.
Parts Used:
-
Gary from Jenkintown, PA
-
Difficulty Level:Really Easy
-
Total Repair Time:Less than 15 mins
-
Tools:Screw drivers
0 of 1 people
found this instruction helpful.
Was this instruction helpful to you?
Thank you for voting!