




















10644103300 Kenmore Refrigerator - Instructions
Keep searches simple. Use keywords, e.g. "leaking", "pump", "broken" or "fit".
My Ice Maker stopped working.
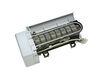
I Ordered an Ice maker assembly and installed it myself using the video that was associated with the part on the website. It was simple and fast.
Parts Used:
-
Jennifer from HUNTSVILLE, AL
-
Difficulty Level:Really Easy
-
Total Repair Time:15 - 30 mins
-
Tools:Nutdriver, Screw drivers
5 of 5 people
found this instruction helpful.
Was this instruction helpful to you?
Thank you for voting!
Tab Was Broken On Ice Guide
Old part would not stay in place (broken). Recieved new part and snapped it in to place . No tools needed.
Parts Used:

-
ALAN from ASH, NC
-
Difficulty Level:Really Easy
-
Total Repair Time:Less than 15 mins
6 of 8 people
found this instruction helpful.
Was this instruction helpful to you?
Thank you for voting!
Broken ice bin coupling
Online parts detail made identifiying the correct part very easy. $10 fix instead of a $150 service call. Once the right part was identified, fixing it was very easy.
Parts Used:

-
Bradley from Woodstock, MD
-
Difficulty Level:Really Easy
-
Total Repair Time:Less than 15 mins
7 of 11 people
found this instruction helpful.
Was this instruction helpful to you?
Thank you for voting!
Ice maker just stpooed making ice
The troubleshooting time takes about 20 to 30 minutes. After checking out the solenoid (valve water), the water line, and the electronic board (emitter/receiver) are working fine. The only thing left is the ice module. I called Partselect and talked to a sale rep to make sure I get the right part, and the lady was so helpful by sendind the picture of the part so I can review before ordering it. I received the part in 3 days ( normal shipping) and did the folowings:
1) Unplugged the power cord from refrigerator.
2) Removed the ice module by removed a 1/4" screw from under the right side of the icemaker that retains the icemaker and a “U” plastic clamp and then pull out the whole unit it from the track.
3) Unplugged the cable connected to the ice maker.
4) Using the phillips screw driver to remove the 3 screws. Carefully pulled out the ice module and installed the new ice module.
5) Put the ice maker back to the freezer, plug the cable back to the ice maker and put the clamp and tighten the nut.
6) Plugged the power cable back to the wall.
The first ice I got in an hour and a full bucket of ice in less than 24 hours. I spent less than $80 for the whole thing. Thank you so much Partselect for the great service and the stories posted, it really helped me to get it done.
1) Unplugged the power cord from refrigerator.
2) Removed the ice module by removed a 1/4" screw from under the right side of the icemaker that retains the icemaker and a “U” plastic clamp and then pull out the whole unit it from the track.
3) Unplugged the cable connected to the ice maker.
4) Using the phillips screw driver to remove the 3 screws. Carefully pulled out the ice module and installed the new ice module.
5) Put the ice maker back to the freezer, plug the cable back to the ice maker and put the clamp and tighten the nut.
6) Plugged the power cable back to the wall.
The first ice I got in an hour and a full bucket of ice in less than 24 hours. I spent less than $80 for the whole thing. Thank you so much Partselect for the great service and the stories posted, it really helped me to get it done.
Parts Used:
-
Cuong from Camarillo, CA
-
Difficulty Level:Easy
-
Total Repair Time:Less than 15 mins
-
Tools:Nutdriver, Screw drivers
5 of 5 people
found this instruction helpful.
Was this instruction helpful to you?
Thank you for voting!
Original part very poorly constructed .. Broke apart
Remove the old part with pliers and pulled out used water filter Installed replacement water filter on cap and installed in grill area below door Hooray !
Parts Used:

-
Don from BEE CAVE, TX
-
Difficulty Level:Very Easy
-
Total Repair Time:Less than 15 mins
-
Tools:Pliers
5 of 5 people
found this instruction helpful.
Was this instruction helpful to you?
Thank you for voting!
Ice Door would not close
The part came with minimal instructions .... "use all the parts in the kit". That is it.
Parts Used:
-
JENNIFER from NORTH CREEK, NY
-
Difficulty Level:A Bit Difficult
-
Total Repair Time:30 - 60 mins
9 of 18 people
found this instruction helpful.
Was this instruction helpful to you?
Thank you for voting!
The light would not turn on when the refrigerator door was opened
I removed the plastic portion to get to the switch and wires. I removed the old switch by disconnecting the two wires and pushing it out of its setting.
I discovered the old switch only had 2 prongs where the new switch had 3. Once I figured which 2 of the 3 prongs would light the lightbulb,
I then connected the two wires to the correct prongs of the new switch. I pushed the new switch into its setting and replaced the plastic portion on the refrigerator. Voila, success. The refrigerator door now comes on when its door is opened.
Thanks for the having the part and getting it at our door step in 3 days.
I discovered the old switch only had 2 prongs where the new switch had 3. Once I figured which 2 of the 3 prongs would light the lightbulb,
I then connected the two wires to the correct prongs of the new switch. I pushed the new switch into its setting and replaced the plastic portion on the refrigerator. Voila, success. The refrigerator door now comes on when its door is opened.
Thanks for the having the part and getting it at our door step in 3 days.
Parts Used:

-
Edward from San Antonio, TX
-
Difficulty Level:Easy
-
Total Repair Time:15 - 30 mins
-
Tools:Screw drivers
8 of 15 people
found this instruction helpful.
Was this instruction helpful to you?
Thank you for voting!
Ice dispensing door would not close
On the bottom of the cover plate are two slots. Insert thin bladed screw driver and pry out gently. Remove electrical connection plate. Remove the old door by removing pin from spring and retaining bracket useing long nose pliers. Install new door kit making sure you use all the parts in the kit. The door buffer is different and the new kit does not require a heater.Install the electrical plate, ice shute and front cover.
Parts Used:
-
Ralph from Sulligent, AL
-
Difficulty Level:Easy
-
Total Repair Time:15 - 30 mins
-
Tools:Pliers, Screw drivers
9 of 18 people
found this instruction helpful.
Was this instruction helpful to you?
Thank you for voting!
Filler tube to the ice maker would freeze up
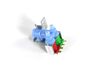
Pulled the fridge (KitchenAid side by side) out from the wall for the 1st time in a few years and dealt with those issues. Followed the instructions which were pretty clear. I was lucky enough that I did not need to retro fit any of the connections - it was really a straight forward replacement. The ice maker and the water dispenser have never worked better. Took about an hour.
Parts Used:
-
Fred from Rockport, TX
-
Difficulty Level:A Bit Difficult
-
Total Repair Time:1- 2 hours
-
Tools:Screw drivers, Socket set, Wrench (Adjustable)
5 of 6 people
found this instruction helpful.
Was this instruction helpful to you?
Thank you for voting!
Ice cube door would not close pr0perly
Because of the design change of the door hinge it was more difficult to slide the pin into the door and spring. I used an allen wrench to hold it in place on the left side so I could slide the pin in the right hole. Then removed the allen wrench so I could slide the pin all the way. I was very impressed with the time that it took to get the kit. I ordered it about 1:30PM and the following day I had the kit delivered by 6PM. FANTASTIC SERVICE!
Parts Used:
-
Betty J from Amherst, VA
-
Difficulty Level:A Bit Difficult
-
Total Repair Time:1- 2 hours
-
Tools:Pliers, Screw drivers
6 of 10 people
found this instruction helpful.
Was this instruction helpful to you?
Thank you for voting!
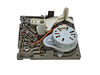
Bad module on icemaker
First shut off water supply and unplug power. Unscrew icemaker assembly from side wall with 3 screws. Remove front cap and you can clearly see module. Unscrew and remove module ( only three screws). Install new module and revers procedure to finish up. Ice was ready in just a few hours. Video provided by this site was right on and left no questions.
Parts Used:
-
Randy from LAFAYETTE, LA
-
Difficulty Level:Really Easy
-
Total Repair Time:30 - 60 mins
-
Tools:Screw drivers
4 of 4 people
found this instruction helpful.
Was this instruction helpful to you?
Thank you for voting!
Ice Maker would not make ice
I Have a Sub Zero refrigerator, but has a Wirlpool ice maker. The ice maker has been repaired 4 times in 2009!!! A complete new ice maker one time! The repair man repaced the double outlet valve three times in 4 months. Then they had to but in a in line water filter. This solved the problem for six months. I thought the water filter would last at lease a year. It will now be changed every six months. For some reason I get minor amounts of dirt,in my water. If a small speck gets to the double outlet valve it causes it to "weep" and the tube that fills the ice tray freezes up. Since I have watched so many times as my ice maker was repaired, it was easy to diconnect the faulty valve with 1/4 inch wrench and the water filter. Replace with the new valve and water filter. Make sure the connections are tite. Turn the water back on and in 24 hours you have ice.
Parts Used:
-
Jack from The Woodlands, TX
-
Difficulty Level:Easy
-
Total Repair Time:15 - 30 mins
-
Tools:Nutdriver, Pliers, Screw drivers, Wrench (Adjustable)
5 of 7 people
found this instruction helpful.
Was this instruction helpful to you?
Thank you for voting!
Water Fill Cup Broke
The Ice maker unit had to be removed and the shaft had to also be removed, which required dis-assembling the motor drive. The thickness of the shaft and the bearing fill cup prevents it from simply pushing it in place. Other than that I have Ice.
Parts Used:

-
Sam from Las Vegas, NV
-
Difficulty Level:A Bit Difficult
-
Total Repair Time:30 - 60 mins
-
Tools:Screw drivers
5 of 7 people
found this instruction helpful.
Was this instruction helpful to you?
Thank you for voting!
The door shoot plastic had cracked allowing air to get into the freezer compartment.
I unplugged the fridge, removed the face plate on the front, disconnected the power feeds, unscrewed the electrical panel and moved it out of the way.
I then dismantled and removed the broken part and installed the new part. I was able to use the rest of the existing parts to get the job done.
I put everything back together, and voila! it works great.
I then dismantled and removed the broken part and installed the new part. I was able to use the rest of the existing parts to get the job done.
I put everything back together, and voila! it works great.
Parts Used:
-
Tony from Lake Forest Park, WA
-
Difficulty Level:Easy
-
Total Repair Time:30 - 60 mins
-
Tools:Pliers, Screw drivers
8 of 16 people
found this instruction helpful.
Was this instruction helpful to you?
Thank you for voting!
The water in the door dispenser would run for several seconds and then start clunking. This resulted in no more water flow.
I guessed that the water dispenser solenoid was getting weak.
A quick web search led me to PartSelect's website where it was so easy to pull up my refrigerator model with diagrams. I ordered the valve kit, and in 5 days it was in my hands.
Installation was literally 10 minutes. It took longer than that to vacuum all the dust from under and in back of my refrigerator !
A quick web search led me to PartSelect's website where it was so easy to pull up my refrigerator model with diagrams. I ordered the valve kit, and in 5 days it was in my hands.
Installation was literally 10 minutes. It took longer than that to vacuum all the dust from under and in back of my refrigerator !
Parts Used:
-
Richard from Novi, MI
-
Difficulty Level:Really Easy
-
Total Repair Time:Less than 15 mins
-
Tools:Nutdriver
5 of 7 people
found this instruction helpful.
Was this instruction helpful to you?
Thank you for voting!