




















10641514100 Kenmore Refrigerator - Instructions
Keep searches simple. Use keywords, e.g. "leaking", "pump", "broken" or "fit".
the door bins failed rather quicklyAn unknown white substance was observed down the side of the door at the juncture of the bin and the edge of the door/hinge side
we removed the old broken bins and replaced with new door bins
Parts Used:
-
miriam from pensacola, FL
-
Difficulty Level:Really Easy
-
Total Repair Time:Less than 15 mins
10 of 14 people
found this instruction helpful.
Was this instruction helpful to you?
Thank you for voting!
Handle on the fridge door broke off leaving the tabs with screws intacts
1. Slid off/Removed the top and bottom parts.
2. Unscrewed the broken tabs. Saved the screws.
3. Screwed in the new handle
4. Slid back the top and the bottom parts.
2. Unscrewed the broken tabs. Saved the screws.
3. Screwed in the new handle
4. Slid back the top and the bottom parts.
Parts Used:
-
Feroze from Sugarland, TX
-
Difficulty Level:Really Easy
-
Total Repair Time:Less than 15 mins
-
Tools:Screw drivers
9 of 11 people
found this instruction helpful.
Was this instruction helpful to you?
Thank you for voting!
My drawer had been broken and I needed a new one.
When I took the pan out of the box, it was not the exact same as the one I had. But it fit perfect. The only hard part was the fact that it looked so good I had to clean the entire fridge side. (Smile)
Parts Used:
-
Jennifer from Birmingham, AL
-
Difficulty Level:Really Easy
-
Total Repair Time:Less than 15 mins
8 of 9 people
found this instruction helpful.
Was this instruction helpful to you?
Thank you for voting!
Contact in thermostat assembly was burned up, making the freezer irregular and the ice would melt, then freeze into a ball!
I took off the front cover with the controls. Pulled out the control knobs, unbolted the assembly (which was identical to my replacement part) and proceded to follow the old thermostat tube to the back of the fridge. The tube should be carefully removed, not pulled on, there's a couple of screws holding it in towards the back. I installed the new part in reverse of how I took out the original part. I'm very happy with how the fridge has come back to life! It was much cheaper to fix it than to replace.
Parts Used:

-
Jennifer from Schertz, TX
-
Difficulty Level:Easy
-
Total Repair Time:30 - 60 mins
-
Tools:Nutdriver, Pliers, Screw drivers
9 of 12 people
found this instruction helpful.
Was this instruction helpful to you?
Thank you for voting!
Worn Down Upper And Lower Cam
Took off refrigerator door from top hinge and lifted off. A little difficulty getting worn out parts off (needed dremel to drill out worn plastic); replaced with new parts, the screw head holding on the part was starting to be worn as well but still worked. If I hadn't got to this repair soon the bottom of the door aluminum would have total worn out as it is, it has a deep groove but not noticeable. The new cams also force the door closed tight instead of slightly ajar at times.
Parts Used:


-
Jose from Corona, CA
-
Difficulty Level:Easy
-
Total Repair Time:30 - 60 mins
-
Tools:Pliers, Wrench set
8 of 9 people
found this instruction helpful.
Was this instruction helpful to you?
Thank you for voting!
Refrigerator wouldn't kick on unless we tapped the thermostat knob and then the freezer would frost up because it wouldn't kick off
Unplugged the refrigerator and then removed the knobs and face plate inside, by removing the screws. I then removed the screws holding the thermostat and unplugged the Thermostat assembly, and replaced it with the new one, then removed the defrost timer and replaced with the new one. I then replaced the screws and the face plate, then the knobs. I plugged the refrigerator and it kicked on right away. Within a half hour we had it running and at the right temperature. It was so easy I think my wife could have done it!
Parts Used:
-
Yolanda B from Waterville, ME
-
Difficulty Level:Easy
-
Total Repair Time:15 - 30 mins
-
Tools:Screw drivers, Socket set
9 of 12 people
found this instruction helpful.
Was this instruction helpful to you?
Thank you for voting!
Refridgerator do not get cold
Disconnect the power, removed the back panel, plastic cover and the relays. Replaced new parts, reattached the back panel and reconnected the power. The hardest part was to remove the plastic cover, it was locked on so tight,I had to use a putty knife to separate the cover from the compressor.
Parts Used:

-
Victor from Colton, CA
-
Difficulty Level:Easy
-
Total Repair Time:15 - 30 mins
-
Tools:Nutdriver, Screw drivers
12 of 21 people
found this instruction helpful.
Was this instruction helpful to you?
Thank you for voting!
The Freezer defrosted and everything on the top and the bottom spoiled
i had used your web site before and i read several problems that your readers had. i went to the back of the unit, removed the bottom cover and right there the i found the run capacitor and i chaged it. since i had only ordered this part to save money i went back and ordered the Start Device which when i took it off it was completely burned. the replacement part came labeled with 2 different compressor #, so i picked the one that i had and unpluged each wire. the part may differ from the one that it's in the unit but it worked when i pluged everything back on. it also helps to take a picture of everything before removing the wires in case you have to leave it and come back later. i hope to use this refrigerator another 10 years. thank you all for your help.
Parts Used:

-
Jorge from Miami, FL
-
Difficulty Level:Easy
-
Total Repair Time:15 - 30 mins
-
Tools:Nutdriver
10 of 16 people
found this instruction helpful.
Was this instruction helpful to you?
Thank you for voting!
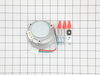
The after market 4 yr old motor was making a wierd noise.
Removed back panel and removed the motor put new quick disconnect on and tapped the mounting holes. Removed and cleaned fan blade from old motor and put on the new motor. Mounted motor plugged it in and replaced panel.
Parts Used:
-
Marcus from St Petersburg, FL
-
Difficulty Level:A Bit Difficult
-
Total Repair Time:30 - 60 mins
-
Tools:Nutdriver, Screw drivers
9 of 13 people
found this instruction helpful.
Was this instruction helpful to you?
Thank you for voting!
Motor Bearings Locking Up
Removed the back panel on the refrigerator--unplugged the condenser fan motor--removed the motor--placed a small fan to cool the condenser--called parts select--ordered the motor--the motor arrived less than 24 hours after I ordered it--replaced the motor and rear panel on the refrigerator--probably saved more than $200. 00--Very happy with parts select service--plus I had a misunderstanding with my credit card and john at parts select was very helpful --not their fault--excellent company
Parts Used:
-
Joseph from North Palm Beach, FL
-
Difficulty Level:Easy
-
Total Repair Time:30 - 60 mins
-
Tools:Nutdriver
7 of 8 people
found this instruction helpful.
Was this instruction helpful to you?
Thank you for voting!
light not working in fridge
It was so easy!
Thanks for the rush to my home on the part.
I just unscrewed the plate that locks in the light switch (screwdriver) and unplugged the old faulty part and plugged in the new switch, screwed the cover back on and I was done!
Easy!
And I am not Mr. Fix-it!
Thanks for the rush to my home on the part.
I just unscrewed the plate that locks in the light switch (screwdriver) and unplugged the old faulty part and plugged in the new switch, screwed the cover back on and I was done!
Easy!
And I am not Mr. Fix-it!
Parts Used:

-
Michael from East Meadow, NY
-
Difficulty Level:Really Easy
-
Total Repair Time:Less than 15 mins
-
Tools:Screw drivers
7 of 8 people
found this instruction helpful.
Was this instruction helpful to you?
Thank you for voting!
broken drawer
-
Thomas from North Port, FL
-
Difficulty Level:Really Easy
-
Total Repair Time:Less than 15 mins
8 of 12 people
found this instruction helpful.
Was this instruction helpful to you?
Thank you for voting!
Broken Door Bins
-
elisa from richlands, NC
-
Difficulty Level:Really Easy
-
Total Repair Time:Less than 15 mins
7 of 9 people
found this instruction helpful.
Was this instruction helpful to you?
Thank you for voting!
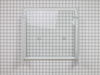
Broke Glass on shelf
The drawings of my side by side refrigerator on your web site made selecting the correct part very easy. The part arrived very quickly and I placed the shelf in the refrigerator and added the snack drawer. Thank you!
Parts Used:
-
Sandra from Valencia, CA
-
Difficulty Level:Really Easy
-
Total Repair Time:Less than 15 mins
8 of 12 people
found this instruction helpful.
Was this instruction helpful to you?
Thank you for voting!
Freezer wouldn't defrost/low temps in refrigerator
Found the housing for the thermostat; took housing apart pulled out thermostat and took off the hose put the hose on the new thermostat installed new thermostat and replaced housing.
Parts Used:
-
Troy from Kansas, OK
-
Difficulty Level:Easy
-
Total Repair Time:30 - 60 mins
-
Tools:Screw drivers, Socket set
8 of 12 people
found this instruction helpful.
Was this instruction helpful to you?
Thank you for voting!