




















10641262801 Kenmore Refrigerator - Instructions
Keep searches simple. Use keywords, e.g. "leaking", "pump", "broken" or "fit".
Refrigerator light would not turn on.
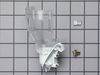
I first replaced the switch and had no results, I then ordered the Light Socket Kit, and because I had the experience of removing the panel to replace the switch, it took a few minutes to remove the two screws behind the panel, removing the temperature control knobs and then releasing the face plate which is secured by tabs at the bottom. The kit came with extra connectors in case they were needed, but they were not in my case and so I pulled off the wires, pushed the old socket out and the new one in. Attaching the wires to the correct pins, I screwed in the light bulb to be sure that the fix was correct and determining that, I replaced the screws that held the panel in place. Voila, I'm a happy camper who found some outdated jars in the back corners of the newly lighted shelves.
Parts Used:
-
Suzanne from STERLING HTS, MI
-
Difficulty Level:Really Easy
-
Total Repair Time:Less than 15 mins
-
Tools:Nutdriver
5 of 8 people
found this instruction helpful.
Was this instruction helpful to you?
Thank you for voting!
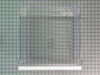
Snack pan drawer was out when refrigerator door was closed. The snack pan drawer was cracked and needed to be replaced.
Replacing the drawer was extremely easy. The refrigerator door need to be completely opened. Drawer slides out very easily and new drawer slides in where old drawer came out. Three minute job, tops.
Parts Used:
-
Jack from Austin, TX
-
Difficulty Level:Really Easy
-
Total Repair Time:Less than 15 mins
4 of 5 people
found this instruction helpful.
Was this instruction helpful to you?
Thank you for voting!
Raplaced switch
Repair went well,took about five to ten minutes to disconnect the power from the fridge removed the defective switch installed the new one ,reconnected the power,,,and Let there be light and there was light!
Parts Used:

-
Winston A from Brooklyn, NY
-
Difficulty Level:Really Easy
-
Total Repair Time:Less than 15 mins
-
Tools:Pliers
5 of 9 people
found this instruction helpful.
Was this instruction helpful to you?
Thank you for voting!
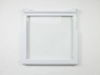
Shelf broke when I was trying to remove it.
I ordered another shelf w glass. Put back in refrigerator and it fit perfectly.
Parts Used:
-
Rebecca from ELYRIA, OH
-
Difficulty Level:Really Easy
-
Total Repair Time:Less than 15 mins
3 of 3 people
found this instruction helpful.
Was this instruction helpful to you?
Thank you for voting!
One of the shelves broke and needed to be replaced
It took less than one minute to open the box and place the shelf in the fridge!
Parts Used:
-
Susan from Bloomington, IL
-
Difficulty Level:Very Easy
-
Total Repair Time:Less than 15 mins
3 of 3 people
found this instruction helpful.
Was this instruction helpful to you?
Thank you for voting!
Part went bad the freezer was freezing up and refrigerator not getting cold
I pulled off the panel covering the part in the freezer cut and stripped the wires. Used crimper and connectors put the new part on put the wires band panel back on and plugged the refrigerator back in. Everything works just fine now.
Parts Used:

-
Jessica from WILLIAMSBURG, VA
-
Difficulty Level:Really Easy
-
Total Repair Time:15 - 30 mins
-
Tools:Nutdriver
3 of 3 people
found this instruction helpful.
Was this instruction helpful to you?
Thank you for voting!
Getting Ice Maker to sit in place prior to tightening screws.
Don not completely remove holding icemaker screws. Unit slips over screws and drops down into place and the use nutdriver to tighten in place. Rest of unit was sound and wasn’t replaced.
After icemaker is installed wait for a while and unit self activated and creates ice cubes.
After icemaker is installed wait for a while and unit self activated and creates ice cubes.
Parts Used:

-
George from POWELL, OH
-
Difficulty Level:Easy
-
Total Repair Time:15 - 30 mins
-
Tools:Nutdriver
3 of 3 people
found this instruction helpful.
Was this instruction helpful to you?
Thank you for voting!
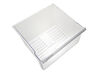
Grandkids try to close the refridge door ...while the drawer was open...the are kids
-
Joe from GARLAND, TX
-
Difficulty Level:Really Easy
-
Total Repair Time:Less than 15 mins
4 of 6 people
found this instruction helpful.
Was this instruction helpful to you?
Thank you for voting!
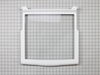
Bin right mounting rail worn, requiring a new bin.
From the Expanded view on the website, I chose the bin -I thought. The expanded view picture is too small and I got the shelf instead. -But a phone call got everything back on track.
Repair involved a knife to open the box!
Repair involved a knife to open the box!
Parts Used:
-
Roy from BEAUMONT, TX
-
Difficulty Level:Really Easy
-
Total Repair Time:Less than 15 mins
3 of 3 people
found this instruction helpful.
Was this instruction helpful to you?
Thank you for voting!
Replaced cracked slide out glass shelf with new one
Simply slid out damaged shelf and slid in new one
Parts Used:
-
Michael from ROYSE CITY, TX
-
Difficulty Level:Very Easy
-
Total Repair Time:Less than 15 mins
3 of 3 people
found this instruction helpful.
Was this instruction helpful to you?
Thank you for voting!
Installed a Ice Maker
-
Don from HOUMA, LA
-
Difficulty Level:Very Easy
-
Total Repair Time:15 - 30 mins
-
Tools:Nutdriver, Screw drivers
3 of 3 people
found this instruction helpful.
Was this instruction helpful to you?
Thank you for voting!
Refrig began to trip the GFI circuit in the garage. When plugged into a house interior circuit the lights and fan ran but no cooling in either the freezer or frig.
First of all I want to thank Michael from Carlisle,PA and this site for publishing Michael's info on the wiring specifics on the new 3 connector Start Relay ( WP2262185 ). The original relay only has 2 connectors The 2 orange wires which are combined to one female connector need to be clipped and separated each to its own connector. Refer to Michael's blog as to which wire goes to which connector on the Start Relay. I replaced the Run Capacitor, Start Relay and Overload just to be safe. The Start Relay was the actual culprit.Thank you for an excellent website!
Parts Used:

-
riley from CAVE CREEK, AZ
-
Difficulty Level:Really Easy
-
Total Repair Time:15 - 30 mins
-
Tools:Pliers, Socket set
3 of 3 people
found this instruction helpful.
Was this instruction helpful to you?
Thank you for voting!
lights wouldn't come on/work in refrigerator
Referencing the info/schematics you have on your website, I unscrewed/unattached top-front panel (carefully), from behind the panel you have to detach the wires (2) from the switch, pushed "in" the switch to remove, put in new switch and attach wires to test BEFORE remounting panel. Tada!! Thank you PartSelect! You saved me at least $80...would have been at least $100 to have a repair person come to the house!
Parts Used:
-
Jane from Albuquerque, NM
-
Difficulty Level:Easy
-
Total Repair Time:15 - 30 mins
-
Tools:Pliers, Screw drivers, Socket set
4 of 6 people
found this instruction helpful.
Was this instruction helpful to you?
Thank you for voting!
Broken Freezer Door Cams
1. Put pieces of wood under door to support it.
2. Unscrew three screws holding door hinge.
3. Disconnect water line.
4. Unscrew screw holding each cam. One to door and one to hinge.
5 Replace cams.
6. Retrieve plate with threaded holes behind frame that the hinge attaches to.
7. Use thin philips screwdriver through the hinge bracket, shim, frame and screw plate to align it for the other two screws.
8. Replace all three hinge screws.
9. Connect water line fitting.
10. Remove wood for door support.
11. Check door for smooth movement and strong pressure when closed.
2. Unscrew three screws holding door hinge.
3. Disconnect water line.
4. Unscrew screw holding each cam. One to door and one to hinge.
5 Replace cams.
6. Retrieve plate with threaded holes behind frame that the hinge attaches to.
7. Use thin philips screwdriver through the hinge bracket, shim, frame and screw plate to align it for the other two screws.
8. Replace all three hinge screws.
9. Connect water line fitting.
10. Remove wood for door support.
11. Check door for smooth movement and strong pressure when closed.
Parts Used:

-
Dennis from Corona, CA
-
Difficulty Level:Easy
-
Total Repair Time:30 - 60 mins
-
Tools:Socket set
3 of 3 people
found this instruction helpful.
Was this instruction helpful to you?
Thank you for voting!
Top half of freezer & fridge were not cooling. Freezer fan had been making unusually loud noises.
Piece of cake. It took me longer to remove the food from the freezer, remove shelves and back panel than to do the repair. I heard the fan making some noises so I replaced both the fan and defrost thermostat. I used the instructions submitted by a another customer. My 20+ year old fridge is like new now.
Parts Used:
-
rich from PEMBROKE PNES, FL
-
Difficulty Level:Really Easy
-
Total Repair Time:30 - 60 mins
-
Tools:Nutdriver
3 of 3 people
found this instruction helpful.
Was this instruction helpful to you?
Thank you for voting!