




















10631419200 Kenmore Refrigerator - Instructions
Keep searches simple. Use keywords, e.g. "leaking", "pump", "broken" or "fit".
3 screws
Ice maker fit perfectly over 2 top screws. I tightened them and put the one on the bottom. I was done in less than 10minutes. Everything fit perfectly as expected. Couldn't have been eaiser. Parts Select is my go to online store.
Parts Used:

-
Michael from SALINA, KS
-
Difficulty Level:Very Easy
-
Total Repair Time:Less than 15 mins
-
Tools:Nutdriver
1 person
found this instruction helpful.
Was this instruction helpful to you?
Thank you for voting!
Missing screw cover

-
Brian K from Richmond, KY
-
Difficulty Level:Very Easy
-
Total Repair Time:Less than 15 mins
1 person
found this instruction helpful.
Was this instruction helpful to you?
Thank you for voting!
No cold

-
Jacqueline from LEXINGTON PK, MD
-
Difficulty Level:Very Easy
-
Total Repair Time:Less than 15 mins
-
Tools:Nutdriver, Pliers
1 person
found this instruction helpful.
Was this instruction helpful to you?
Thank you for voting!
Plugged it in.
Not so good that was not the problem. Fan is not seized and all the lights work and display is not on but lights up as well. No start once plugged back in after 15 minutes of being unplugged. Nothing same no change.
Parts Used:
-
Adam from GLOVERSVILLE, NY
-
Difficulty Level:Really Easy
-
Total Repair Time:Less than 15 mins
-
Tools:Nutdriver
1 person
found this instruction helpful.
Was this instruction helpful to you?
Thank you for voting!
Light rocker switch broke and refrigerator light couldn't go on.
I just popped out the old switch with a flat head screwdriver. Removed the connections and then installed new switch by reversing steps. Popped in back in and the light went on.
Parts Used:

-
Cathy from HOPATCONG, NJ
-
Difficulty Level:Very Easy
-
Total Repair Time:Less than 15 mins
2 of 4 people
found this instruction helpful.
Was this instruction helpful to you?
Thank you for voting!
Freezer occasionally had a temperature alarm.Clicking noise also.
Was told capacitor was problem 90% of the time.Capacior was not the problem.Bad start relay.
Parts Used:
-
Barry from FORD CITY, PA
-
Difficulty Level:Really Easy
-
Total Repair Time:Less than 15 mins
1 person
found this instruction helpful.
Was this instruction helpful to you?
Thank you for voting!
Light switch broke
Pried out old part with screwdriver. Unplugged. When new part came, just plugged it in and pushed the part into place.
Parts Used:
-
Carolee from Spokane Valley, WA
-
Difficulty Level:Really Easy
-
Total Repair Time:Less than 15 mins
-
Tools:Screw drivers
2 of 4 people
found this instruction helpful.
Was this instruction helpful to you?
Thank you for voting!
freezer and refrigerator compartments not cold enough
Used the suggested problem list here to narrow down that the repair was most likely the run capacitor. Poped the new one in and I now have better control of my compartment ranges. I have a temperature gauge in each compartment. Check them every opening of the doors.
Parts Used:
-
Michael from Colorado Springs, CO
-
Difficulty Level:Really Easy
-
Total Repair Time:Less than 15 mins
-
Tools:Nutdriver
1 person
found this instruction helpful.
Was this instruction helpful to you?
Thank you for voting!
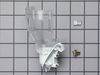
The Light Socket Burned Out.
I pulled the socket out and unplugged the wires. I replaced the light socket by plugging in the wires and snapping the light socket into place. A very simple fix.
Parts Used:
-
MATTHEW from STOCKTON, CA
-
Difficulty Level:Really Easy
-
Total Repair Time:Less than 15 mins
5 of 13 people
found this instruction helpful.
Was this instruction helpful to you?
Thank you for voting!
freezer would not freeze
inst said,"50 pct of the time this calls for new capacitor," so we changed the capacitor. Same prob. It also said,"25 pct of the time it's the bi-metal thermostat" So we ordered it. We removed the plastic rear panel from inside the freezer comp. using small nut driver. Here we found much ICE surrounding the defrost unit, three inches thick. We thawed the whole mess. and the freezer has worked fine ever since. I think my habit of getting ice cubes from the inside container rather than from the ice cube dispenser, had kep t the freezer door open too much, interfering with the normal defrost cycle and allowing ice to build up over time so that it finally defeated the system. My new rule, "get ice cubes only from the front."
Parts Used:
-
Michael from HELENDALE, CA
-
Difficulty Level:A Bit Difficult
-
Total Repair Time:30 - 60 mins
-
Tools:Nutdriver, Screw drivers
1 person
found this instruction helpful.
Was this instruction helpful to you?
Thank you for voting!
Installed Ice Maker in Freezer
Installed ice machine components using kit and included instructions. Easy! Ran a copper line from under sink valve to back of refrigerator under the floor. Drilled two holes to run copper line. Plumber turned water off and replaced single valve with a double valve (one line to faucet and the other for the copper line). Installed shut off valve and filter at the other end of copper line. Then stainless hose to refrigerator. Everything went smooth. Double check the factory installed plastic line from the electric valve to the inlet for your freezer. Mine was barely inserted and leaked. I pushed it in all the way and it is fine now... Ice maker works really well! Wish I had done this sooner!
Parts Used:
-
Chris from SACRAMENTO, CA
-
Difficulty Level:Easy
-
Total Repair Time:1- 2 hours
-
Tools:Nutdriver, Screw drivers
1 person
found this instruction helpful.
Was this instruction helpful to you?
Thank you for voting!
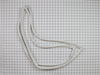
Gasket was splitting
Had to remove both doors freezer and fresh section. Once I had door off removed the screws, and old gasket, cleaned all aroud where old gasket was, and proceeded to put new gasket on, It was hard lining up gasket with metal rods that hold gasket on could only do one screw at a time, because gasket kept slipping out, it was very time consuming.
Parts Used:
-
Lawrence from Tishomingo, OK
-
Difficulty Level:Difficult
-
Total Repair Time:More than 2 hours
-
Tools:Socket set
2 of 5 people
found this instruction helpful.
Was this instruction helpful to you?
Thank you for voting!
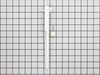
Water tubing was accidentally broken from the back of the freezer.
Removed the two screws holding the funnel in place...removed the old one and replaced it witht he new tubing...screwed screws back in and the jov was complete. It actually took longer to get it out of the sack than it did to put it together
Parts Used:
-
Lois from Thomasville, AL
-
Difficulty Level:Really Easy
-
Total Repair Time:Less than 15 mins
-
Tools:Screw drivers
1 of 2 people
found this instruction helpful.
Was this instruction helpful to you?
Thank you for voting!
Poor design leaves fitting vulnerable to damage. Part was broken when pushed to close to the wall.
-
Mike from Camas, WA
-
Difficulty Level:Really Easy
-
Total Repair Time:Less than 15 mins
-
Tools:Screw drivers
1 of 2 people
found this instruction helpful.
Was this instruction helpful to you?
Thank you for voting!
Movers broke the icemaker water fill tube shoving my refrigerator through the front door.
I unscrewed the fill tube screws from the back of the fridge, and pulled the tube out.
Then I put the new tube in, screwed the screws back in and reconnected the waterline.
Then I put the new tube in, screwed the screws back in and reconnected the waterline.
Parts Used:
-
Christopher from Valley Village, CA
-
Difficulty Level:Really Easy
-
Total Repair Time:Less than 15 mins
-
Tools:Screw drivers
1 of 2 people
found this instruction helpful.
Was this instruction helpful to you?
Thank you for voting!