




















10631404200 Kenmore Refrigerator - Instructions
Keep searches simple. Use keywords, e.g. "leaking", "pump", "broken" or "fit".
Faulty light socket
-
Larry from HOUSTON, TX
-
Difficulty Level:Very Easy
-
Total Repair Time:15 - 30 mins
-
Tools:Screw drivers
3 of 5 people
found this instruction helpful.
Was this instruction helpful to you?
Thank you for voting!
Freezer worked but the refrigerator was not cooling
Toddler left the fridge door open for an undocumented amount of time. The freezer was operating perfectly but the refrigerator was not cooling. After some research I ordered the part needed and went to work. Process was simple, just keep track of the fans mounting bracket. I installed it upside down and the holes didn't align with the back wall freezer cover.
Step 1: Unplug the fridge
Step 2: Gloves and safety goggles
Step 3: Tools - Socket Set and screw drivers. Hammer and chisel for the ice build up.
Step 4: Remove the back wall of the freezer carefully
Step 5: Remove fan and motor housing, unplug Hot, Neutral and ground wire from motor
Step 6: Drink a beverage
Step 7: Remove fan and motor from housing. You will have to reuse the rubber gaskets/washers so do not dispose.
Step 8: Install new motor and connect the hot, neutral and ground. Do not overtighten the screws connecting the motor housing to the mounting bracket.
Step 9: Before mounting the bracket, plug in the fridge to confirm the fan is operating.
Step 10: Put everything back and have another beverage.
Step 1: Unplug the fridge
Step 2: Gloves and safety goggles
Step 3: Tools - Socket Set and screw drivers. Hammer and chisel for the ice build up.
Step 4: Remove the back wall of the freezer carefully
Step 5: Remove fan and motor housing, unplug Hot, Neutral and ground wire from motor
Step 6: Drink a beverage
Step 7: Remove fan and motor from housing. You will have to reuse the rubber gaskets/washers so do not dispose.
Step 8: Install new motor and connect the hot, neutral and ground. Do not overtighten the screws connecting the motor housing to the mounting bracket.
Step 9: Before mounting the bracket, plug in the fridge to confirm the fan is operating.
Step 10: Put everything back and have another beverage.
Parts Used:

-
Jason from WARWICK, NY
-
Difficulty Level:Really Easy
-
Total Repair Time:15 - 30 mins
-
Tools:Screw drivers, Socket set
2 of 2 people
found this instruction helpful.
Was this instruction helpful to you?
Thank you for voting!
OLDER Ice Maker on the fritz
Grat help on the phone. We saw repair on YouTube. my wife and I worked it together. It was child's play!! It went beautifully. we were able to "chill out" with ice aplenty!!Thanks...eric
Parts Used:

-
Eric S from Boca Raton, FL
-
Difficulty Level:Really Easy
-
Total Repair Time:15 - 30 mins
-
Tools:Nutdriver, Wrench set
6 of 14 people
found this instruction helpful.
Was this instruction helpful to you?
Thank you for voting!
Light didnt go on
The light rocker switch wasnt working. I found the part on the web site. It was so easy. I used a screw driver to pop out the old one and pop the new one in. It took 5 min. Thanks!!!
Parts Used:

-
dorotea from staten island, NY
-
Difficulty Level:Really Easy
-
Total Repair Time:Less than 15 mins
-
Tools:Screw drivers
3 of 5 people
found this instruction helpful.
Was this instruction helpful to you?
Thank you for voting!
Original crisper drawer broke
Since the original drawer sides had broken off the repair was very easy. I threw the old one in the trash and inserted the new drawer in its place. The fit was perfect and I have had no issues at all. The delivery was rather speedy also. Very happy!!
Parts Used:

-
Samantha from JUNCTION CITY, KS
-
Difficulty Level:Very Easy
-
Total Repair Time:Less than 15 mins
2 of 2 people
found this instruction helpful.
Was this instruction helpful to you?
Thank you for voting!
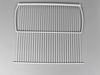
Refrigerator Shelf replacement, good fit.
The rental house I live in did not come with the original shelves for the Refrigerator. Had to strategically stack stuff on top of one another with locker shelves. Entered the model number on the site, order the best matching item, and the part that came was a perfect fit. I'll be getting another.
Parts Used:
-
Denise from OKLAHOMA CITY, OK
-
Difficulty Level:Very Easy
-
Total Repair Time:Less than 15 mins
2 of 2 people
found this instruction helpful.
Was this instruction helpful to you?
Thank you for voting!
The plastic water fill tube got cracked when we moved. I called a parts company and they told me they couldn't just sell me the tube I would have to buy a whole kit for about $50 dollars. I decided to glue the tube. It worked for a while then it started leaking. So I thought I would have to buy
I hand screwed the fill tube into the water tube and stuck it into the freezer hole. I screwed the fill tube to the back of the refrigerator.
Thanks so much! You saved me a bundle!!
Thanks so much! You saved me a bundle!!
Parts Used:
-
Joseph from Chesterfield, MO
-
Difficulty Level:Really Easy
-
Total Repair Time:Less than 15 mins
-
Tools:Screw drivers
3 of 6 people
found this instruction helpful.
Was this instruction helpful to you?
Thank you for voting!
none
-
Joseph from BONITA SPGS, FL
-
Difficulty Level:Really Easy
-
Total Repair Time:Less than 15 mins
-
Tools:Screw drivers
2 of 3 people
found this instruction helpful.
Was this instruction helpful to you?
Thank you for voting!
Broke light switch while cleaning
use kitchen knife to pry out. replaced switch assemble and pressed back into place. Could not have done this with out help from previous customers. Thanks
Parts Used:
-
Gail from Golden, CO
-
Difficulty Level:Really Easy
-
Total Repair Time:Less than 15 mins
2 of 3 people
found this instruction helpful.
Was this instruction helpful to you?
Thank you for voting!
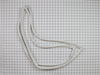
the freezeer gasket was not sealing properly and the refrigerator door one was torn
Since the parts arrived with no instructions and I had a vague idea of what I had to do, I went on You-tube and watched a video which was very helpful. It was a little difficult at first but once I got the hang of it things went smoothIy. It's like a brand new refrigerator now!
Parts Used:
-
christine from hackensack, NJ
-
Difficulty Level:A Bit Difficult
-
Total Repair Time:1- 2 hours
-
Tools:Socket set
2 of 3 people
found this instruction helpful.
Was this instruction helpful to you?
Thank you for voting!
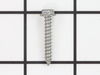
Screws are a bit small and short for the job

-
Sheryll Lawrence from BRONX, NY
-
Difficulty Level:Really Easy
-
Total Repair Time:30 - 60 mins
-
Tools:Screw drivers
2 of 3 people
found this instruction helpful.
Was this instruction helpful to you?
Thank you for voting!
freezer (later fridge too) wouldn't stay cold~
****Make are you order Capacitor & Starter relay too (we ordered separtely so had to pay shipping twice)**** Super easy just open access panel on back near compressor and remove retention clip with fingers, remove & replace both capacitor & starter, put clip and access panel back on, plug in and allow 8 hours to cool! Works like new again! Hope it goes another 10 years
Parts Used:

-
David from MARYLAND HTS, MO
-
Difficulty Level:Very Easy
-
Total Repair Time:30 - 60 mins
-
Tools:Nutdriver
2 of 3 people
found this instruction helpful.
Was this instruction helpful to you?
Thank you for voting!
freezer would not freeze
inst said,"50 pct of the time this calls for new capacitor," so we changed the capacitor. Same prob. It also said,"25 pct of the time it's the bi-metal thermostat" So we ordered it. We removed the plastic rear panel from inside the freezer comp. using small nut driver. Here we found much ICE surrounding the defrost unit, three inches thick. We thawed the whole mess. and the freezer has worked fine ever since. I think my habit of getting ice cubes from the inside container rather than from the ice cube dispenser, had kep t the freezer door open too much, interfering with the normal defrost cycle and allowing ice to build up over time so that it finally defeated the system. My new rule, "get ice cubes only from the front."
Parts Used:
-
Michael from HELENDALE, CA
-
Difficulty Level:A Bit Difficult
-
Total Repair Time:30 - 60 mins
-
Tools:Nutdriver, Screw drivers
1 person
found this instruction helpful.
Was this instruction helpful to you?
Thank you for voting!
Installed Ice Maker in Freezer
Installed ice machine components using kit and included instructions. Easy! Ran a copper line from under sink valve to back of refrigerator under the floor. Drilled two holes to run copper line. Plumber turned water off and replaced single valve with a double valve (one line to faucet and the other for the copper line). Installed shut off valve and filter at the other end of copper line. Then stainless hose to refrigerator. Everything went smooth. Double check the factory installed plastic line from the electric valve to the inlet for your freezer. Mine was barely inserted and leaked. I pushed it in all the way and it is fine now... Ice maker works really well! Wish I had done this sooner!
Parts Used:
-
Chris from SACRAMENTO, CA
-
Difficulty Level:Easy
-
Total Repair Time:1- 2 hours
-
Tools:Nutdriver, Screw drivers
1 person
found this instruction helpful.
Was this instruction helpful to you?
Thank you for voting!
Light switch broke
Pried out old part with screwdriver. Unplugged. When new part came, just plugged it in and pushed the part into place.
Parts Used:
-
Carolee from Spokane Valley, WA
-
Difficulty Level:Really Easy
-
Total Repair Time:Less than 15 mins
-
Tools:Screw drivers
2 of 4 people
found this instruction helpful.
Was this instruction helpful to you?
Thank you for voting!