




















ZISS42GDXASS General Electric Refrigerator - Instructions
Keep searches simple. Use keywords, e.g. "leaking", "pump", "broken" or "fit".
refrigerator not cold
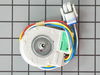
removed freezer door / shelf /ice maker pulled back panel off and removed fan
Parts Used:
-
Joseph from FARMINGVILLE, NY
-
Difficulty Level:Easy
-
Total Repair Time:30 - 60 mins
-
Tools:Nutdriver, Screw drivers
4 of 4 people
found this instruction helpful.
Was this instruction helpful to you?
Thank you for voting!
ice door light bulbs burned out
found the correct bulbs, the hardest part.
un screwed old bulb.
Screwed in new bulb.
Waa La,
There was light.
un screwed old bulb.
Screwed in new bulb.
Waa La,
There was light.
Parts Used:

-
Austin from New Portland, ME
-
Difficulty Level:Really Easy
-
Total Repair Time:Less than 15 mins
7 of 14 people
found this instruction helpful.
Was this instruction helpful to you?
Thank you for voting!
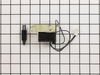
replace solenoid on ice door
remove the front plate. use screwdriver to pry the cover off from the bottom of the cover, remove the wiring from the front cover.remove the 4 screws and pull out the shute. remove three screws from the solonide and replace . very easy fix. save yourself $100.00 labor.
Parts Used:
-
Allan from Ponce Inlet, FL
-
Difficulty Level:Easy
-
Total Repair Time:15 - 30 mins
-
Tools:Screw drivers
3 of 3 people
found this instruction helpful.
Was this instruction helpful to you?
Thank you for voting!
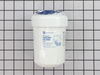
replace filter
-
Marie from Philidelphia, PA
-
Difficulty Level:Really Easy
-
Total Repair Time:Less than 15 mins
5 of 9 people
found this instruction helpful.
Was this instruction helpful to you?
Thank you for voting!
Nothing to tell it was a replacement
Nothing to tell it was just a replacement part that the old part was removed and the new one inserted. Works like a dream Thanks
Parts Used:
-
Royce from Pasadena, TX
-
Difficulty Level:Really Easy
-
Total Repair Time:Less than 15 mins
3 of 3 people
found this instruction helpful.
Was this instruction helpful to you?
Thank you for voting!
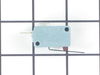
Water dispenser not dispensing water
I went to the internet and found parts select web site. Saw all of the possible fixes for my problem and read all of the other repair stories. My story actually became a journey that is still continuing. I first changed the water filter, but still no water at the dispenser. I next disconnected the coupling at the bottom of the freezer door that carries water to the dispenser and when the dispenser was depressed, water flowed at the coupling, but not at the dispenser. After reconnecting the coupling, I turned the freezer setting to 1 for 4-5 days, but still no water at the dispenser (possibly the line was frozen, but we had recently been away for a week and the water dispenser still supplied water at a freezer setting of 4). Now I am at the point of the journey into replacing parts one at a time to get water. First I ordered the dual water valve for the ice maker and water dispenser. I replaced this valve with instructions from Parts Select and still no water at dispenser. Next I ordered and replaced the switch at the dispenser lever and still no water. Next was the solenoid attached to the ice door, ordered, replaced and still no water at dispenser. I am now at the final part in this repair and that is the $132 circuit board. So I will be ordering this part soon and hopefully that will fix the issue.
Parts Used:
-
David from Georgetown, TX
-
Difficulty Level:Easy
-
Total Repair Time:15 - 30 mins
-
Tools:Pliers, Screw drivers, Wrench (Adjustable)
3 of 3 people
found this instruction helpful.
Was this instruction helpful to you?
Thank you for voting!
Won't dispence ice or water
Changing out solenoid was very easy, but you don't have to remove trim ring and it didn't fix my problem. Turns out a relay fell out of its holder in the piece you have after removing the 4 screws per the video.
Parts Used:
-
Randy from Cypress, TX
-
Difficulty Level:Really Easy
-
Total Repair Time:Less than 15 mins
-
Tools:Screw drivers
2 of 2 people
found this instruction helpful.
Was this instruction helpful to you?
Thank you for voting!
noisy evaporator fan motor
Replaced evaporator fan motor, and this solved the whistling noise that had developed. Reviewed and followed the removal and installation instruction video as closely as possible. This was very helpful, with a few additions. For the model PS123NGPBBB GE refrigerator/freezer, there were a few differences from the video. There a was an additional cover panel that was positioned vertically at the back of the freezer compartment below the auger motor assembly. It was necessary to remove this cover (4 screws) to gain access to the auger motor cover screws. The unit also has a different light configuration with 2 lights. I found it helpful to remove these light bulbs and the corresponding light fixtures in order to remove the evaporator motor assembly. As mentioned in the video, it was necessary to cut the 4 wires from the wire harness of the new motor, and use butt end connectors to reattach these wires to the corresponding wires in the unit. Total job took between 1 and 2 hours, and the motor change solved the noise problem.
Parts Used:
-
Russell from GLEN, NH
-
Difficulty Level:Easy
-
Total Repair Time:1- 2 hours
-
Tools:Screw drivers, Socket set, Wrench set
2 of 2 people
found this instruction helpful.
Was this instruction helpful to you?
Thank you for voting!
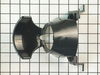
Ice funnel was broken and didn’t dispense water or ice
Used a YouTube video with step by step directions, this made the repair very easy.
Parts Used:
-
Jennifer from EDMOND, OK
-
Difficulty Level:Really Easy
-
Total Repair Time:30 - 60 mins
-
Tools:Pliers, Screw drivers
2 of 2 people
found this instruction helpful.
Was this instruction helpful to you?
Thank you for voting!
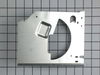
Ice-maker grinding faceplate heavily rusted causing rusty ice
Disassembled ice-maker, noting what screws went where, what direction ice release control arm pointed, and noting how the control arm spring was mounted. The door assembly comes off first followed by the circular assembly that houses the ice door and last grinding arms. It is quite easy see how it comes apart as you look at the screws. Remove the screw holding the back end of the control arm and note the spring position. The control arm needs to be turned to line up notches to pull it thru a faceplate hole while rotating the arm about the "U" that is on the outside of the faceplate in the door housing. There is a retaining clip holding the rotating impeller to remove to complete the dis-assembly. Use vinegar to clean rust out of bin and other parts around the faceplate. Assemble the unit in the reverse order to complete the job.
Parts Used:
-
kenneth from west chicago, IL
-
Difficulty Level:Easy
-
Total Repair Time:30 - 60 mins
-
Tools:Nutdriver, Screw drivers
3 of 5 people
found this instruction helpful.
Was this instruction helpful to you?
Thank you for voting!
No or little ice would dispense
Went exactly by the video. Perfect job, you send the installation video with the part. You watch the video before or during, goof proof, took longer to disassemble than to replace the part.
Parts Used:
-
stephen from GOODLETTSVLLE, TN
-
Difficulty Level:Really Easy
-
Total Repair Time:Less than 15 mins
-
Tools:Nutdriver, Screw drivers
2 of 2 people
found this instruction helpful.
Was this instruction helpful to you?
Thank you for voting!
Freezer frosting up around ice dispenser chute.
Ordered new solenoid so the flap would close. That did the trick.
Parts Used:
-
Bryan from Fairfax, VA
-
Difficulty Level:A Bit Difficult
-
Total Repair Time:15 - 30 mins
-
Tools:Screw drivers
2 of 3 people
found this instruction helpful.
Was this instruction helpful to you?
Thank you for voting!
The indoor water occasionaly stops working due to the waterline in the door freezing.
I applied heat to the area with a hair drier. Used a little too much heat and deformed the ice funnel which also controls the water spigot. Ordered a new ice funnel from PartSelect. Part arrived in about a week and included a schematic of the mechanism which made disassembly and reassembly very easy. In a short time everything was working like new.
Parts Used:
-
Randall from NORTHFIELD, MN
-
Difficulty Level:Very Easy
-
Total Repair Time:15 - 30 mins
-
Tools:Screw drivers
2 of 3 people
found this instruction helpful.
Was this instruction helpful to you?
Thank you for voting!
Yearly replacement of filter
Moved stuff out of my way on the top shelf, reached in and turned old filter to remove. Filled new filter with water, lined up and turned to lock in place. Whew, never thought I would get that job done. :-)
Parts Used:
-
Robert from Myrtle Beach, SC
-
Difficulty Level:Really Easy
-
Total Repair Time:Less than 15 mins
2 of 3 people
found this instruction helpful.
Was this instruction helpful to you?
Thank you for voting!
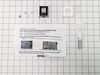
Crushed Ice Only
Let me start by saying, I usually hire something like this out but figured I would give it a try. The install was fairly straight forward, however it would’ve been nice if the instructions would have been more useful. Instructing me to remove one screw to release the auger and solenoid enclosure wouldve been nice. There were 3 other screws that I didn’t need to remove and they were the ones holding the auger in place, which made assembling that much more difficult. Once to enclosure was removed, and the solenoid was exposed, it was a seemless process. I would however, recommend paying attention to or taking a picture of the connections on the solenoid. I was lucky to remember or got lucky. Regardless, I was able to complete the project successfully. If I had to do it again, I believe it can be done in 30 minutes or less.
Parts Used:
-
Allen from Hills, IA
-
Difficulty Level:A Bit Difficult
-
Total Repair Time:30 - 60 mins
-
Tools:Screw drivers, Socket set
2 of 3 people
found this instruction helpful.
Was this instruction helpful to you?
Thank you for voting!