




















ZISS360NMA General Electric Refrigerator - Instructions
Keep searches simple. Use keywords, e.g. "leaking", "pump", "broken" or "fit".
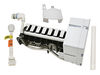
The icemaker quit making ice and the water started forming on the bottom of the ice bucket.
First I removed the electrical plug from the back of the freezer that plugs into the icemaker. I then removed the two hex head screws that hold the icemaker to the wall of the freezer and removed the icemaker. I removed the plastic cover, which incidentally protects the gears, by prying it off with a srewdriver. I removed three small nuts(7mm) which holds the internal cam in place. I removed the cam by pulling it off the shaft. Once I got the part from you folks I reversed the procedure that I just mentioned, and put the icemaker back together. It works great. The part with shipping was around $16.00. A new icemaker was roughly $159.00. If I would have called a technician it would have cost around $300.00 to repair.
Parts Used:
-
John from Anaheim, CA
-
Difficulty Level:Really Easy
-
Total Repair Time:Less than 15 mins
-
Tools:Nutdriver, Screw drivers, Wrench (Adjustable)
2 of 3 people
found this instruction helpful.
Was this instruction helpful to you?
Thank you for voting!
Yearly replacement of filter
Moved stuff out of my way on the top shelf, reached in and turned old filter to remove. Filled new filter with water, lined up and turned to lock in place. Whew, never thought I would get that job done. :-)
Parts Used:
-
Robert from Myrtle Beach, SC
-
Difficulty Level:Really Easy
-
Total Repair Time:Less than 15 mins
2 of 3 people
found this instruction helpful.
Was this instruction helpful to you?
Thank you for voting!
Refrigerator not defrosting, ice tray clogging up in ice tray, refrigerator making loud humming noise, and compressed running all the time.
First, turn off power - since I did not want to pull the refrigerator out on my wood floor I tripped the circuit breaker to that circuit and opened door to make sure interior light was off (ensuring power was off). This unit has a bottom freezer, I took out all shelves, ice maker and all parts in the way of accessing back of interior of freezer section. Removed back plastic section by removing one screw in middle top of back panel and prying it out. This was a bit difficult as it was in there a bit tight but once the plastic warmed up it pulled out ok. This revealed the compressor section and temp sensor that was attached to the copper coils with of all things - a zip tie! In pictures of this that I looked at on various web sites the sensor was on a metal bracket attached to the coil so it made me wonder if tf the factory took a shortcut? I cut the old sensor wire, stripped the two wires 1/2", and connected them to the new sensor wire with butt connectors, I put some silicone into the ends of the butt connectors to prevent moisture from entering into connectors and wrapped the connection in black electrical tape. I then "attached" the sensor to the coil using a zip tie, put the plastic back piece back on, inserted everything I took out and put power back to refrigerator. It's been 3 days and temp of refrigerator is stable, ice maker not clogging up, and compressor not running all the time! So far so good.
Parts Used:
-
Mark from ROSEMOUNT, MN
-
Difficulty Level:A Bit Difficult
-
Total Repair Time:30 - 60 mins
-
Tools:Screw drivers
2 of 3 people
found this instruction helpful.
Was this instruction helpful to you?
Thank you for voting!
Ice Maker Did Not Work
Tried replacing water valve since no water in ice cube tray. Exact part not available due to age of refrigerator, but I got the equivalent replacement part for $18. Mounting holes different, but I made it work. Also one connect on new one slip connect whereas both compression fittings on old valve. I put it back together and icemaker now works great.
Parts Used:

-
Donald from Jacksonville, FL
-
Difficulty Level:Easy
-
Total Repair Time:30 - 60 mins
-
Tools:Pliers, Screw drivers
2 of 3 people
found this instruction helpful.
Was this instruction helpful to you?
Thank you for voting!
Water valve failed. Constant drip in ice maker.
Removed old valve easily. New WR57XI0033 valve is designed to mount on lower left, but on mine it has to mount on lower right. Had to drill two 1/32 holes in lower rail to mount the new valve.
Parts Used:
-
Steven from RUSHVILLE, IL
-
Difficulty Level:Easy
-
Total Repair Time:30 - 60 mins
-
Tools:Screw drivers, Socket set, Wrench set
1 person
found this instruction helpful.
Was this instruction helpful to you?
Thank you for voting!
icemaker quit working when we moved
My husband took out the old icemaker in about 5 minutes. The new icemaker was a perfect fit even though the refrigerator was >10yrs old. The only difficult part was the plug extension that was needed so that it would fit into an older appliance. The part was included, it just made the cord about 3 inches longer than it needed to. After working with it for about 20 minutes we were able to fit it on the back side of the icemaker. Now it works great!!
Parts Used:
-
Regina from Taylorsville, KY
-
Difficulty Level:Really Easy
-
Total Repair Time:15 - 30 mins
-
Tools:Screw drivers
4 of 10 people
found this instruction helpful.
Was this instruction helpful to you?
Thank you for voting!
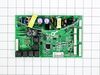
In had a knocking in the refrigerator and it sounded like someone knocking at the door.
I received the new control panel and shut off the power to the refrigerator and found the control panel. Unscrewed four screws, took each connection apart with a pliers and put it in the new control panel (one at a time) then snapped it back in place, Put the 4 screws back in place and made sure the ground was connected on one to the corner screws.
Turned on the refrigerator and no more knocking.
Turned on the refrigerator and no more knocking.
Parts Used:
-
CAROL from FRANKTOWN, CO
-
Difficulty Level:Really Easy
-
Total Repair Time:30 - 60 mins
-
Tools:Pliers, Screw drivers
1 person
found this instruction helpful.
Was this instruction helpful to you?
Thank you for voting!
Fan making noise.
Remove ice maker and all of it's accessories in order to remove the panel covering the fan. Don't drop the screws!
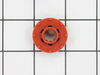
Unscrew the lower fan bracket. You will see the lower red rubber grommet. Hold fan motor with one hand and push the fan off the shaft and into the compartment above. Then remove the round retainer thing below it by holding it and pulling down on the motor assembly. Install new grommet on upper part. and put it all together.
REMEMBER where the fan is on the shaft. It has about one inch of shaft placement. I put mine so that most of it was above the hole that the fan goes into and about 20 percent showing below the sheet metal.
Also check to see if your fan is damaged. Mine was not.
This refrigerator has been awesome! I have had many issues but have been able to fix all of them for the last 15 years!
Unscrew the lower fan bracket. You will see the lower red rubber grommet. Hold fan motor with one hand and push the fan off the shaft and into the compartment above. Then remove the round retainer thing below it by holding it and pulling down on the motor assembly. Install new grommet on upper part. and put it all together.
REMEMBER where the fan is on the shaft. It has about one inch of shaft placement. I put mine so that most of it was above the hole that the fan goes into and about 20 percent showing below the sheet metal.
Also check to see if your fan is damaged. Mine was not.
This refrigerator has been awesome! I have had many issues but have been able to fix all of them for the last 15 years!
Parts Used:
-
Matthew from Escondido, CA
-
Difficulty Level:Really Easy
-
Total Repair Time:30 - 60 mins
-
Tools:Screw drivers
1 person
found this instruction helpful.
Was this instruction helpful to you?
Thank you for voting!
noisy refrigerator
I followed your video and completely dismantled the refrigerator evaporator motor, fan, brackets, and grommet, I completely cleaned the refrigerator including the cooling coils. I then ordered the evaporator motor ,fan, grommets, lid bumper, and brackets. The order would take a week to arrive. In the meantime I cleaned and reassembled all the old parts, waiting for the new ones to come. Guess what! The refrigerator was quiet as a mouse. I really did not need the new parts, but I kept them anyway just for good luck. Not bad for a refrigerator that's twenty four years old.
Parts Used:

-
James from NEW YORK, NY
-
Difficulty Level:Easy
-
Total Repair Time:1- 2 hours
-
Tools:Nutdriver, Pliers, Screw drivers, Socket set
1 person
found this instruction helpful.
Was this instruction helpful to you?
Thank you for voting!
light switch freezer door
put the gratefruit knife behind the old switch pooped it out pluged the new one in piece of cake 5min.even vacumed the dust off the coil
Parts Used:

-
Sumlorq from Cleveland, OH
-
Difficulty Level:Really Easy
-
Total Repair Time:Less than 15 mins
3 of 7 people
found this instruction helpful.
Was this instruction helpful to you?
Thank you for voting!
Bad tasting ice cubes
Took the old filter out and put the new one in.
Easy Breezy!!
Easy Breezy!!
Parts Used:
-
susan from hartford, WI
-
Difficulty Level:Really Easy
-
Total Repair Time:15 - 30 mins
2 of 4 people
found this instruction helpful.
Was this instruction helpful to you?
Thank you for voting!
Noisy Freezer Evaporator
Find a video on youtube. Remove 6 screws. Pull the Styrofoam part up before removing the panel. Unplug and Remove the fan assembly.
You will need a NUT DRIVER to take the bracket off the backing plate.
I ordered the red grommet and the red bumper. You need TWO of the red grommets if that is the problem. My freezer was about 8 years old, and the grommets were worn and compressed, the bumper was not. Replacing these parts DID NOT FIX the problem. I needed a new motor.
I probably disassembled and reassembled this stuff about 7 times before I got all the parts and tools. Each time I had to unload the freezer.
You will need a NUT DRIVER to take the bracket off the backing plate.
I ordered the red grommet and the red bumper. You need TWO of the red grommets if that is the problem. My freezer was about 8 years old, and the grommets were worn and compressed, the bumper was not. Replacing these parts DID NOT FIX the problem. I needed a new motor.
I probably disassembled and reassembled this stuff about 7 times before I got all the parts and tools. Each time I had to unload the freezer.
Parts Used:
-
Brian from BOZEMAN, MT
-
Difficulty Level:A Bit Difficult
-
Total Repair Time:15 - 30 mins
-
Tools:Nutdriver, Screw drivers
1 person
found this instruction helpful.
Was this instruction helpful to you?
Thank you for voting!
Ice maker stopped working
Remove the one screw holding the unit in place, unplug it, slide in the replacement, plug and screw it in.
Parts Used:
-
Cary from ORLANDO, FL
-
Difficulty Level:Really Easy
-
Total Repair Time:15 - 30 mins
-
Tools:Pliers
1 person
found this instruction helpful.
Was this instruction helpful to you?
Thank you for voting!
Water dispensed at a trickle
I only had to remove the old filter and install the new one - all by hand. I then ran about 1 to 1and1/2 gallons of water through the filter to clear it.
A WORD OF CAUTION - HOLD YOUR GLASS CLOSE TO THE WATER DISPENSER FOR THE INITIAL FILLING - IT WILL SPIT UNTIL THE AIR IS PURGED FROM THE SYSTEM!!!
An extremely easy repair.
A WORD OF CAUTION - HOLD YOUR GLASS CLOSE TO THE WATER DISPENSER FOR THE INITIAL FILLING - IT WILL SPIT UNTIL THE AIR IS PURGED FROM THE SYSTEM!!!
An extremely easy repair.
Parts Used:
-
JAMES from MORENO VALLEY, CA
-
Difficulty Level:Really Easy
-
Total Repair Time:Less than 15 mins
3 of 7 people
found this instruction helpful.
Was this instruction helpful to you?
Thank you for voting!
Auto water stopped working, found that filter needed replacement
Unscrewed old cartridge, ordered new cartridge, installed new cartridge by following very simple instructions. Took only one day for part to arrive from PartSelect although I paid for cheapest shipping, which was "ground." I was amazed!
Parts Used:
-
Joanne from Fort Smith, AR
-
Difficulty Level:Really Easy
-
Total Repair Time:Less than 15 mins
2 of 4 people
found this instruction helpful.
Was this instruction helpful to you?
Thank you for voting!