




















ZISP480DXBSS General Electric Refrigerator - Instructions
Keep searches simple. Use keywords, e.g. "leaking", "pump", "broken" or "fit".
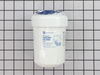
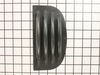
filter replacement/water tray replace
remove by hand turning old and replacing new by turning by hand.Lifted out old grill and placed in new one
Parts Used:
-
ron from Winter Haven, FL
-
Difficulty Level:Really Easy
-
Total Repair Time:Less than 15 mins
-
Tools:Screw drivers
12 of 16 people
found this instruction helpful.
Was this instruction helpful to you?
Thank you for voting!
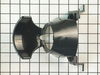
Ice funnel cracked
Followed video for replacing the ice chute flap solenoid replacement because getting to the ice funnel took same steps of disassemble. Looked at how the existing funnel was set in the housing, where and how one spring was located, where the switch and its activating arm on the ice funnel were located, took old one out and put new one in. Cleaned everything in process.
Parts Used:
-
Jim from Glendale, AZ
-
Difficulty Level:Easy
-
Total Repair Time:15 - 30 mins
-
Tools:Screw drivers
18 of 34 people
found this instruction helpful.
Was this instruction helpful to you?
Thank you for voting!
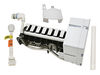
Refridgerator Freezer stoped making ice
Turned off power, removed cover from Ice maker, checked resistance across thermostat for zero (read open), all other switches read proper value (when activated). Ordered and received thermostat. Removed Ice Maker from freezer, removed two screws holding ice tray to Control Assembly. Removed Thermostat and replaced with new one. Applied Silicone Sealant to face of Thermostat for adhesion to ice tray when assembled. Remounted Ice Tray to Control Assembly and remounted in freezer. Works Great...
Parts Used:
-
Marion from Palm Coast, FL
-
Difficulty Level:Easy
-
Total Repair Time:30 - 60 mins
-
Tools:Screw drivers
17 of 31 people
found this instruction helpful.
Was this instruction helpful to you?
Thank you for voting!
Ice machine wasnt making ice
First I turned the refrigerator and water line off. Then moved to the freezer section, followed the directions, removed the two screws. Directions state to not remove them but I had to in this case. Unplugged the ice maker and removed it from the freezer. I installed the two mounting screws then tried to plug the electrical connection back in but had to use the adaptor cord furnished in the kit. The cord was a little long but I tucked it in and mounted the ice maker. Turned it on then turned the refrigerator and water back on and in a few hours had ice! Very easy to do!
Parts Used:
-
Robert from Auburn, AL
-
Difficulty Level:Really Easy
-
Total Repair Time:Less than 15 mins
-
Tools:Screw drivers
14 of 23 people
found this instruction helpful.
Was this instruction helpful to you?
Thank you for voting!
The unit will not dispense water, but does make and dispence ice.
I replaced that part, but I still have the same problem, no water is dispensed. I believe I may need a circuit board. The problem was not the parts I replaced.
Parts Used:
-
michael from west bend, WI
-
Difficulty Level:Easy
-
Total Repair Time:15 - 30 mins
-
Tools:Pliers, Screw drivers
16 of 29 people
found this instruction helpful.
Was this instruction helpful to you?
Thank you for voting!
Ice maker Stripper lost a tooth
First turn off the power, remove the ice tray, remove the two screws holding the ice maker to the side of the freezer, use the screw driver to gently open the electrical clip for the power cord inside the freezer, remove the complete unit from freezer, bend the old stripper from the holding pin- it is flexible- it will bend, replace the new stripper on the holding pin and bend into the slot to hold it firmly, no water will come out from the fill cup into the freezer, plug in the power cord, mount back to side of freezer, you are done.
Parts Used:
-
Ernest W. from Charlotte, NC
-
Difficulty Level:Really Easy
-
Total Repair Time:Less than 15 mins
-
Tools:Nutdriver, Screw drivers
10 of 12 people
found this instruction helpful.
Was this instruction helpful to you?
Thank you for voting!
refrigerator and freezer stopped working
I replaced the three sensors, 2 in the freezer 1 in the refrigerator. This was rated as the most common problem. Did not fix the problem. I then checked the ohms on the new sensors then the old sensors they were all within .5 of each other. So I got smart and went down the list of causes on their list. I emailed partselect and asked what the parts should read. They replied with that information and it turned out to be the voltage converter on the compressor. I ordered the part on friday payed for overnight delivery and it arrived tuesday. This as you can imagine makes me angry. But the part was easy to install and my refrigerator started working right away. I would advise anyone with this problem to start at the top of the problem list use a multi meter check everything on the list and only replace part or parts that don't come up to standards. This will save time and money and hopefully fix the problem the first time as you are not switching out parts and hoping that it solves the problem.
Parts Used:
-
mike from Aguilar, CO
-
Difficulty Level:Really Easy
-
Total Repair Time:30 - 60 mins
-
Tools:Nutdriver
9 of 9 people
found this instruction helpful.
Was this instruction helpful to you?
Thank you for voting!
broken ice maker
removed 3 screws unplug and remove old unit. install two screws install new ice maker, tighten screws plug in and turn on. had ice in 20 min.
Parts Used:
-
robert from bensalem, PA
-
Difficulty Level:Really Easy
-
Total Repair Time:Less than 15 mins
-
Tools:Screw drivers
10 of 12 people
found this instruction helpful.
Was this instruction helpful to you?
Thank you for voting!
Icemaker flap not closing, frosting up
Watched video, however could not get outer casing off. Under the panel are three small holes, pushed up with an Allen key, used a small screwdriver to wedge out, came out easily, followed instructions from video on removing and replacing solenoid
Parts Used:
-
Graeme from Sarasota, FL
-
Difficulty Level:Easy
-
Total Repair Time:15 - 30 mins
-
Tools:Screw drivers
9 of 11 people
found this instruction helpful.
Was this instruction helpful to you?
Thank you for voting!
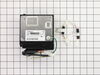
Frig stopped working
Tested the circuits then the inverter and found that to be no good. There was no 277 voltage leaving the inverter. Ordered new and replaced. The frig is now working fine.
Parts Used:
-
Anthony from CAMBRIDGE, MA
-
Difficulty Level:Very Easy
-
Total Repair Time:1- 2 hours
-
Tools:Pliers, Screw drivers
10 of 14 people
found this instruction helpful.
Was this instruction helpful to you?
Thank you for voting!
Will not make ice
-
GEORGE from ELIOT, ME
-
Difficulty Level:Easy
-
Total Repair Time:Less than 15 mins
-
Tools:Screw drivers
13 of 23 people
found this instruction helpful.
Was this instruction helpful to you?
Thank you for voting!
Ice maker door not opening
Removed panel from front of freezer door by pushing up on three spring loaded screws located in the opening where the ice door opens and closes. they are about 1 inch apart on the bottom of the opening. Push up to free ice maker panel. Remove three screws from solenoid, located at the top right. Remove wire, replace with new and that is it. Fixed the problem!! Our ice maker hadn't worked for months. Be careful if you remove the round ice maker door to clean. There is a spring that located on the left side of sprocket. The spring fell off and took me a while to figure where it came from. Recieved package in three days and the job took minutes. Works great! Very easy to complete.
Parts Used:
-
scott from lake orion, MI
-
Difficulty Level:Really Easy
-
Total Repair Time:Less than 15 mins
-
Tools:Nutdriver, Screw drivers
8 of 10 people
found this instruction helpful.
Was this instruction helpful to you?
Thank you for voting!
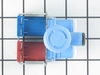
No water/no ice
The first sign of trouble was when the water dispenser would continue to come out after you let up on the button. Then water and ice stopped. Changed the secondary inlet value and the main water valve, as well as a 1/4" water line running to the freezer (it was cracked). Water is working. Ice maker is working better than ever. New life for an aged refrige.
Parts Used:
-
Joseph from Cortlandt Manor, NY
-
Difficulty Level:Easy
-
Total Repair Time:1- 2 hours
-
Tools:Nutdriver, Pliers, Screw drivers
9 of 14 people
found this instruction helpful.
Was this instruction helpful to you?
Thank you for voting!
Compressor would not kick on and condenser fan ran constantly
Remove back panel on bottom of fridge to access compressor area. Remove screws from water solenoid and water valve and push to the side so the side of the compressor can be accessed. Then locate the inverter box. You will find a Phillips head screw on the bottom of the inverter. This is the only screw that hold the inverter in place. Remove the screw and tilt the inverter box forward away from the compressor, then lift the box out of the the holder. You may have to wiggle it a bit to get it out. Remove the plug that attaches to the compressor and then with the power on check your voltage coming to the compressor. It should read 120 volt. If it doesn’t your inverter is bad. Remove the other plug on the inverter box and pull the box out.
Reinstall the unit in reverse order. Use the appropriate jumper to plug into the wire connection going to box and then plug it into the connection off the fridge.
Once everything is reinstalled and before you put the back panel on plug your refrigerator back in and you should be able to hear the compressor working or feel the top of it to make sure. If it’s working you are good and can reinstall the back panel.
It will take 4-5 hours to come back to temp if it’s been off for any length of time.
Reinstall the unit in reverse order. Use the appropriate jumper to plug into the wire connection going to box and then plug it into the connection off the fridge.
Once everything is reinstalled and before you put the back panel on plug your refrigerator back in and you should be able to hear the compressor working or feel the top of it to make sure. If it’s working you are good and can reinstall the back panel.
It will take 4-5 hours to come back to temp if it’s been off for any length of time.
Parts Used:
-
Charles from ORO VALLEY, AZ
-
Difficulty Level:Really Easy
-
Total Repair Time:15 - 30 mins
-
Tools:Nutdriver, Screw drivers, Socket set
6 of 6 people
found this instruction helpful.
Was this instruction helpful to you?
Thank you for voting!
Unit was not dispensing water nor ice.
Removed the plastic frame by pushing to the inside (all 4 sides), removed touch pad by sliding it to my right and disconnected the wires. Removed the four screws that hold the dispensing unit and replaced broken parts. Please note that I also replaced the funnel. Total cost of repair for DIY $30.00, savings by avoiding repair man, priceless.
Parts Used:
-
Javier from Woodstock, GA
-
Difficulty Level:Really Easy
-
Total Repair Time:15 - 30 mins
-
Tools:Screw drivers
9 of 16 people
found this instruction helpful.
Was this instruction helpful to you?
Thank you for voting!