This is an authentic LG water inlet valve for a top-load washer. It is designed to control the flow of water into the washer. If your washer is filling slowly, making loud noises, overflowing, or stop...
This is a pulsator assembly, also known as an agitator, for your washing machine. This pulsator sits at the bottom of your washer and is what is used as the main driving force to wash your clothes. If...
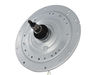
This clutch housing assembly with mode shifter, or washer drive shaft and shifter assembly, is made for your washer. It connects the appliance wash plate to the motor so the washer can shift the drive...
Got an LG washer that needs a fix? We have the perfect solution for you! Here is our bespoke screw, made just for LG washing machines. It's crafted to meet safety and efficiency standards, ensuring a ...
Discover how you can keep your LG washer running like a breeze with our authentic LG Washer Shifter Coupling. This key component enables your washer to transition from agitation to spin cycle smoothly...
This suspension assembly helps stabilize the washer drum during spin cycles, reducing vibration and noise for smooth operation. Built for strength and reliability, it restores balance when the origina...
Ask our experts a question about this model and we'll get back to you as soon as possible!
9 questions answered by our experts.
< Prev
1
2
Next >
Sort by:
Search filter:
Clear Filter
Your search term must have 3 or more characters.
Keep searches simple. Use keywords, e.g. "leaking", "pump", "broken" or "fit".
Sorry, we couldn't find any existing answers that matched.Try using some different or simpler keywords, or submit your new question by using the "Ask a Question" button above!
Aldra
November 8, 2021
How do you unlock child lock
For model number WT1201CV
Hello Aldra, thank you for your question. To turn the child lock off, press and hold the child lock button for 3 minutes during a wash cycle. We hope this helps.
2 peoplefound this helpful.
Was this helpful?
Thank you for voting!
Evadna
March 21, 2022
Door not locking missing a piece washer has a code de
For model number WT1201CV
Hi Evadna,
Thank you for your question. If the door on your washer is not locking, the dE error code will appear. If the door is shut and locked correctly, turn the washer off and unplug it for 5 seconds to reset it. If the dE error code reappears, the door lock switch may be malfunctioning and it will need to be replaced. The part number listed under your model number for the door lock switch is PS12589836. If you need help placing an order for it, customer service is open 7 days a week and anyone will be happy to assist you. Please feel free to give us a call. We look forward to hearing from you!
WT1201CV Wash plate is stuck. I'm trying to change clutch assembly
For model number WT1201CV
Hello Justin and thanks for writing.
We have attached the link to a repair video. We hope this helps. Please contact us anytime.
https://www.youtube.com/watch?v=DLOki6eCs3o
1 personfound this helpful.
Was this helpful?
Thank you for voting!
Mike
December 11, 2019
Washer seems to get off balance frequently, sometimes several times in a load and the machine will keep filling the drum with water and taking longer than necessary to complete a cycle.
For model number WT1201CV
Hello Mike,. Thank you for the question. I suggest checking for wear or damage to the Suspension Assembly PartSelect Number PS7785197. Hope this helps!
The dL error code is on. Washer will not run. Do I need to fix a lock mechanism?
For model number WT1201CV
Hi Sarah, thank you for reaching out. Yes, you need to replace the lid switch assembly, part number PS3644957, to fix the issue. We hope this helps! If you need help placing an order, customer service is open 7 days a week. Thanks again for your great question.
I diagnosed by running a full wash. I watched it and when the water should have stopped it kept running. I unplugged the washer from the power and the water kept running. This told me the inlet valve was the issue and not an electronic issue. I stopped the water by closing the water valve manually. Replacing the inlet valve was very easy. Hardest part is moving the washer out of the laundry room. The videos online show very simple steps. Maybe 8 screws to remove and a couple of hoses and five electronic connectors. Take a photo of connectors before removing them to ensure you reconnect properly.
Watch this video on youtube:https://www.youtube.com/watch?v=8ZKgP6hu8Fk very similar
Keep all parts separate and in order in a plastic box with dividers 1. Disconnect washer from wall. (electrical and hot/cold hoses, drain tube) 2. Remove center cap from bottom tub plate 3. Remove small bolt under cap 4. Remove bottom Tub Plate 5. Remover washer 6. Remove larger 38mm nut (I bought the correct deep well socket) Ive seen other video use a pipe wrench) 6a. Remove the large washer under nut NOTE- I did not remove the tub, total hassle, found it unnecessary, Yes the washer was heavier but nothing that cant be managed. 7. Place a blanket on the floor and lay the washer on its back to access the bottom. NOTE Everthing is nuts and bolts at this point. 10mm socket worked on all 8. Remove Nut & washer on rotor. Remove rotor-its has a line of magnets and the edges are sharp. Just wiggle it a bit. wear gloves if need be. 9. Remove bolts from Stator, user a small flat blade screw driver to undo 1 or 2 (some) electrical connections. Lay the stator aside. Move the electric connector(s) out of the way. 10. Remove the grounding wire at 6 oclock position 11.Remove the rectangular pack and the 3 oclock position by removing 2 bolts. It has a small arm that reaches out to the clutch arm, slide the piece out to the widest part of hole in clutch arrn an wiggle it loose. Almost there.... 12. Remove all the 10MM headed bolts from the clutsh and drive assemble The inner bolts are a slightly different style, keep the two sets separate. 13. Remove the clutch and drive.
NOTE: if the drive doesnt come out with a slight pull, you have missed a bolt(s)-inspect and remove as need be
14 Wipe clean the pocket in the outer wash tub that accepts the seal on the top of the drive. Lubricate the new drives seal completely with a little dishwasher detergent so it slides smoothly and seals well.
15. Assembly is the reverse:
Last Notes: *Install all bolts for the clutch and drive hand tight as you get everything lined up. *Once all bolt are in the clutch and drive are hand tight, tighten the bolts in a cross pattern as you would a wheels lug nuts *Snug the bolts used to attached the clutch and drive firmly 1/8 to 1/4 turn past snug *Make sure you clock the stator to the correct position, again hand tighten bolts then final tighten in a cross pattern. *The nut and washer in the rotor tighten to 1/4 to 1/2 turn past snug, its tight. *The large 38 MM nut on the top of the drive assembly torque is 88 ft lbs. Have a partner or friend hold the tub while you torque the large nut. If you don't have a torque wrench you can rent one from a number of auto-part chain stores. *I used a 1/2 Impact gun to remove the 38mm nut, Never use that kind of power to reassemble as it will damage parts.