




















WSF26C2EXF01 Whirlpool Refrigerator - Instructions
Keep searches simple. Use keywords, e.g. "leaking", "pump", "broken" or "fit".
Both Upper Lights Burned Out Same Time
The holder is held in place with two screws. Once you have it unscrewed you can snap the old sockets out and replace them.
Ordered new sockets and presto, the lights work again.
They just snapped into the holder and the holder went up with two screws.
HINT: I did take a photo of the 4 electrical connectors AND labeled each one with a Sharpie 1, 2, 3, and 4 from left to right.
Ordered new sockets and presto, the lights work again.
They just snapped into the holder and the holder went up with two screws.
HINT: I did take a photo of the 4 electrical connectors AND labeled each one with a Sharpie 1, 2, 3, and 4 from left to right.
Parts Used:

-
Victor from CEDAR CREEK, TX
-
Difficulty Level:Very Easy
-
Total Repair Time:Less than 15 mins
-
Tools:Nutdriver
2 of 2 people
found this instruction helpful.
Was this instruction helpful to you?
Thank you for voting!
Lights failed despite new bulbs.
Used u-tube video to review steps in making repair. Wires shorter than described but after looking at replacement sockets difference was clear.
Parts Used:
-
Thomas from EASTON, MD
-
Difficulty Level:Easy
-
Total Repair Time:15 - 30 mins
-
Tools:Screw drivers
3 of 5 people
found this instruction helpful.
Was this instruction helpful to you?
Thank you for voting!
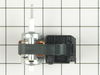
Evaporator Fan Motor quit working; top shelves of freezer got too warm
After viewing online videos of the repair process, it was very easy to replace the evaporator fan motor - just remove the back panel of the freezer compartment for EASY access to the evaporator motor. I received the new motor a day earlier than I thought I would. I took 15 to 20 minutes to replace the old motor. The only problem was the wiring on the new motor was on the opposite side of the motor as compared with the old motor. I was able to rotate the new motor enough for the new wiring to connect. VERY HAPPY with the results. A word of caution: the motor mounting brackets are plastic - go easy when trying to remove the brackets.
Parts Used:
-
Adrian from REXBURG, ID
-
Difficulty Level:Very Easy
-
Total Repair Time:15 - 30 mins
-
Tools:Screw drivers
2 of 2 people
found this instruction helpful.
Was this instruction helpful to you?
Thank you for voting!
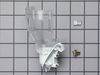
Faulty light socket
-
Larry from HOUSTON, TX
-
Difficulty Level:Very Easy
-
Total Repair Time:15 - 30 mins
-
Tools:Screw drivers
3 of 5 people
found this instruction helpful.
Was this instruction helpful to you?
Thank you for voting!
Catastrophic loss of cooling
It was straight forward enough--removed six screws from the metal cooling coil shield at the back of the freezer compartment and removed the shield. That left the motor and its mounting exposed atop the coil. Removed the electrical leads and popped out the motor and fan. Then I replaced the leads on the new motor, reset it in the mounting and pushed the fan propeller from the old motor on the spindle of the new. Twenty minutes tops.
Parts Used:
-
Mark from Sugar Land, TX
-
Difficulty Level:Really Easy
-
Total Repair Time:15 - 30 mins
-
Tools:Nutdriver, Screw drivers
4 of 8 people
found this instruction helpful.
Was this instruction helpful to you?
Thank you for voting!
Light didnt go on
The light rocker switch wasnt working. I found the part on the web site. It was so easy. I used a screw driver to pop out the old one and pop the new one in. It took 5 min. Thanks!!!
Parts Used:

-
dorotea from staten island, NY
-
Difficulty Level:Really Easy
-
Total Repair Time:Less than 15 mins
-
Tools:Screw drivers
3 of 5 people
found this instruction helpful.
Was this instruction helpful to you?
Thank you for voting!
fridge door switch did not work
I removed the switch housing (4 screws), replacing the switch in the housing was a snap. It took 5 minutes, cost $8 and light works like new!
Why didn't I order this part and do the repair earlier? Very simple.
Why didn't I order this part and do the repair earlier? Very simple.
Parts Used:
-
stu from richmond, VA
-
Difficulty Level:Easy
-
Total Repair Time:Less than 15 mins
-
Tools:Socket set
2 of 2 people
found this instruction helpful.
Was this instruction helpful to you?
Thank you for voting!
Door light switch disintegrated
Very simple fix, remove 3 screws, two connectors to the old switch
Parts Used:
-
Thomas from Roseville, CA
-
Difficulty Level:Really Easy
-
Total Repair Time:Less than 15 mins
-
Tools:Screw drivers
2 of 2 people
found this instruction helpful.
Was this instruction helpful to you?
Thank you for voting!
Refrigerator light would not turn on.
I first replaced the switch and had no results, I then ordered the Light Socket Kit, and because I had the experience of removing the panel to replace the switch, it took a few minutes to remove the two screws behind the panel, removing the temperature control knobs and then releasing the face plate which is secured by tabs at the bottom. The kit came with extra connectors in case they were needed, but they were not in my case and so I pulled off the wires, pushed the old socket out and the new one in. Attaching the wires to the correct pins, I screwed in the light bulb to be sure that the fix was correct and determining that, I replaced the screws that held the panel in place. Voila, I'm a happy camper who found some outdated jars in the back corners of the newly lighted shelves.
Parts Used:
-
Suzanne from STERLING HTS, MI
-
Difficulty Level:Really Easy
-
Total Repair Time:Less than 15 mins
-
Tools:Nutdriver
3 of 6 people
found this instruction helpful.
Was this instruction helpful to you?
Thank you for voting!
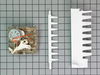
Icemaker failed to function
Removed and disconnected the icemaker, cleaned all areas and disassembled the failed parts. Reassembled with the new parts inlcuded with the purchased package and resinstalled the unit. Started the unit and chedked for proper operation. Successful repair.
Parts Used:
-
Terry from Glendora, CA
-
Difficulty Level:Easy
-
Total Repair Time:15 - 30 mins
-
Tools:Nutdriver, Screw drivers
2 of 3 people
found this instruction helpful.
Was this instruction helpful to you?
Thank you for voting!
ice maker quit working
I was amazed when Fed Ex pulled up to our front door the following day after I ordered the parts, I was wondering what they were delivering and to my amazement it was the parts I had ordered from parts select the previous day , thank you so much , you are awesome. My 73 year old husband who is a 5 year cancer survivor had the part installed and we were ready to start making ice within 1 hour.He went by the installation information sent in by your customers. Thank you all, Jo Mesplay
Parts Used:
-
Thomas from Hornsby, TN
-
Difficulty Level:Really Easy
-
Total Repair Time:30 - 60 mins
-
Tools:Screw drivers
2 of 3 people
found this instruction helpful.
Was this instruction helpful to you?
Thank you for voting!
freezer (later fridge too) wouldn't stay cold~
****Make are you order Capacitor & Starter relay too (we ordered separtely so had to pay shipping twice)**** Super easy just open access panel on back near compressor and remove retention clip with fingers, remove & replace both capacitor & starter, put clip and access panel back on, plug in and allow 8 hours to cool! Works like new again! Hope it goes another 10 years
Parts Used:

-
David from MARYLAND HTS, MO
-
Difficulty Level:Very Easy
-
Total Repair Time:30 - 60 mins
-
Tools:Nutdriver
2 of 3 people
found this instruction helpful.
Was this instruction helpful to you?
Thank you for voting!
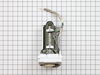
Ice maker Quit working
Got new part. Removed cover. Tape at top had to be pried loose from door.
Had to turn cup cover from top portion to access power wire. Door and light wires had to be unplugged and moved from clips.
Two screws at bottom removed. Motor unit was freed up and set on table.
Had to remove bottom white section due to light Assembly was not on new section. Removed three screws. Removed three screws from new unit.
Attached old white section with light to new motor unit.
Reattached power wire routed into cup and plugged in. Cup turned clockwise so as to attach.Other wires re-routed and plugged back in.
Cover section screws inserted and reattached.
Turned on/off button back on. Checked all light switches in refrigerator and freezer section to ensure operating. Put bin back in and closed door. No warning lights present. Approximately one hour later, bin had ice in it.
Had to turn cup cover from top portion to access power wire. Door and light wires had to be unplugged and moved from clips.
Two screws at bottom removed. Motor unit was freed up and set on table.
Had to remove bottom white section due to light Assembly was not on new section. Removed three screws. Removed three screws from new unit.
Attached old white section with light to new motor unit.
Reattached power wire routed into cup and plugged in. Cup turned clockwise so as to attach.Other wires re-routed and plugged back in.
Cover section screws inserted and reattached.
Turned on/off button back on. Checked all light switches in refrigerator and freezer section to ensure operating. Put bin back in and closed door. No warning lights present. Approximately one hour later, bin had ice in it.
Parts Used:
-
Peter from DE KALB, MS
-
Difficulty Level:Really Easy
-
Total Repair Time:30 - 60 mins
-
Tools:Nutdriver, Screw drivers, Socket set
2 of 3 people
found this instruction helpful.
Was this instruction helpful to you?
Thank you for voting!
No problem
-
Janet from PITTSFORD, NY
-
Difficulty Level:Really Easy
-
Total Repair Time:Less than 15 mins
-
Tools:Pliers
2 of 3 people
found this instruction helpful.
Was this instruction helpful to you?
Thank you for voting!
Light over range burned out
Philips screwdriver
Removed screw (1)
Removed light bulb
Put in new light bulb
Closed door to bulb compartment
Returned screw.
Pro tip! Check how many bulbs you need before ordering. Mine only needed two. I got two. I suspect I’ll buy a new microwave before new bulb burns out again. Ordering/delivery was fast. No need to have spare on hand.
Removed screw (1)
Removed light bulb
Put in new light bulb
Closed door to bulb compartment
Returned screw.
Pro tip! Check how many bulbs you need before ordering. Mine only needed two. I got two. I suspect I’ll buy a new microwave before new bulb burns out again. Ordering/delivery was fast. No need to have spare on hand.
Parts Used:
-
Vincent from CHICAGO, IL
-
Difficulty Level:Very Easy
-
Total Repair Time:Less than 15 mins
-
Tools:Screw drivers
3 of 6 people
found this instruction helpful.
Was this instruction helpful to you?
Thank you for voting!