This 40w light bulb is a replacement bulb constructed of glass and metal. It is an easy-to-install electrical part which produces 40w of light. If the bulb won't light up then it may be broken and sho...
$9.85
In Stock
Order within the next 3 hrs and your part ships today!
This Charcoal Filter traps grease from your oven's exhaust to help prevent it from entering the vent, which could cause damage over time. If the exhaust fan on your microwave is not working, you may n...
$19.75
In Stock
Order within the next 3 hrs and your part ships today!
This Grease Filter is constructed of Acrylonitrile Butadiene Styrene and is used to trap grease and help eliminate odors from the exhaust air while cooking. It attaches onto the exhaust and is rated ...
$35.15
In Stock
Order within the next 3 hrs and your part ships today!
This three-terminal switch fits your microwave door. This part is mostly black in color and is about 1.5 inches with metal terminals. You might need to replace this part if your microwave is not heati...
$13.12
In Stock
Order within the next 3 hrs and your part ships today!
This door interlock switch is a genuine replacement part designed for use in microwaves. It serves a critical safety function by preventing the microwave from operating when the door is open. Because ...
$42.70
In Stock
Order within the next 3 hrs and your part ships today!
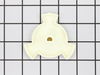
The light socket in your microwave houses the light bulb and connects it to the power source. The light bulb will screw into it, so the light bulb will be held in place. Be very careful when installin...
$14.77
In Stock
Order within the next 3 hrs and your part ships today!
Order within the next 3 hrs and your part ships today!
Questions And Answers for WMH1163XVQ1
Ask our experts a question about this model and we'll get back to you as soon as possible!
6 questions answered by our experts.
< Prev
1
2
Next >
Sort by:
Search filter:
Clear Filter
Your search term must have 3 or more characters.
Keep searches simple. Use keywords, e.g. "leaking", "pump", "broken" or "fit".
Sorry, we couldn't find any existing answers that matched.Try using some different or simpler keywords, or submit your new question by using the "Ask a Question" button above!
Raymond
March 17, 2020
Can the fan be configured to discharge into an outside vent?
For model number WMH1163XVQ1
Hello Raymond, thank you for your question. Yes, this unit can be vented outside. The damper is PartSelect Number: PS11728088 for this unit which is what you would need to adapt the unit to vent outside. I hope this helps.
2 peoplefound this helpful.
Was this helpful?
Thank you for voting!
Dolores
October 30, 2021
I need a new filter
For model number WMH1163XVQ1
Hello Dolores, Thank you for contacting us. We have researched the model you have provided and have found the part you are looking for is PartSelect Number: PS3650910 for the Grease Filter and PartSelect Number: PS1871363 for the Charcoal Filter. We hope this helps!
The light in the bottom of the microwave which shines onto the stovetop has burned out. There is a small gold part that the blub screws into. I was out of town and my friend attempted to put in a new blub and apparently threw the part away on the old blub.
For model number WMH1163XVQ1
Hello Connie, Thank you for contacting us. We have researched the model you have provided and have found the part you are looking for is PartSelect Number PS2342199. If you need help placing an order, customer service is open 7 days a week. Please feel free to give us a call. We look forward to hearing from you!
There is a break in the white plastic frame around the window. I do not see a replacement part. Is it unsafe?
For model number WMH1163XVQ1
Hello Linda, thank you for your question. The complete Door is part PS2352830- White and Stainless door is PS2352831 and Black door is PS2352829. It is not recommended to operate the unit with a break in the frame. We are pleased to have been able to help.
My microwave stopped running. It made a clicking noise and stopped. I shut off the breaker the first time and got it going, but the next time it won't start. I pulled the plug out of the socket. The one plug prong looks like it melted a little. The socket itself has a small burn mark on the left prong. Don't know if I have a microwave or socket problem or both. Maybe even a socket wire problem. Thank you
For model number WMH1163XVQ1
Hi John, thank you for reaching out. Based on the description you provided, it seems like there could be an issue with both the microwave and the socket. The melted prong and burn mark on the socket suggest that there might have been an electrical fault, which could be because of a faulty power cord, a problem with the socket itself, or potentially an issue with the wiring in the wall. You may need to check the house wiring and replace the socket first. If the issue persists, check the microwave's power cord for any visible damage, such as fraying or melting. If the cord is damaged, it should be replaced. The power cord for your model is part number PS10063954. We hope this solves your problem!
The nightmare was that this microwave is installed under the cabinet....in order to get to the light bulb I had to pull out my stove then squeeze into the space between the stove and counter....my old microwave light bult was much easier to change.....Shame on Whirlpool for making this so difficult.....must be a better way to cover the light bulb so that we do not need a screwdriver to remove the door to get to the light bulb
Ordered top & bottom micro-switches and mounting plate parts. Internet reviews could not find specifics if the issue was due to a top/bottom or combination of micro-switch or mounting plate failure. Pulled the plug. Removed the top vent assembly cover held in by 2 Phillips screws inside the vent. Removed the control panel held in by 1 Phillip screw at the top vent assembly area. Lifted control panel upward to release the catch and moved it off to the side - didn't disconnect any leads. Used a Torx bit to remove the door switch mounting plates at the front and pulled the plates through the opening from the control panel. Documented the wire color code connections, the top plate uses 2 micro's with one using both the closed & open contact. Installed the respective micros on the mounting plates and worked backwards with the wiring and removal steps. Once completed, the open/close sensing has worked every time.