




















WFE775H0HV2 Whirlpool Range - Instructions
Keep searches simple. Use keywords, e.g. "leaking", "pump", "broken" or "fit".
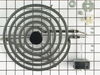
I wanted a second 8" canning element for home canning
I purchased an 8" canning element for my new Kenmore Stove. The ordering process was easy. I printed my order out. I did not receive a confirmation by email, however I received the part in a timely manner. I was satisfied with the process.
Parts Used:
-
Shelley from Powell, WY
-
Difficulty Level:Really Easy
-
Total Repair Time:Less than 15 mins
5 of 13 people
found this instruction helpful.
Was this instruction helpful to you?
Thank you for voting!
cleaner
just needed clearner for the top of my glass top, the operator was very helpful I received my clearniner in 7 days thank you
Parts Used:

-
Mary from Duarte, CA
-
Difficulty Level:Really Easy
-
Total Repair Time:Less than 15 mins
2 of 5 people
found this instruction helpful.
Was this instruction helpful to you?
Thank you for voting!
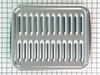
broiler pan missing
-
RAYMOND from JACKSONVILLE, FL
-
Difficulty Level:Really Easy
-
Total Repair Time:Less than 15 mins
1 of 2 people
found this instruction helpful.
Was this instruction helpful to you?
Thank you for voting!
The side trim on the glass door needed to be replaced.
After we put the latch pins in, the door was easily lifted off. We placed the door on the table and unscrewed the trim pieces. The new trim pieces went into place after we cleaned the door. We slipped the door back on the oven and removed the hinge pins.
Parts Used:

-
Mary from LARAMIE, WY
-
Difficulty Level:Easy
-
Total Repair Time:Less than 15 mins
-
Tools:Screw drivers
1 of 2 people
found this instruction helpful.
Was this instruction helpful to you?
Thank you for voting!
Both outside door handles turned very beige
Everything worked perfectly---thanks to the suggestion of your call center agent. She suggested that since the replacement door handles were no longer available, I should consider repainting them--it worked like a charm. Please tell her she was a life saver. We rent that house in Fl and my returning tenants had complained about the discoloring refer handles. Thank you
Parts Used:
-
Howard from Boynton Beach, FL
-
Difficulty Level:Easy
-
Total Repair Time:30 - 60 mins
-
Tools:Nutdriver
23 of 72 people
found this instruction helpful.
Was this instruction helpful to you?
Thank you for voting!
stove top got hot when using large pans
Removed the existing element and replaced it with the new one.
Parts Used:
-
Albert from Bryant, SD
-
Difficulty Level:Really Easy
-
Total Repair Time:15 - 30 mins
-
Tools:Screw drivers
Was this instruction helpful to you?
Thank you for voting!
An Insect got in between the element coil & shorted it out
unplugged the range, removed the cooktop left & right front screws, unplugged left & right plug & unscrewed ground wire. Parts arrived fast & reassembled. . Happy, Happy, Happy! Happy Wife...Happy Life!
Parts Used:

-
Howard from Land O' Lakes, FL
-
Difficulty Level:Really Easy
-
Total Repair Time:Less than 15 mins
-
Tools:Screw drivers
Was this instruction helpful to you?
Thank you for voting!
Burned out stove top burner
Easy change! Two screws in front and grounding strap screw-lifted out and turned stove top upside down on table. three more screws for burner element and then reinstall with first two screws and grounding strap screw.
Parts Used:
-
Gene from Turtle Lake, ND
-
Difficulty Level:Really Easy
-
Total Repair Time:15 - 30 mins
-
Tools:Screw drivers
Was this instruction helpful to you?
Thank you for voting!