This part is a one-time use thermal fuse which attaches to the blower wheel housing of your clothes dryer. It cannot be re-set and must be replaced when there is no longer continuity between the pins....
$22.77
In Stock
Order within the next 10 hrs and your part ships today!
This dryer repair kit consists of five commonly replaced dryer parts: one multi-rib belt (part #661570V and measures 93 1/2 inches long), four drum support rollers, one idler assembly, nine tri-rings,...
$60.74
In Stock
Order within the next 10 hrs and your part ships today!
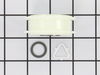
This Idler Pulley includes the tri-ring and gasket and everything included here is manufacturer-certified. This part maintains correct tension on the drive belt in order to spin the drum properly. If ...
$32.93
In Stock
Order within the next 10 hrs and your part ships today!
When connected to electricity the dryer heating element glows red hot and generates heat. When air is blown over it, it heats the air which is used to dry the clothes. The heating element fits inside ...
$82.61
In Stock
Order within the next 10 hrs and your part ships today!
This drum support roller is sold individually. Most dryers require two. The tri-rings are included. This is a drum support roller for a dryer. It is a genuine replacement part. This part is sold separ...
$23.96
In Stock
Order within the next 10 hrs and your part ships today!
This dryer lint filter is designed to capture lint and debris during the drying cycle, helping maintain airflow and prevent potential fire hazards. Measuring approximately 12.5 inches wide by 10.5 inc...
$67.65
In Stock
Order within the next 10 hrs and your part ships today!
The Drive Belt is a 93 1/2" belt which wraps around the dryer drum to allow tension and movement. If broken the dryer will not turn properly, or there may be loud noises. The part is rated as "medium"...
$30.59
In Stock
Order within the next 10 hrs and your part ships today!
This thermostat may differ in appearance, but functions the same as the original part. This part controls the temperature of the inside of the dryer drum and prevents the dryer from overheating.
$45.26
In Stock
Order within the next 10 hrs and your part ships today!
This idler pulley assembly includes the pulley and bracket, ensuring proper tension on the dryer drive belt for smooth drum rotation. Compatible with several Whirlpool, KitchenAid, Maytag, Jenn-Air, A...
$34.56
In Stock
Order within the next 10 hrs and your part ships today!
Questions And Answers for WED5600XW0
Ask our experts a question about this model and we'll get back to you as soon as possible!
9 questions answered by our experts.
< Prev
1
2
Next >
Sort by:
Search filter:
Clear Filter
Your search term must have 3 or more characters.
Keep searches simple. Use keywords, e.g. "leaking", "pump", "broken" or "fit".
Sorry, we couldn't find any existing answers that matched.Try using some different or simpler keywords, or submit your new question by using the "Ask a Question" button above!
Derald
January 20, 2020
How do i access the pulleys for the dryer
For model number WED5600XW0
Hello and thank you for writing.
For your convenience, we have attached the link to our repair video. We hope this helps. Good luck with your repair.
https://www.youtube.com/watch?v=y011lnwfx6Q&feature=emb_title
9 peoplefound this helpful.
Was this helpful?
Thank you for voting!
Robert
February 18, 2020
Dryer makes a high squilling noise. Sometimes intermittent other times constant.
For model number WED5600XW0
Hello, Thank you for your question. Typically that is caused from a worn belt- PartSelect Number: PS11722115. You will need to look into this and possible replace it. We hope this helps.
1 personfound this helpful.
Was this helpful?
Thank you for voting!
Steve
November 7, 2019
I need to replace the door switch but i cannot figure out how to get the top off. The videos i have watched are for different models and do not look like my model. I could not figure out how the top was attached from the parts drawings i have seen. Thanks for any help you can provide.
For model number wed5600xw0
Hi Steve, thank you for your question. Much like in this installation video: https://youtu.be/95sXlRjCsXw. You would have to pop the clips that are holding your top to the rest of the cabinet. I hope that helps. Good luck with your repair.
Was this helpful?
Thank you for voting!
Jim
February 7, 2020
Have a felt type of gasket coming out from the back inside the drum. How do i fix this?
For model number WED5600XW0
Hi Jim. You will need to replace it with part number PS970088. Thank you for your question and good luck with your repair.
Hello and thank you for writing.
rinkle Guard is a cycle created to help alleviate wrinkles from setting into clothing. If you are unable to remove a load immediately, press Wrinkle Shield™ or Wrinkle Guard option to add from 30 to 140 minutes of periodic tumbling to help reduce wrinkling. On models with Wrinkle Shield™ with Steam, a short steam cycle is added after 60 minutes to help smooth out wrinkles.
The Wrinkle Shield™ cycle works when the normal drying cycle has ended. In other words, the dryer will turn off, then turn back on for 15 - 30 seconds, approximately every 5 to 10 minutes. This may appear that the dryer is turning back on by itself. Depending on how long your model allows, this could continue for up to 140 minutes. It will continue to turn off and turn on for the duration of the Wrinkle Shield™ setting. This is normal. We hope this helps. Please contact us anytime if you require further assistance.
Was this helpful?
Thank you for voting!
< Prev
1
2
Next >
✖
Ask a Question
Ask our experts a question on this model and we'll respond as soon as we can.
First I unplugged the dryer, then removed the back panel, this exposed most all of the wiring and I could see the heater coils. Not knowing what the problem was I started looking at the coils and could not see any broken parts. So then checked the thermal fuse for continuity I removed the two wires from it with a small pair of needle nose pliers, it was held in place by two screws, once they were removed the fuse came out easily, I checked continuity with a volt meter placing the meter on X1 Ohms and could not get a reading. I replaced with a new one and put it all back together the way I took it apart. Then I plugged it in and it worked first time, I now have warm dry clothes.
Cleaning the lint out of the whole machine took quite a bit of time--it was everywhere. Underneath the lint trap was a collection that ultimately ruined the thermal fuse where it restricted the air flow considerably.
Ascertaining the problem was the most time consuming part.
The actual repair was quite simple and didn't take but 15-20 minutes.


 Diagram and Parts List for Whirlpool Dryer")