




















WDF730PAYB6 Whirlpool Dishwasher - Instructions
Keep searches simple. Use keywords, e.g. "leaking", "pump", "broken" or "fit".
Water leak
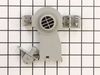
I watched the instructional videos that showed how to replace the inlet fill hose/water inlet a couple of times. The repair was exactly as shown. No trouble at all.
Parts Used:


-
J from HARPERSVILLE, AL
-
Difficulty Level:Very Easy
-
Total Repair Time:30 - 60 mins
-
Tools:Nutdriver, Pliers, Screw drivers, Wrench (Adjustable)
23 of 28 people
found this instruction helpful.
Was this instruction helpful to you?
Thank you for voting!
Leaking dishwasher
Removed old gasket. Cleaned the area and let dry. Aligned gasket, pressed into the groove. Corners are tricky, stretch and press to get a tight seal. Follow around appliance. Inital try, small leak. Adjusted seal second use no leak. 10/10 would recommend this part. Super easy self install.
Parts Used:

-
Amy from MIDDLEBURG, FL
-
Difficulty Level:Really Easy
-
Total Repair Time:15 - 30 mins
18 of 21 people
found this instruction helpful.
Was this instruction helpful to you?
Thank you for voting!
clean light flashing 7 times would not run
removed screws holding dishwasher to counter top,raised leveling pads,pulled dishwasher out, unplugged wiring,removed hold down nuts from inside dishwasher and installed new heater element, this was all easy the hard part was finding the code to reset the dishwasher there was no paperwork inside the dishwasher although there was an empty plastic holder.The code that worked for my model was with the door open to push the normal wash button then the high temp button three times as fast as you can within four seconds then close the door. It worked and reset the dishwasher which ran a short cycle then shut down as normal and is now working fine.After doing this select the beverage of your choice and relax. Hope this helps someone.
Parts Used:

-
Mark from Winchester, VA
-
Difficulty Level:Really Easy
-
Total Repair Time:30 - 60 mins
-
Tools:Screw drivers, Wrench (Adjustable), Wrench set
18 of 22 people
found this instruction helpful.
Was this instruction helpful to you?
Thank you for voting!
Upper Dishrack and tines rusting out
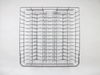
My KitchenAid dishwasher's upper dishrack had several places that were completing rusting out, just leaving the skins of the plastic coating in place. I ordered the upper dishrack - just the dishrack, none of the clips or other items shown in the schematic - and installed it pretty easily. One caution - this is JUST the upper dishrack. If you have two rows of tines that are clipped in and flip-flop back and forth on the left and right wider sides of the rack, you will need to order one or two pieces of part # PS 898500 as well. One of my tine rows was in salvageable shape, so I only needed to order one (in a second order upon discovering I it wasn't included). It wasn't difficult to figure out how the clips could come out and snap back in place. Just be careful, know that these are just plastic items and can break easily.
Parts Used:
-
Karen from Great Falls, VA
-
Difficulty Level:Easy
-
Total Repair Time:15 - 30 mins
-
Tools:Screw drivers
18 of 23 people
found this instruction helpful.
Was this instruction helpful to you?
Thank you for voting!
Scratches in Surface
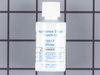
This product comes in a bottle with a brush like Liquid Paper. It goes on incredibly easy. A second coat might be needed. I wanted to prevent rust from setting in so I covered the scratches and dings. The paint is a little brighter since my washer is 10 years old but it still looks great.
Parts Used:
-
Michelle from Richardson, TX
-
Difficulty Level:Really Easy
-
Total Repair Time:Less than 15 mins
81 of 213 people
found this instruction helpful.
Was this instruction helpful to you?
Thank you for voting!
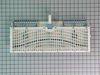
latch on silverware basket would't lock
-
David A from Show Low, AZ
-
Difficulty Level:Really Easy
-
Total Repair Time:Less than 15 mins
16 of 18 people
found this instruction helpful.
Was this instruction helpful to you?
Thank you for voting!
Lower spray arm worn out

-
Shawn from WEIRTON, WV
-
Difficulty Level:Really Easy
-
Total Repair Time:Less than 15 mins
15 of 17 people
found this instruction helpful.
Was this instruction helpful to you?
Thank you for voting!
wash pump stopped working

-
christopher from MOSES LAKE, WA
-
Difficulty Level:Very Easy
-
Total Repair Time:30 - 60 mins
14 of 14 people
found this instruction helpful.
Was this instruction helpful to you?
Thank you for voting!
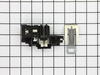
Dishwasher would not turn on and door did not latch properly.
New latch assembly improved door closure. However, door latch did not solve problem. There appears to be another problem.
Parts Used:
-
Robert from BOULDER, CO
-
Difficulty Level:Really Easy
-
Total Repair Time:30 - 60 mins
-
Tools:Screw drivers
15 of 18 people
found this instruction helpful.
Was this instruction helpful to you?
Thank you for voting!
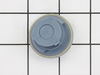
I did not lock the cap good enough and it fell off and melted
I just placed the cap back on, it worked great, fit fine and so glad I found this part. I was thinking of ways to McGyver it, thinking it would be impossible to find a new part. Glad i fount this site and the part.
Parts Used:
-
Crystal from Stansbury Park, UT
-
Difficulty Level:Really Easy
-
Total Repair Time:Less than 15 mins
14 of 15 people
found this instruction helpful.
Was this instruction helpful to you?
Thank you for voting!
Friction sleeve

-
Dave from PALM BAY, FL
-
Difficulty Level:Really Easy
-
Total Repair Time:15 - 30 mins
-
Tools:Screw drivers
14 of 15 people
found this instruction helpful.
Was this instruction helpful to you?
Thank you for voting!
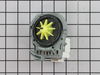
Water not draining from the dishwasher
I watched the video and this was the easiest repair ever. Took longer to disconnect and reinstall than it did to change out the pump. Highly recommended watching the video
Parts Used:
-
Frederick from BIG PRAIRIE, OH
-
Difficulty Level:Very Easy
-
Total Repair Time:30 - 60 mins
-
Tools:Screw drivers, Wrench (Adjustable)
13 of 13 people
found this instruction helpful.
Was this instruction helpful to you?
Thank you for voting!
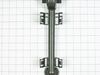
rubber flaps on the end of the manifold were worn - no pressure
Ordered the "right" part according to the diagram. The part I received was about 1/4" too long so I couldn't use the whole manifold. Took the rubber end off and - fortunately- it fit the old manifold. Dishwasher works fine now. Wish I could have ordered just the rubber valves.
Parts Used:
-
Paula from ANDOVER, MA
-
Difficulty Level:Easy
-
Total Repair Time:30 - 60 mins
13 of 13 people
found this instruction helpful.
Was this instruction helpful to you?
Thank you for voting!
No heat. Replaced thermostat
Was able to replace and repair without taking the dishwasher out. Thermostat is behind and to the left of the power junction box. Has 2 wires going to it. It is up against the bottom of tub. I used an angled mirror to see what I was doing. 1 small screw to detach and pull down thermostat. Be sure power is off before you start. Also reprogrammed defaults. Hit any button 1-2-3, 1-2-3, 1-2-3, fast and close door. Let it sit 15 min to run and re-set defaults. Now I have heat and dry dishes.
Parts Used:

-
Tim from BURTONSVILLE, MD
-
Difficulty Level:Really Easy
-
Total Repair Time:30 - 60 mins
-
Tools:Screw drivers, Socket set
13 of 14 people
found this instruction helpful.
Was this instruction helpful to you?
Thank you for voting!
Drain Pump was giving off a burning smell. When I pulled the dishwasher out it had some light smoke coming from the Drain Pump
Shut the power to the dishwasher off. Pulled unit out from under the counter top and raised the left hand side up for easy access. Disconnected the wiring, undid the clips, turned counter clockwise and removed. Reversed the order for installation and Connected the power. Ran several cycles successfully. Problem fixed. Burnt out water pump. Good as new if not better so far. Easy item search, Fast Shipping, Quality Part, Fair Pricing. Thank You Partselect.com
Parts Used:
-
Armand from N STONINGTON, CT
-
Difficulty Level:Really Easy
-
Total Repair Time:15 - 30 mins
-
Tools:Screw drivers
13 of 15 people
found this instruction helpful.
Was this instruction helpful to you?
Thank you for voting!