The tub dampening straps support the wash tub and reduce vibration by keeping the tub at the center of the cabinet. If your washer shakes and moves, or is making a loud banging noise during the wash c...
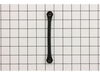
This is a washing machine agitator coupling kit. It connects the transmission drive shaft to the agitator base. It includes the couple, gasket, and bolt.
This part is the replacement inner tub base hub for your washer. It is made of metal and is approximately 15 inches in diameter. The inner tub base hub fits between the wash tub and the spin basket, a...
This switch keeps your washer from overflowing. It is responsible for shutting off the power to the fill valve and redirects the power to the timer to start the washing machine running once the corre...
This part is a replacement socket rod support for your washer. The socket rod support is found at the top of the washer frame in the front part of the washer. It supports the suspension rod, so the ro...
This part is the replacement water fill nozzle for your washer. It is white and tan in color, made of plastic, and is approximately 7 inches long and 4 inches wide. The water fill nozzle is also known...
This hose clamp kit contains two clamps. The smaller of the two is an inch in diameter while the larger of the two is two inches in diameter.
$22.95
Special Order
Questions And Answers for VBXR1070W1WW
Ask our experts a question about this model and we'll get back to you as soon as possible!
1 question answered by our experts.
< Prev
1
Next >
Sort by:
Search filter:
Clear Filter
Your search term must have 3 or more characters.
Keep searches simple. Use keywords, e.g. "leaking", "pump", "broken" or "fit".
Sorry, we couldn't find any existing answers that matched.Try using some different or simpler keywords, or submit your new question by using the "Ask a Question" button above!
Jody
October 16, 2025
The water fills instead of spinning out the water. Is the drain pump what i need?
For model number VBXR1070W1WW
Hello Jody, thank you for reaching out. You might need a new drain pump, but it is not the only possible cause of this problem. A clog in the drain pump filter or the drain hose can also prevent the water from spinning out. The drain pump for your model is part number PS8768445. We hope this information is useful!
first remove the front washer cover by finding the two pressure clips that hold it to the top lid. gently push the putty knife into the clips one at a time. this will raise and separate them from the front panel. the panel will tilt forward and u can now remove it from the bottom clips by sliding it up and out. to open the top cover u remove the two 1/4 in screws on the sides of the front panel and lift the top. make sure to secure it in place or unplug the single electrical connection at the rear and remove the whole top from the clips, its really simple and the most convenient mehtod. to remove the straps u can now get to all four without much interference. there are two size screw heads so make sure u have a nut driver or small socket set. after changing the straps i went to change the agitator coupling. the agitator pulled directly up without a problem. just put your two hands under and pull straight up with one good jolt. the plastic coupler has one bolt in the middle that came out easily with a small socket set. my problem arose when the plastic coupler would not come off the metal shaft. after a short time of pulling and prying i finally decided to cut it off. using a small hacksaw and taking my time i put two cuts into the coupler. they were on opposite sides and where vertical, running along the steel shaft. i could now split it in two and it came off very easily and quickly. now when putting on the new one make sure the splines line up. push as far down as u can then use the center bolt to seat the gear all the way down. the agitator also has to be lined up just right. it also has splines on the interior that allow it to line up with the coupler and merely push down until it reseats itself in place. replace the top of the washer and then the front panel. don't forget to rebolt the top panel to the frame. push the front panel in until it snaps into place. full replacement time was about 40 minutes and actually not bad with the right tools.
I placed both hands under the agitator 180 degrees apart, gave a quick jerk, and seperated the agitator from the coupling. With the agitator removed, use a socket and ratchet to remove the bolt holding the coupling to the spline. Remove the old coupling and slide the new one over the spline. Lightly tap on the coupling if necessary. Insert the bolt with the ratchet and slide the agitator back over the coupling and you are done.
Aside from getting the wet clothes and most of the water out,the toughest part of the job for me was to figure out how to get inside the machine. I nearly wrecked the thing trying to lift the top panel. After some frustration I removed the star-type screws on back of the control panel and found, tucked away neatly, the documentation/parts list complete with instructions on how to remove the FRONT panel. Once I got inside it was easy to locate the pump. I ran the drain cycle for a moment to see if the pump turned at all. The original had an exposed fan so it was easy to see that indeed the motor was not turning. I inspected all the hose and electrical connections to make sure I had the tools I'd need and the savvy to replace the part(s) if I could locate them. I'm not much of a web-head, so I was a little surprised when I typed G.E. appliances and the search took me to partselect.com where I was pretty much coached through the procedure before I even ordered the part. The box arrived ahead of schedule (yay) and when I looked at the pump it didn't look much like the one I was replacing. But then I realized it was the same thing just ten years more advanced. I used a small pair of vise grips to pinch and lock the pipe clamps open. I know there is a plier made for this, but... Anyways, after loosening the clamps and sliding them away from the pump I pulled the hoses off and let the last of the rinse water still in them run down my shirt sleeve to my elbow. (optional, not recommended) Thus refreshed I then rummaged through my socket set and found what I needed to remove the 2 sheet metal mounting screws and disconnected the 2 power leads. I removed the faulty pump and proudly showed it to my wife. Unimpressed, she asked how much longer. I quickly reversed the procedure to install the new unit and confidently piled in a load of laundry. The cycle completed just fine and has done so since. I will and have recommmended partselect.com to friends and will use it again for sure.