




















TFX22XPDAWW General Electric Refrigerator - Instructions
Keep searches simple. Use keywords, e.g. "leaking", "pump", "broken" or "fit".
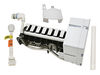
icemaker stripper fall a part
instalation was very easy - but the part was 3/4 inch to long and a 1/32 inch to wide.Trimmed it with the "faithfull"
Dremel and it works!The instalation part of the "job" was less then 10 min.
Dremel and it works!The instalation part of the "job" was less then 10 min.
Parts Used:
-
Ted from Harrisonburg, VA
-
Difficulty Level:Easy
-
Total Repair Time:15 - 30 mins
-
Tools:Screw drivers
3 of 4 people
found this instruction helpful.
Was this instruction helpful to you?
Thank you for voting!
Ice maker arm disconnected from frame causing problems.
The icemaker arm disconnected from the metal frame. This caused the icemaker to cycle and the heater to come on and stay on until the plastic parts melted causing a mess and stink. This action melted the ice and then the water fell through the frozen items in the freezer and refreezed in the lower portion. OK, I remover the dead icemaker and tossed it away. I installed the new icemaker and the wiring harness didn't fit right (way to long). I retrieved the old icemaker and removed the wiring harness from it. I removerd the new ice maker and installed the old wiring harness to the new icemaker. I then installed the new icemaker, plugged it in and turned on the power. No water, I ordered the dual solenoid water valve, installed it with difficulty (another story) the turned on the power. I reinstalled the ice bin and found it didn't fit. The icemaker was to low and couldn't be adjusted, 1/4" higher would have been great. I shoved in the bin anyway, I was out of ice for my scotch, and it started making ice.
Parts Used:
-
Kenneth from Callaway, FL
-
Difficulty Level:A Bit Difficult
-
Total Repair Time:1- 2 hours
-
Tools:Pliers, Screw drivers, Wrench (Adjustable)
5 of 10 people
found this instruction helpful.
Was this instruction helpful to you?
Thank you for voting!
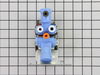
Leaking water control valve
Unplugged electrical and turned off water at source. Removed back cover of refrigerator. Removed one bracket screw holding water valve. Pulled element out six to nine inches and disconnected water line to the unit. Removed electrical and water lines from old valve. Marked each line for easy reassembly of new valve. Turned water back on and tested for leaks. The whole process was very easy. Service from PartSelect .com was very good.
Parts Used:
-
Thomas from Venice, FL
-
Difficulty Level:Really Easy
-
Total Repair Time:30 - 60 mins
-
Tools:Wrench set
3 of 4 people
found this instruction helpful.
Was this instruction helpful to you?
Thank you for voting!
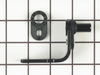
After replacing the door seal we saw that the door still did not seal because the lower hinge cam was worn.
Propped the door up with wood so we could change it without removing the whole door.
Removed &Replaced the cam and bracket quite easily. It did require 2 people, one to help hold the door while the other did the work.
Removed &Replaced the cam and bracket quite easily. It did require 2 people, one to help hold the door while the other did the work.
Parts Used:
-
June from Maple Valley, WA
-
Difficulty Level:A Bit Difficult
-
Total Repair Time:15 - 30 mins
-
Tools:Nutdriver, Pliers, Screw drivers
3 of 4 people
found this instruction helpful.
Was this instruction helpful to you?
Thank you for voting!
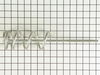
The existing auger was rusty and made the ice taste bad.
Removed the screws holding the faceplate. Then couldn't change out the auger so needed to remove all of the other screws in the unit and fully disassemble the icemaker unit. Should have marked the parts as I took them apart as I needed to find a parts diagram on-line to reassemble. Not sure that I put them back together right as the unit will not dispense whole ice cubes as it did previously.
Parts Used:
-
Scott from martinez, CA
-
Difficulty Level:A Bit Difficult
-
Total Repair Time:15 - 30 mins
-
Tools:Screw drivers
5 of 10 people
found this instruction helpful.
Was this instruction helpful to you?
Thank you for voting!
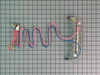
the defrost heater went out cause my freezer to freeze up I changed out the heater and it was simple and repaired
I had to defrost the freezer again before I could even start the replacement We unplub the old wiring harness took out two screws removed the old heater put in the new one replaced the srews and reconnected the harness we were done.
Parts Used:
-
DARWIN from HECTOR, AR
-
Difficulty Level:Really Easy
-
Total Repair Time:15 - 30 mins
-
Tools:Nutdriver, Screw drivers
4 of 7 people
found this instruction helpful.
Was this instruction helpful to you?
Thank you for voting!
Ice maker didn't work.
Replaced icemaker assembly. Only 3 Phillips screws to remove the old assembly. Pretty much an exact swap. Was easy to replace but the connecting cable on the new replacement assembly wasn't very easy to make fit. Had to force it into a location that would be out of the way and allow everything to operate properly. That connecting cable should be more flexible and adapt to the fridge a little more friendly.
Parts Used:
-
Amanda from New Albany, MS
-
Difficulty Level:Easy
-
Total Repair Time:15 - 30 mins
-
Tools:Screw drivers
3 of 4 people
found this instruction helpful.
Was this instruction helpful to you?
Thank you for voting!
water dispensor leak
The water dispenser on my GE refrig started leaking for about 5 seconds after release of the switch. I replaced the filter and the combination ice/water solenoids. Though this did not solve my problem I did troubleshoot more. I located the water reservoir behind the vegetable drawer. The reservoir mount had broken off. The reservoir had flipped so the water connection was no longer at the top. This was the cause for the continual leak. After mounting the reservoir correctly, the water leak stopped.
Parts Used:
-
wanda from fredericksburg, VA
-
Difficulty Level:Easy
-
Total Repair Time:15 - 30 mins
-
Tools:Nutdriver, Screw drivers
3 of 4 people
found this instruction helpful.
Was this instruction helpful to you?
Thank you for voting!
Water was dripping from the rear of refrigerator.
I removed the nuts holding the cover to the back of the refrigerator.
I removed the main water line to the part.
I then removed the nut holding the old water and valve bracket assembly to the refrigerator.
I removed the wiring harness from the old part and attached it to the new one.
I pressed down on the release to the hoses, pulled them out, and reattached them to the new part.
I reattached the part to the refrigerator.
I reattached the main water line back to the part.
I reattached the cover to the back of the fridge.
I tested the icemaker and water dispenser--and everything worked fine.
And, the best thing was, there was no puddle of water at my feet! Such an easy fix!
I removed the main water line to the part.
I then removed the nut holding the old water and valve bracket assembly to the refrigerator.
I removed the wiring harness from the old part and attached it to the new one.
I pressed down on the release to the hoses, pulled them out, and reattached them to the new part.
I reattached the part to the refrigerator.
I reattached the main water line back to the part.
I reattached the cover to the back of the fridge.
I tested the icemaker and water dispenser--and everything worked fine.
And, the best thing was, there was no puddle of water at my feet! Such an easy fix!
Parts Used:
-
Doyle from Richmond, VA
-
Difficulty Level:Really Easy
-
Total Repair Time:15 - 30 mins
-
Tools:Wrench (Adjustable)
3 of 4 people
found this instruction helpful.
Was this instruction helpful to you?
Thank you for voting!
The bottom hinge broke
First, I removed all items on the door shelves and the shelves themselves to reduce the weight of the door. The door came off by itself because the bottom hinge had broken. Then I placed the door horizontal on the kitchen floor to have easier access to the bottom of the door. I had a piece of blanket under the door to prevent any scratch. I then removed two screws holding the door closing cam and shim and replaced them with the new parts. Next, I removed the base grill to have easy access to the old hinge assembly on the refrigerator itself. All I had to do was grab it firmly at either end and pull it forward. I replaced the hinge assembly with the new one. I removed the cover on the top hinge assembly and removed the two screws that secured that hinge (I was not able to put the door back without removing the top hinge assembly). All down hill from this point. Time to reinstall the door, aligning the bottom of the door cam over the hinge assembly and setting the door down on it making sure the door sets on the hinge assembly cams. To the top of the refrigerator. reinstalled the top door hinge assembly and cover (I had to make sure the door was standing straight vertically before I tightened the nuts), I also put a small amount of white grease into both the top and bottom hinges.
Parts Used:
-
W from Northbrook, IL
-
Difficulty Level:Easy
-
Total Repair Time:15 - 30 mins
-
Tools:Screw drivers, Wrench set
3 of 4 people
found this instruction helpful.
Was this instruction helpful to you?
Thank you for voting!
lights blown out

-
Gerald from WINTERVILLE, GA
-
Difficulty Level:Very Easy
-
Total Repair Time:Less than 15 mins
6 of 14 people
found this instruction helpful.
Was this instruction helpful to you?
Thank you for voting!
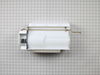
The feeder was rusted and would get all over the ice
Opened the box, removed the ice maker, removed the old ice maker from freezer, empty drawer of ice into the sink( the hardest part of the job) Phillips screw driver and removed the four screws holding the plastic front on and installed it on the new ice maker. Put it in freezer and I am back in business . This is real easy
Parts Used:
-
David from WINDHAM, NH
-
Difficulty Level:Really Easy
-
Total Repair Time:15 - 30 mins
-
Tools:Screw drivers
2 of 2 people
found this instruction helpful.
Was this instruction helpful to you?
Thank you for voting!
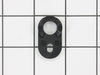
Replacing the Hinge Cam Riser (GE Part # WR02X10140) - it was brooken
I have just followed the instructions on the youtube video: It is really easy. I did. Thank you
Parts Used:
-
Itamar from SARASOTA, FL
-
Difficulty Level:Easy
-
Total Repair Time:15 - 30 mins
-
Tools:Nutdriver, Screw drivers
2 of 2 people
found this instruction helpful.
Was this instruction helpful to you?
Thank you for voting!
Ice Maker stopped making ice.
Did the repair just as the instruction said, once I read it. The part I didn't read was that if the plug was under the ice maker, you had to take the wire out of the clip on the side. So, had to dismount ice maker, unclip wire, remount maker, plug it in. Still under 30 minutes. Thank you.
Parts Used:
-
Hugh from LADSON, SC
-
Difficulty Level:Really Easy
-
Total Repair Time:15 - 30 mins
-
Tools:Nutdriver
2 of 2 people
found this instruction helpful.
Was this instruction helpful to you?
Thank you for voting!
Door would drop down when opened
Removed the door by removing the top hinge and lifting it off the broken bottom hinge/cam assembly. Removed the broken hinge/cam assembly found out why the cam broke the doorstop was bent so I had to order the doorstop also. The ordering of the parts was so easy. They shipped them on Monday and they arrived the next day. I will use Parts Select again
Parts Used:
-
Donald from Lauderhill, FL
-
Difficulty Level:Really Easy
-
Total Repair Time:15 - 30 mins
-
Tools:Nutdriver, Pliers
2 of 2 people
found this instruction helpful.
Was this instruction helpful to you?
Thank you for voting!