




















RF315PXGT1 Whirlpool Range - Instructions
Keep searches simple. Use keywords, e.g. "leaking", "pump", "broken" or "fit".
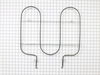
Broiler element burned out
After doing a YouTube search. I successfully completed the repair by easily diagnosing the issue with the element.
I watched a video about 5 most common problems with whirlpool broiler elements.
The first being to inspect the element for damage. I found a small section that appeared to be rough and had a raised bump.
I decided to order a new element because the oven is older and it wouldn’t hurt to install a new one even if this wasn’t the issue.
Once the part arrived, which it did quickly, I followed the video instructions. It was easy and straight forward. I completed the task in under thirty minutes. It was very simple and I now have a functional broiler element.
I watched a video about 5 most common problems with whirlpool broiler elements.
The first being to inspect the element for damage. I found a small section that appeared to be rough and had a raised bump.
I decided to order a new element because the oven is older and it wouldn’t hurt to install a new one even if this wasn’t the issue.
Once the part arrived, which it did quickly, I followed the video instructions. It was easy and straight forward. I completed the task in under thirty minutes. It was very simple and I now have a functional broiler element.
Parts Used:
-
chris from HILTON HEAD, SC
-
Difficulty Level:Really Easy
-
Total Repair Time:15 - 30 mins
-
Tools:Screw drivers
3 of 5 people
found this instruction helpful.
Was this instruction helpful to you?
Thank you for voting!
Broken Door Handle
Remove the side covers. Remove the 2 screws on the back side of the door, hold on to the glass and front panel, they will fall out. remove the 2 screws holding the handle. Put the new handle in place and insert screws, note the old handle had metal inserts that are threaded, the new does not. Had to push very hard and let the screws bite into the plastic.
Parts Used:

-
Daniel from BROOKLYN, NY
-
Difficulty Level:Really Easy
-
Total Repair Time:15 - 30 mins
-
Tools:Screw drivers
2 of 2 people
found this instruction helpful.
Was this instruction helpful to you?
Thank you for voting!
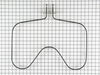
Old lower element fell apart
1. Unplug the power
2. Unscrew the two screws that hold the element
3. Pull the element out a little to expose the wires.
4. Gently pull off each wire (best done with needle nose) MAKE SURE THE WIRES DONT FALL INTO THE BACK OF THE OVEN.
5. Firmly seat wires back onto new element and replace screws
6. Bake stuff!
2. Unscrew the two screws that hold the element
3. Pull the element out a little to expose the wires.
4. Gently pull off each wire (best done with needle nose) MAKE SURE THE WIRES DONT FALL INTO THE BACK OF THE OVEN.
5. Firmly seat wires back onto new element and replace screws
6. Bake stuff!
Parts Used:
-
Matthew from MIDDLETOWN, CT
-
Difficulty Level:Very Easy
-
Total Repair Time:Less than 15 mins
-
Tools:Pliers, Screw drivers
2 of 2 people
found this instruction helpful.
Was this instruction helpful to you?
Thank you for voting!
LIght switch on oven door was broken
Turned off power at circuit breaker. Removed 4 phillips screws from area over oven door. Pulled control panel out and twisted to clear top rail. Pulled two wires off of old switch.Pulled old switch through panel. Inserted new switch. Attached the two wires to new switch. Replaced panel and inserted four screws. Turned on power - it works!
Parts Used:

-
James from Sequim, WA
-
Difficulty Level:Easy
-
Total Repair Time:Less than 15 mins
-
Tools:Screw drivers
2 of 3 people
found this instruction helpful.
Was this instruction helpful to you?
Thank you for voting!
I was trying to remove the oven door so I could clean the glass. Spills had run down between the layers of glass.
This oven probably was manufactured in the '60s when the house was built. The door doesn't just pull off like the newer models. These pins fit into small holes on the oven hinges. I inserted the pins and lifted the door to a 45 degree angle, before pulling the door completely off. Now that turned out to be the easy part. I then proceeded to completely dismantle the door. It actually has 4 glass layers which had to be cleaned individually. The hardest part of all was actually remembering how to put it back together again. I put the door back on just as I had removed it, then took out the pins, and I was finally done! This was not an easy project, BUT the results look great.
Parts Used:
-
Karen from Oklahoma City, OK
-
Difficulty Level:Difficult
-
Total Repair Time:More than 2 hours
-
Tools:Screw drivers
3 of 6 people
found this instruction helpful.
Was this instruction helpful to you?
Thank you for voting!
Fire Damaged Control Board and Panel
A range top grease fire destroyed the control board and blackened the contol panel on my Whirlpool range/oven. Both replacement parts came within 3 days and the repair was pretty straightforward. I removed the back panel, diconnected all wiring connectors to the control board, range conrol rheostats and LED indicator lights, and removed the blackened control panel. The replacement parts fit perfectly and the entire reassembly took less than 30 minutes. The oven/range looks brand new and the entire repair cost less than $400. Thanks Parts Select.
Parts Used:

-
Brad from Miami, FL
-
Difficulty Level:Easy
-
Total Repair Time:30 - 60 mins
-
Tools:Screw drivers
9 of 24 people
found this instruction helpful.
Was this instruction helpful to you?
Thank you for voting!
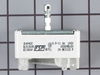
Burner didn’t work right
-
Ralph from MARION, OH
-
Difficulty Level:Really Easy
-
Total Repair Time:30 - 60 mins
-
Tools:Screw drivers
2 of 3 people
found this instruction helpful.
Was this instruction helpful to you?
Thank you for voting!
the fastener became loose and dropped into the stove
This is a cook stove that is used 5 months a year. We have not fixed it yet because we are now in Florida the stove is in New York. We ordered that part just before we left NY for FL so the repair will be done in June of 2021.
George Clark
George Clark
Parts Used:
-
George E from OCALA, FL
-
Difficulty Level:Really Easy
-
Total Repair Time:30 - 60 mins
2 of 3 people
found this instruction helpful.
Was this instruction helpful to you?
Thank you for voting!
could not control the temp of the element
take off back panel, simply unplug the old switch and plug in the new one. Simple
Parts Used:
-
Steve from GREENBRIER, TN
-
Difficulty Level:Very Easy
-
Total Repair Time:Less than 15 mins
-
Tools:Nutdriver, Screw drivers
2 of 3 people
found this instruction helpful.
Was this instruction helpful to you?
Thank you for voting!
burner plug broken
Cut wires removed old plug,new plug in wire nuts on.Put heat on shrink tube done.
Less than 30 min.
Less than 30 min.
Parts Used:

-
Norman from Newport, NC
-
Difficulty Level:Really Easy
-
Total Repair Time:15 - 30 mins
-
Tools:Pliers, Screw drivers
2 of 3 people
found this instruction helpful.
Was this instruction helpful to you?
Thank you for voting!
back burner would not heat
removed the heating element then removed the screw that holds the plug in on cut the two wires and reconnect the two wires and put back
Parts Used:
-
wayne from whittemore, IA
-
Difficulty Level:Really Easy
-
Total Repair Time:15 - 30 mins
-
Tools:Screw drivers
3 of 6 people
found this instruction helpful.
Was this instruction helpful to you?
Thank you for voting!
8" FRONT BURNER STAYED ON HIGH HEAT/WOULD NOT REDUCE TEMPERTURE
REMOVE BACK OF RANGE, REMOVE BURNER KNOB. REMOVE SWITCH CONTROL REMOVE WIRES. REPLACE WIRES ON NEW SWITCH. INSERTED ALL WIRES REPLACE NEW SWITCH RE REPLACE ALL SCREWS. CHECK SWITCH. TURN BRAKER BACK ON. CHECK SWITCH FUNCTION. ALL IS FINE. PUT BACK ON RANGE SCREW IT IN PLACE. MOVE RANGE BACK IN IT POSITION.
Parts Used:
-
RICHARD from DELTONA, FL
-
Difficulty Level:Really Easy
-
Total Repair Time:15 - 30 mins
-
Tools:Screw drivers
1 person
found this instruction helpful.
Was this instruction helpful to you?
Thank you for voting!
outer glass on door broke

-
Marc from FOXBORO, MA
-
Difficulty Level:Very Easy
-
Total Repair Time:15 - 30 mins
-
Tools:Screw drivers
2 of 4 people
found this instruction helpful.
Was this instruction helpful to you?
Thank you for voting!
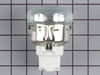
Worn/Bulb Socket
It was alittle difficult at 1st to remove the clips that held in the socket. But once out everything went smoothly.
Parts Used:
-
JOSEPH from COON RAPIDS, MN
-
Difficulty Level:Really Easy
-
Total Repair Time:Less than 15 mins
-
Tools:Screw drivers
2 of 4 people
found this instruction helpful.
Was this instruction helpful to you?
Thank you for voting!
surface element out
Unplug from outlet and top remove back section of range and unplug wiring from switch, remove knob and unscrew two screws and remove old switch. Install new switch reinstall screws and plug switch plugs into new switch (will only go on the correct way). reattach back and plug into outlet. All done and surface element works perfectly.
Parts Used:
-
Edward from TAYLORS, SC
-
Difficulty Level:Really Easy
-
Total Repair Time:15 - 30 mins
-
Tools:Screw drivers
1 person
found this instruction helpful.
Was this instruction helpful to you?
Thank you for voting!