




















RF302BXDQ0 Whirlpool Range - Instructions
Keep searches simple. Use keywords, e.g. "leaking", "pump", "broken" or "fit".
Bottom element was burned out
I removed two screws, pulled it out a few inched and unpluged two wires. I then plugged the two wires into the new element slowly slid the wires and element back into place and put the two screws back in... and it worked perfectly. I did it all in less than five mins. And I am a 53 year old woman.No man was required.
Parts Used:

-
Veronica from Brunswick, GA
-
Difficulty Level:Really Easy
-
Total Repair Time:Less than 15 mins
-
Tools:Screw drivers
1 person
found this instruction helpful.
Was this instruction helpful to you?
Thank you for voting!
Bake element blew
remove all element that is held with two screws and install the new one. easy fix! and a lot cheaper than a new stove!
Parts Used:
-
Mark from Natchez, MS
-
Difficulty Level:Really Easy
-
Total Repair Time:Less than 15 mins
-
Tools:Screw drivers
1 of 2 people
found this instruction helpful.
Was this instruction helpful to you?
Thank you for voting!
Bake element sparked & smoked, then wouldn't work.
Turned off circuit breaker for oven. Unscrewed the 2 screws that held the element in place on the back wall of the oven. Save those screws! Pulled the element out from the wall. Disconnected the 2 wires. Attached the wires for the new element and then screwed the new element into the back wall. Flipped the circuit back on and the oven was fixed.
Parts Used:
-
Karen from Snellville, GA
-
Difficulty Level:Really Easy
-
Total Repair Time:Less than 15 mins
-
Tools:Screw drivers
1 of 2 people
found this instruction helpful.
Was this instruction helpful to you?
Thank you for voting!
Clip was broken, plug in connector end bad on burner
lifted up burner and pulled it free from its connection, then removed drip pan. used my cordless drill to drill out broken stabilizer clip. cleaned up chips from the drill process before installing new clip. installed clip with enclosed screw and nut. I then installed the new burner by lining it up with the connection under the cook top pushed it place and lowered it into the stabilizer clip. Then I turned the burner on to try it out, but I waited for about one hour before turning on the burner because it was cold from being outside.
Parts Used:

-
Phillip from Pekin, IL
-
Difficulty Level:Really Easy
-
Total Repair Time:Less than 15 mins
-
Tools:Screw drivers
1 of 2 people
found this instruction helpful.
Was this instruction helpful to you?
Thank you for voting!
bottom burner in oven not working
Super simple, and the part arrived less than 48 hours after buying it online. I turned off the breaker to the oven and unscrewed the burner at the bracket holding it to the back wall of the oven. After pulling out the wires, all you do is tug at the two connectors and they detach. Just slide the new burner's connectors in, then screw it back into place. My arms aren't quiet long enough to reach all the way back there, so I got my son to help and I held the flashlight for him. Had it done before my husband got home from work!
Parts Used:
-
Erica from Merced, CA
-
Difficulty Level:Really Easy
-
Total Repair Time:Less than 15 mins
-
Tools:Screw drivers
1 of 2 people
found this instruction helpful.
Was this instruction helpful to you?
Thank you for voting!
The baking element had burned out
First, turn the breaker off to the oven, you don't want to electrocute yourself. There are two screws that hold the element to the back wall of the oven, undo those and pull the element towards you. There are two terminals at each end of the element, take these off, then reattach to the new element and screw back in to the back wall of the oven. This process takes maybe all of five minutes
Parts Used:
-
Robert from Abingdon, MD
-
Difficulty Level:Really Easy
-
Total Repair Time:Less than 15 mins
-
Tools:Screw drivers
1 of 2 people
found this instruction helpful.
Was this instruction helpful to you?
Thank you for voting!
Stove Burner wouldn't heat up

-
Donna from Sandwich, MA
-
Difficulty Level:Really Easy
-
Total Repair Time:Less than 15 mins
1 of 2 people
found this instruction helpful.
Was this instruction helpful to you?
Thank you for voting!
Burners needed replacing
Pulled out the old burners and put in the new ones.
Parts Used:
-
Alene from INDIANAPOLIS, IN
-
Difficulty Level:Very Easy
-
Total Repair Time:Less than 15 mins
1 of 2 people
found this instruction helpful.
Was this instruction helpful to you?
Thank you for voting!
the top of baked goods were not baking
turn off electric breaker, unscrew the 2 screws unplug the 2 ends replace old element with new repeat previous steps but unfortunately the control panel was also failing and that item has been discontinued.
Parts Used:
-
Myrna from Fowler, CO
-
Difficulty Level:Really Easy
-
Total Repair Time:15 - 30 mins
-
Tools:Screw drivers
1 of 2 people
found this instruction helpful.
Was this instruction helpful to you?
Thank you for voting!
Burner broken
I removed the block, cut and spliced the wires to the new block and installed the burner. I used the new style block kit and saved about $30. It worked great!
Parts Used:
-
J. R. from Ellettsville, IN
-
Difficulty Level:Really Easy
-
Total Repair Time:15 - 30 mins
-
Tools:Screw drivers
1 of 2 people
found this instruction helpful.
Was this instruction helpful to you?
Thank you for voting!
Oven not heating with bake element, broil element working OK.
Locate and shut off 220 volt breaker to Stove/Oven. Remove baking racks from oven. Use phillips screw driver to remove two phillip head screws holding bottom baking element in place. Slowly pull out element/wires and use volt meter to check for presence of voltage. Remove wires from element by pulling off female spade connector, push wire connector onto new element, carefully push wiring and element end thru rear opening and secure with the two phillip head screws. Replace baking racks, turn 220 volt source back on and test element to a high temperture, leave oven door open, new element will smoke slightly and create a burning odor, so take a few minutes to break in the new element. You're now readly to bake.
If you don't have a volt meter, turn stove/oven "ON" with lights indicating that stove/oven is ON, turn circuit breaker off and watch indicator lights go "OFF" when circuit breaker is tripped.
If you don't have a volt meter, turn stove/oven "ON" with lights indicating that stove/oven is ON, turn circuit breaker off and watch indicator lights go "OFF" when circuit breaker is tripped.
Parts Used:
-
Joe from Moore, SC
-
Difficulty Level:Easy
-
Total Repair Time:15 - 30 mins
-
Tools:Screw drivers
1 of 2 people
found this instruction helpful.
Was this instruction helpful to you?
Thank you for voting!
wire came loose and shorted out
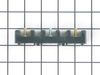
Ordering the part online was easy. It arrived in a timely manner. I found a terrific video online showing how to install the terminal. It was so easy. Thank you for the great instructional video.
Parts Used:
-
Elizabeth from HOUSTON, TX
-
Difficulty Level:Really Easy
-
Total Repair Time:30 - 60 mins
-
Tools:Pliers, Screw drivers
1 of 2 people
found this instruction helpful.
Was this instruction helpful to you?
Thank you for voting!
Three of four electric coils won't turn on
I took out the coils manually by pulling them out with slight pressure. Then I lift the hood by first unscrewing the four screws. I have never done anything like this before just intuitive sense to locate the screws that needed to be loosened. Afterwards I remember placing something underneath like a piece of 2x4 wood block to act as support to hold the hood open so I can work on the coils. The parts I got are exactly the same as those I am replacing so I just copied the connection and voila my electric range is working like new. Well of course before I touched anything, I made sure I turned off the main switch and that nobody switches it back on without my knowledge. Thanks for providing the parts, I just saved myself from buying a $600 electric range.
Parts Used:
-
Arsenio from Beaverton, OR
-
Difficulty Level:Really Easy
-
Total Repair Time:30 - 60 mins
-
Tools:Pliers, Screw drivers
1 of 2 people
found this instruction helpful.
Was this instruction helpful to you?
Thank you for voting!
Dead Short In Baking Element
Disconnect power to the oven at circuit breaker. Most important confired power removed by turning on buner,also with electrial meter. Remove hex screw. Pulled purner forward approx 3 inches remove the two wires to burner element . Installed new burner reverse rotation . Returned power to oven,all was well no problems. Not to sure of burner wattage on old and new unit,as two burners are avaiable for this unit. All ok . Thanks to parts select for speedy part needed
Parts Used:
-
JIMMY from GRAY, TN
-
Difficulty Level:Easy
-
Total Repair Time:30 - 60 mins
-
Tools:Nutdriver, Screw drivers
1 of 2 people
found this instruction helpful.
Was this instruction helpful to you?
Thank you for voting!
The Problem Was That The Plug Was Gone It Fell Down Out Of The Bracket
I took the old wires and plug off and replaced it with the new block it works fine
Parts Used:
-
Elnora from Brundidge, AL
-
Difficulty Level:Easy
-
Total Repair Time:15 - 30 mins
-
Tools:Screw drivers
1 of 2 people
found this instruction helpful.
Was this instruction helpful to you?
Thank you for voting!