




















RE960PXVW5 Whirlpool Range - Instructions
Keep searches simple. Use keywords, e.g. "leaking", "pump", "broken" or "fit".
bottom heating element was bad
Two screws held the element in place, removed the screws and pulled the piece out.
Back of piece has two wires attached, unplug them then attach the new element and replace the two screws to remount.
First make sure the breaker to the range is turned off before starting the repair.
Back of piece has two wires attached, unplug them then attach the new element and replace the two screws to remount.
First make sure the breaker to the range is turned off before starting the repair.
Parts Used:

-
glenn from greenwood, DE
-
Difficulty Level:Easy
-
Total Repair Time:Less than 15 mins
-
Tools:Screw drivers
4 of 4 people
found this instruction helpful.
Was this instruction helpful to you?
Thank you for voting!
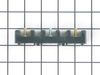
Loose terminal caused block to overheat and break
Removed all terminals and block mounting screws. Repaired one burnt terminal and reassembled. Replacement part was an exact fit and reassembly whnet very well.
Parts Used:
-
Dana from Black Mountain, NC
-
Difficulty Level:Really Easy
-
Total Repair Time:Less than 15 mins
-
Tools:Nutdriver, Screw drivers
6 of 10 people
found this instruction helpful.
Was this instruction helpful to you?
Thank you for voting!
Electric stove burners working intermitantly.
replaced old, worn blocks with new style surface plug in block kits - all 4 burners. Completely resolved the problem at very low cost (less than $50.00).
Parts Used:

-
Michael from St. Louis, MO
-
Difficulty Level:Really Easy
-
Total Repair Time:15 - 30 mins
-
Tools:Pliers, Screw drivers
4 of 4 people
found this instruction helpful.
Was this instruction helpful to you?
Thank you for voting!
replacing the hold down clip for the burner
Started out removing the old clip that didnt hold burner element down anymore. It was a bit rough, since i was taking off a rivet. I used the screwdriver to carefully wedge the edges of the rivet upward so that i could get the wire cutters underneath it enough to snap the head off. After some fanagling for about 20 minutes, i popped it off. The rest of the repair went like cake, and i am soooo thankful that the replacement part i ordered from you included a screw and a nut. Next time, if there is a next time, this repair could be done in 2 minutes. THANK YOU FOR SAVING THANKSGIVING AND A $100 REPAIRMAN SERVICE COST FOR A $10 PART!!!
Parts Used:

-
Roseanne from North Syracuse, NY
-
Difficulty Level:A Bit Difficult
-
Total Repair Time:15 - 30 mins
-
Tools:Pliers, Screw drivers
5 of 7 people
found this instruction helpful.
Was this instruction helpful to you?
Thank you for voting!
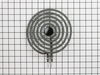
Intermittant heating, arcing in the socket
Simple to do. Remove old element, remove screw holding socket, cut the socket wires with 2 inches to spare, assemble the newsocket and wires with heat shrink tubing, strip range wires, apply the wire nuts as instructed and shrink the tubning with a heat gun.
Screw on the socket to the range. Shut the lid and install the element.
The replacemnet screw is thicker than the original one, so you might want to drill out the hole very slightly. I did not but the resistance was high on getting the screw fully seated.
Works great
Screw on the socket to the range. Shut the lid and install the element.
The replacemnet screw is thicker than the original one, so you might want to drill out the hole very slightly. I did not but the resistance was high on getting the screw fully seated.
Works great
Parts Used:
-
David from Jefferson Hills, PA
-
Difficulty Level:Really Easy
-
Total Repair Time:15 - 30 mins
-
Tools:Screw drivers
5 of 7 people
found this instruction helpful.
Was this instruction helpful to you?
Thank you for voting!
two large burners wouldn't heat or would smoke even after cleaning
i really wanted a new stove, but budget wouldn't permit; so just had to insert the new ones and they work great with level cooking.
Parts Used:
-
Lois from KNOXVILLE, TN
-
Difficulty Level:Really Easy
-
Total Repair Time:Less than 15 mins
5 of 7 people
found this instruction helpful.
Was this instruction helpful to you?
Thank you for voting!
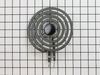
Burners were becoming weak. Home Depot and Lowes did not have replacements.
Remove burners using my hands and replace new burners using my hands.
Parts Used:
-
James from EDGEWOOD, MD
-
Difficulty Level:Very Easy
-
Total Repair Time:Less than 15 mins
4 of 4 people
found this instruction helpful.
Was this instruction helpful to you?
Thank you for voting!
did not heat properly
First I removed the two screws that hold the element in place. I then pulled the element out about 3 inches and disconnected the two wires, Removed the old element and installed the new one
Parts Used:
-
Ronald from Powhatan, VA
-
Difficulty Level:Really Easy
-
Total Repair Time:Less than 15 mins
-
Tools:Screw drivers
5 of 7 people
found this instruction helpful.
Was this instruction helpful to you?
Thank you for voting!
oven unit burned up.
simply turned off power. took old element out, held in by two screws. pulled out far enough to take off wires. removed and replaced with new element. that was a purfect fit. Works great.
Parts Used:
-
Jerry from Mt. Gilead, OH
-
Difficulty Level:Really Easy
-
Total Repair Time:Less than 15 mins
-
Tools:Screw drivers
4 of 5 people
found this instruction helpful.
Was this instruction helpful to you?
Thank you for voting!
burned out element
Removed 2 screws holding element in place. Pulled out element to access two wires. Slid off the old element connectors. Placed new element in place and attached the two wires. Pushed it back into place and replaced the screws. Done in 10 min max.
Parts Used:
-
Lee from Laceys Spring, AL
-
Difficulty Level:Easy
-
Total Repair Time:Less than 15 mins
-
Tools:Screw drivers
4 of 5 people
found this instruction helpful.
Was this instruction helpful to you?
Thank you for voting!
Inner door glass cracked in 3 places
Removed 3 screws on bottom edge of door,2 screws on top edge of door. Outside of door comes off. Then use a 1/4 nut driver and remove glass window supports until you get to the inner door glass. Reverse to assemble. Gasket was okey.
Parts Used:

-
John from Emmetsburg, IA
-
Difficulty Level:Easy
-
Total Repair Time:15 - 30 mins
-
Tools:Nutdriver, Screw drivers
4 of 5 people
found this instruction helpful.
Was this instruction helpful to you?
Thank you for voting!
Sparks emitted at burner connection and burner does not work.
1. Turn off circuit breaker, pull out element and remove reflector pan.
2. Unfasten terminal block mounting screw and remove terminal block from casing.
3. Cut wires as close to defective terminal block as possible (not as per instructions) since you will need the maximum possible length of wire.
4. Slip on heat shrink sleeves, strip stove wires and connect to new terminal block per instructions.
5. Heat shrink sleeves per instructions.
2. Unfasten terminal block mounting screw and remove terminal block from casing.
3. Cut wires as close to defective terminal block as possible (not as per instructions) since you will need the maximum possible length of wire.
4. Slip on heat shrink sleeves, strip stove wires and connect to new terminal block per instructions.
5. Heat shrink sleeves per instructions.
Parts Used:
-
Doug from Puyallup, WA
-
Difficulty Level:Easy
-
Total Repair Time:15 - 30 mins
-
Tools:Pliers, Screw drivers
4 of 5 people
found this instruction helpful.
Was this instruction helpful to you?
Thank you for voting!
Panel light burnt out after 10 years
I live in a small town in South East Colorado. We have just a Walmart and Sears and a few smaller hardware stores. I checked all of them to try to find this 25 1/2 inch Fluorescent Light Bulb, and nobody carried one. I would have had to drive 70 miles to find one. The Service of Partselect was wonderful and the bulb showed up in just 4 days. I was lost without this light. I have bought a few other items for my older appliances in the past from Partselect. com and was very happy with the service and how easy the web page is to navigate. .
Parts Used:

-
Pamela from La Junta, CO
-
Difficulty Level:Really Easy
-
Total Repair Time:Less than 15 mins
4 of 5 people
found this instruction helpful.
Was this instruction helpful to you?
Thank you for voting!
Broken glass on inside of oven door
Take the time to pull off the door from the hinge; which is to simply pull it up to release with the door open approx. 4 inches. Have a Philips head screwdriver and a nut driver set available. Keep the screws grouped and the take it apart in the logical sequence. It took about 30 minutes total to complete the job. But then again, it was a woman who did it!
Parts Used:
-
Peggy from Bronson, MI
-
Difficulty Level:Easy
-
Total Repair Time:30 - 60 mins
-
Tools:Nutdriver, Screw drivers
4 of 5 people
found this instruction helpful.
Was this instruction helpful to you?
Thank you for voting!
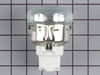
Oven lamp socket had broken center electric tab - failed.
1993 model oven, built in wall model, so didn't to remove oven for the normal rear access to replace the lamp socket. As someone else posted, replacement can be done from inside the oven -- BUT the socket removal was more complex than just 'twisting it out.' But below worked! (1) Turned off oven power at circuit breaker panel. To facilitate working in the oven compartment, removed oven door (2 screws on back of door), raised the over door almost closed, put 2 large nails through the hinge holes when they lined up. Lifted the door out (heavy ~20-25 lbs) and put aside. (2) Put work light inside oven. (3) unscrew glass socket lens and the bulb). (3) Using inspection mirror, studied the inside of the socket to determine that its lock tab type and locations -> were on left and right sides of the socket. These tabs needed to be bent in, but they were each held out by a small circumferential length of think metal, a tab about 3/16" x 3/8". These small tabs could be moved/positioned by just finger friction, with a little start with a screwdriver tip on their edge! I got an end positioned to put sharp screwdriver under that end, then pried it (bent it) inward a short distance. Enough to use needle-nosed pliers to pull it completely out - came fairly easily. Repeated on other side of socket. (4) Then, with pliers, bent each of the 4 locking tabs inward a short distance, Used sharp tool to get one socket edge lifted a small amount; then use mini-pry bar and screwdriver to gently pry around the socket in steps, working evenly around its edge. At about 3/8", it was free. Lifted it inward gently so as not to damage the insulation of the 2 wires attached to its rear. Noted the direction of the wire tabs was straight up (keep same orientation on new socket). (5) Needle-nosed pliers on each connector to gently work the connectors off their socket tabs. Note one tab is larger than the other. Keep the wires inside the oven compartment. Don't damage the insulation. (6) Pushed the wire connectors onto their respective new socket tabs. Aligned socket with the tabs upward, and inserted it, careful to nurse the wires back into the oven wall hole; press socket into the hole, pushing it in evenly and firmly until flush. (7) Pushed in the new type bulb that came with new Socket. Turned on power, and light came on. (8) screwed on new glass cover. (9) Lifted oven back onto the hinge prongs. (easier with two people to get the prongs aligned and into their door slots.) Worked door left and right to get it to lower down fully. Removed nails, lowered door, and put its 2 screws back on. (10) Poured a glass of wine.
Parts Used:
-
Stan from FLAT ROCK, NC
-
Difficulty Level:A Bit Difficult
-
Total Repair Time:30 - 60 mins
-
Tools:Pliers, Screw drivers
3 of 3 people
found this instruction helpful.
Was this instruction helpful to you?
Thank you for voting!