




















RE960PXKW2 Whirlpool Range - Instructions
Keep searches simple. Use keywords, e.g. "leaking", "pump", "broken" or "fit".
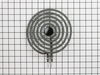
Heat in elements was inconsistent
Removed block (1 screw) Cut 2 connecting wires. Strip insulation. Attach new block with wire nut(per enclosed instructions) Heat shrink wrap with Lighter. attach block. 10 minutes: problem solved
Parts Used:

-
Irma from Greensboro, NC
-
Difficulty Level:Really Easy
-
Total Repair Time:15 - 30 mins
-
Tools:Screw drivers
2 of 3 people
found this instruction helpful.
Was this instruction helpful to you?
Thank you for voting!
bake element was broken
was very easy to install I only needed a phillips screwdriver to remove old part and install new one.
Parts Used:

-
carolyn from ROGERSVILLE, TN
-
Difficulty Level:Very Easy
-
Total Repair Time:Less than 15 mins
-
Tools:Screw drivers
2 of 3 people
found this instruction helpful.
Was this instruction helpful to you?
Thank you for voting!
The dryer nob wasn't working the dryer knob broke off inside the unit
It was very easy to install the new parts successfully thanku parts select I will always keep using your business the representative was so helpful and understanding my problem I wish I could remember his name he was outstanding and a 100 thumbs up to him
Parts Used:
-
WILLIAM from SEBASTIAN, FL
-
Difficulty Level:Very Easy
-
Total Repair Time:30 - 60 mins
-
Tools:Pliers, Screw drivers
2 of 3 people
found this instruction helpful.
Was this instruction helpful to you?
Thank you for voting!
Bake Element went bad, will not work.
As soon the Bake Element has arive, I install it no more than 5 min... All I nedd was a Screw driver. It was so easy, Thank You PartSelet!
Parts Used:
-
Kent from Spooner, WI
-
Difficulty Level:Really Easy
-
Total Repair Time:Less than 15 mins
-
Tools:Screw drivers
2 of 3 people
found this instruction helpful.
Was this instruction helpful to you?
Thank you for voting!
Bake Element Failed
I had previously partially removed the element and tested with multi-meter to determine that it was not working (open circuit). Repair procedure follows:
Turned off Power
Removed 2 retaining screws
Pulled element out part way
Removed 2 spade connectors supplying power
Replaced element w/new element
Reversed procedure
Tested Oven; worked fine.
Turned off Power
Removed 2 retaining screws
Pulled element out part way
Removed 2 spade connectors supplying power
Replaced element w/new element
Reversed procedure
Tested Oven; worked fine.
Parts Used:
-
Johnson from Norwood, CO
-
Difficulty Level:Easy
-
Total Repair Time:Less than 15 mins
-
Tools:Screw drivers
2 of 3 people
found this instruction helpful.
Was this instruction helpful to you?
Thank you for voting!
burnt out bake element
unscrewed two screws put in new element replaced two screws done, recieved the element within days of order,it was the right part,couldn't have been happier with the service from parts select thank you.
Parts Used:
-
richard from burnthills, NY
-
Difficulty Level:Really Easy
-
Total Repair Time:Less than 15 mins
-
Tools:Screw drivers
1 person
found this instruction helpful.
Was this instruction helpful to you?
Thank you for voting!
Oven wouldn't heat
First I removed the two screws that hold the element in place. I then pulled the element out about 3 inches and disconnected the two wires fom the old element .. connected them to the new element ... put the screws back ...and tested. problem solved
Parts Used:
-
Don from Rutland, VT
-
Difficulty Level:Really Easy
-
Total Repair Time:Less than 15 mins
-
Tools:Screw drivers
1 person
found this instruction helpful.
Was this instruction helpful to you?
Thank you for voting!
Oven element caught on fire!!
My husband is an over-the-road driver, so I have to do all of the repairs myself. I went to the breaker box and turned off the power to the range. Then I removed 2 screws, pulled the element out about 3", and disconnected the wires. I then connected the wires to the new element, pushed it back in place, and replaced the screws. We had Parmesan Chicken for dinner and my children were thrilled!
Parts Used:
-
Sharon from Redding, CA
-
Difficulty Level:Really Easy
-
Total Repair Time:Less than 15 mins
-
Tools:Screw drivers
1 person
found this instruction helpful.
Was this instruction helpful to you?
Thank you for voting!
bottom element burnt out
removed 2 screws . pulled out the 2 wires and disconect them. took out the element. Put the new element in and hooked the wires up. placed the metal bracket to the back and put in the 2 screw and turned it on and it worked like new.
Brenda
Brenda
Parts Used:
-
brenda from las vegas, NV
-
Difficulty Level:Really Easy
-
Total Repair Time:Less than 15 mins
-
Tools:Screw drivers
1 person
found this instruction helpful.
Was this instruction helpful to you?
Thank you for voting!
The bake element burned out and the oven wouldn't heat.
First, my son pulled the range out and I unplugged it. Then he removed the 2 screws that hold the element in place. He then pulled the element out about 3 inches and disconnected the wires. Then he placed the new element in the oven, connected the wires and put in the screws back in. It worked immediately!!
Parts Used:
-
Patsy from Coppell, TX
-
Difficulty Level:Really Easy
-
Total Repair Time:15 - 30 mins
-
Tools:Screw drivers
1 person
found this instruction helpful.
Was this instruction helpful to you?
Thank you for voting!
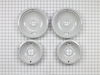
my first order a small drip bowl
-
marie from WATERBURY, CT
-
Difficulty Level:Really Easy
-
Total Repair Time:30 - 60 mins
1 person
found this instruction helpful.
Was this instruction helpful to you?
Thank you for voting!
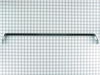
Door handle brace broke off
The new handle, braces and screws arrived as quoted. My son-in-law installed the new one without much trouble. The handle is black and matches the black front of my stove. The older handle was sort of a wood-brown. Thus I like the new one better. Thank you for good service and prompt attention to the problem.
Linda Archibald
Hanson, MA
Linda Archibald
Hanson, MA
Parts Used:

-
Linda from Hanson, MA
-
Difficulty Level:A Bit Difficult
-
Total Repair Time:30 - 60 mins
-
Tools:Screw drivers
3 of 7 people
found this instruction helpful.
Was this instruction helpful to you?
Thank you for voting!
Oven Heating element had a melt down and small explosion
Remove racks, extract two phillips head screws, pull out element, unattached wires, install new element, reverse procedure to complete installation. (Note: With the racks and element out, great time to clean oven.)
Parts Used:
-
Phillip from YONCALLA, OR
-
Difficulty Level:Very Easy
-
Total Repair Time:15 - 30 mins
-
Tools:Screw drivers
1 person
found this instruction helpful.
Was this instruction helpful to you?
Thank you for voting!
old heating element "popped"
Ordered the part Friday afternoon. It was delivered early on Saturday afternoon. Very impressed with the speed of the delivery! Power off, unscrew the old part, replace, screw the plate back on. Easy!
Parts Used:
-
Sally from Chesterfield, MO
-
Difficulty Level:Really Easy
-
Total Repair Time:15 - 30 mins
-
Tools:Pliers, Screw drivers
1 person
found this instruction helpful.
Was this instruction helpful to you?
Thank you for voting!
N/A
-
Gerry from Mackay, ID
-
Difficulty Level:Really Easy
-
Total Repair Time:15 - 30 mins
-
Tools:Screw drivers
1 person
found this instruction helpful.
Was this instruction helpful to you?
Thank you for voting!