




















RDE6550Y Whirlpool Range - Overview
Models starting with RDE6550Y
Click on the best match to narrow your results.
Keep searches simple, eg. "belt" or "pump".
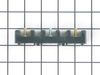
Range Main Power Terminal Block
PartSelect #: PS11745232
Manufacturer #: WP8203546
Sold individually.
$32.57
In Stock
Order within the next 6 hrs and your part ships today!
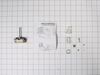
Surface Element Switch
PartSelect #: PS12070192
Manufacturer #: W10900107
$59.35
In Stock
Order within the next 6 hrs and your part ships today!

Range Surface Burner Knob
PartSelect #: PS11740686
Manufacturer #: WP307458
This knob is sold individually.
$27.95
In Stock
Order within the next 6 hrs and your part ships today!
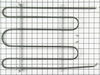
Broil Element
PartSelect #: PS340509
Manufacturer #: 326795
This five loop broil element has a hanger style mount.
No Longer Available
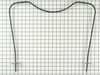
Bake Element - 240V 2500W
PartSelect #: PS340507
Manufacturer #: 326793
This partially open tapered style bake element has push on wire terminals.
$84.97
Special Order


Common Symptoms of models starting with RDE6550Y
[Viewing 3 of 3]Element will not heat
Fixed by
these parts
these parts


Show All
Little to no heat when baking
Fixed by
these parts
these parts
Show All
Will Not Start
Fixed by
these parts
these parts
Show All

Keep searches simple. Use keywords, e.g. "leaking", "pump", "broken" or "fit".
Burner would not heat
First i shut off the power since this is an electric cook top/range. I then removed the knob and the two screws that hold the burner switch in place. I removed the wires one at a time and connected each to the new switch. I then reattached the screws to the switch. The most difficult part to me was breaking off the switch stem at the right level. I got that done and finally selected the appropriate adapter for the stem/knob fit.
Parts Used:
-
Edward from Malvern, AR
-
Difficulty Level:A Bit Difficult
-
Total Repair Time:30 - 60 mins
-
Tools:Pliers, Screw drivers
27 of 35 people
found this instruction helpful.
Was this instruction helpful to you?
Thank you for voting!
The bake element was arcing/smoking and needed immediate replacement.
I removed (2) mounting screws from the back of the oven and pulled the element out far enough to access the terminal lugs. I unplugged the old element and plugged in the new element. I also replaced the old mounting screws w/new hardware and replaced one of the terminal lugs on a damaged wire. I went ahead and replaced the broiler element at the same time (also only 2 screws on the top of the oven) although there was no indication of a problem. The process was very easy although I caution non-electrically skilled people to insure the power is off at the breaker panel when performing this work and, if the electrical wires are damaged, seek qualified assistance to repair them.
Parts Used:
-
John from Houston, TX
-
Difficulty Level:Really Easy
-
Total Repair Time:Less than 15 mins
-
Tools:Screw drivers
11 of 15 people
found this instruction helpful.
Was this instruction helpful to you?
Thank you for voting!
The lower element was not working
We turned off the power to the unit, removed the old element and secured the wireswith electrical tape to keep them from going back into the insulation at the back of the stove. We ordered a replacement part. After turning off the power to the stove again, we inserted the element and screwed in the brackets. The element worked GREAT! It saved us having to buy a new stove for the rental unit. Thanks, PartSelect!!
Parts Used:
-
Jennifer from Greensburg, IN
-
Difficulty Level:A Bit Difficult
-
Total Repair Time:Less than 15 mins
-
Tools:Pliers, Screw drivers
9 of 12 people
found this instruction helpful.
Was this instruction helpful to you?
Thank you for voting!