




















RCS2012GS1 Whirlpool Cooktop - Instructions
Keep searches simple. Use keywords, e.g. "leaking", "pump", "broken" or "fit".
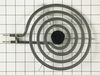
Old burner stopped working right.
Was able to unplug the old burner and plug the new one in. Very easy.
Parts Used:
-
Paulette J. from Connell, WA
-
Difficulty Level:Really Easy
-
Total Repair Time:Less than 15 mins
Was this instruction helpful to you?
Thank you for voting!
No Problem
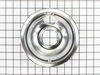
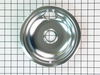
Needed new drip pans for range top. Easy fix. Was impressed on how quick the parts were shipped out to me.
Parts Used:
-
Sharon from Emmett, ID
-
Difficulty Level:Really Easy
-
Total Repair Time:Less than 15 mins
Was this instruction helpful to you?
Thank you for voting!
bowls had burnt on food
-
David from Saranac Lake, NY
-
Difficulty Level:Really Easy
-
Total Repair Time:Less than 15 mins
Was this instruction helpful to you?
Thank you for voting!
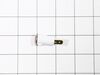
Indicator light on whirlpool electrical cook top shorted out
Removed old indicator light, after turning off electricity, installed terminals on new indicator light as I was doing this I noticed that female spade terminals had extended fastening ends on them, making an extremely unsafe condition. I replaced those terminals with insulated female spade terminals thus eliminating the possibility of a short in the future.
Parts Used:
-
Barry from Anderson, IN
-
Difficulty Level:Easy
-
Total Repair Time:15 - 30 mins
Was this instruction helpful to you?
Thank you for voting!
Burner "on" indicator light went out
It appears that the indicator light is a "pop-up" replacement but you can't get it to fit through the mounting hole without it breaking up...Here's the easier way: 1st remove the power to the cooktop...2nd remove the 4 burners and the bowls.. 3rd remove the 2 front small sheet metal screws that are on the front flange where you removed the front bowls...4th gently lift the front end of the cooktop whereby you'll have access to the indicator light...5th remove the 2 wires from the light and with your fingers or long-nose pliers squeeze the mounting flanges on the sides of the light and pop it out from the top...Now you can replace the light---it's "keyed" on one side so it'll fit in only one way...Reattach the 2 wires on the bottom of the light....Reverse the disassembly procedure and restore the power....Let there be "light" when you turn on any of the burners !!!
Parts Used:
-
Tom from Austin, TX
-
Difficulty Level:Easy
-
Total Repair Time:30 - 60 mins
-
Tools:Pliers, Screw drivers
Was this instruction helpful to you?
Thank you for voting!
corroded, rusted drip bowls
-
Noah from Richardson, TX
-
Difficulty Level:Really Easy
-
Total Repair Time:15 - 30 mins
Was this instruction helpful to you?
Thank you for voting!
burned out coil
Simply slide out old coil by lifting cooktop pan; position new coil electirc elements in oven slots, slowly push in, then push coil tab into slot in pan for balance. No problems
Parts Used:
-
L from Richardson, TX
-
Difficulty Level:Really Easy
-
Total Repair Time:Less than 15 mins
Was this instruction helpful to you?
Thank you for voting!
Element terminal connection loose caused overheating and carbon buildup.
Sanded element contact, replaced connector block. The easiest part of the task was ordering the part online. You made it unbelievably easy. I was amazed!
Parts Used:

-
Mark from Louisville, KY
-
Difficulty Level:Really Easy
-
Total Repair Time:15 - 30 mins
-
Tools:Screw drivers
Was this instruction helpful to you?
Thank you for voting!
Burner knobs broken
Pulled old knobs off and replaced with new knobs from PartSelect. I'm glad they had them, no one locally had them available.
Parts Used:

-
ANTHONY from HOUSTON, TX
-
Difficulty Level:Really Easy
-
Total Repair Time:Less than 15 mins
Was this instruction helpful to you?
Thank you for voting!
Generic Drip Bowls Made The Burners Tilt.
Pulled out the generics and popped in the correct bowls for my whirlpool. Done in less than 10 minutes and perfecto,. . . Level burners :-) thanks we'll be back when we need you again.
Parts Used:
-
PATRICIA*NAYLOR from NEW PRT RCHY, FL
-
Difficulty Level:Really Easy
-
Total Repair Time:Less than 15 mins
Was this instruction helpful to you?
Thank you for voting!
The burner didn't work because it had the wrong drip bowl
Replaced the drip bowls, very simple. Excellent delivery time, ordered them Saturday, delivered Tues morning.
Parts Used:
-
Leslie from Spring HIll, FL
-
Difficulty Level:Really Easy
-
Total Repair Time:Less than 15 mins
Was this instruction helpful to you?
Thank you for voting!
Burner not working
I took the burner out of the box and snapped it into the slots on the stove, turned on the stove and made dinner! By the way, I received it in 2 days, which was great. I will recommend your company to others and purchase all of my appliance replacement parts from Parts Select. The Norton Service Guarantee was awesome!! Thank you.
Parts Used:
-
Margaret from North Miami Beach, FL
-
Difficulty Level:Really Easy
-
Total Repair Time:Less than 15 mins
Was this instruction helpful to you?
Thank you for voting!
Wrong replacement Drip Pans installed previously caused damge to 8" Burner.
Removed burners and drip pans, replaced drip pans and re-installed burners. Simple....
Parts Used:
-
Lloyd from Pinellas Park, FL
-
Difficulty Level:Really Easy
-
Total Repair Time:Less than 15 mins
Was this instruction helpful to you?
Thank you for voting!
Old receptacle was burnt from lots of use.
Just cut the old receptacle wires and splice in new kit. Very simple and worked perfectly.
Parts Used:
-
Brenda from Scurry, TX
-
Difficulty Level:Really Easy
-
Total Repair Time:15 - 30 mins
-
Tools:Screw drivers
Was this instruction helpful to you?
Thank you for voting!
Two drip Bowls needed to be replaced
No tools needed. And it's always great to be able to replace parts on my VERY old counter-top range. It still works very well, and now it also looks great. Delivery was amazingly fast, too! Thanks!
Parts Used:
-
Robin from Boca Raton, FL
-
Difficulty Level:Really Easy
-
Total Repair Time:Less than 15 mins
Was this instruction helpful to you?
Thank you for voting!