




















PGS968DEP2BB General Electric Range - Instructions
Keep searches simple. Use keywords, e.g. "leaking", "pump", "broken" or "fit".
Lower oven would not light consistently
I did find instruction in the Q&A on how to to change the part was for an older oven.
Here are the instructions that matched my oven model "JGSP42SET1SS"
https://www.youtube.com/watch?v=aHg-O1-NnXM
I also had issues where the connector for the new part would not come through the hole in the back of the oven. I used a shoestring around the connector so I would have a good grip on it when I disconnected the old igniter.This allowed me to have a good grip to reconnect to the new igniter.
While you have this apart I would also recommend that you remove the burner and blow out any material that may have accumulated over the years,
Here are the instructions that matched my oven model "JGSP42SET1SS"
https://www.youtube.com/watch?v=aHg-O1-NnXM
I also had issues where the connector for the new part would not come through the hole in the back of the oven. I used a shoestring around the connector so I would have a good grip on it when I disconnected the old igniter.This allowed me to have a good grip to reconnect to the new igniter.
While you have this apart I would also recommend that you remove the burner and blow out any material that may have accumulated over the years,
Parts Used:
-
Brad from PARIS, IL
-
Difficulty Level:Easy
-
Total Repair Time:1- 2 hours
-
Tools:Nutdriver, Screw drivers, Wrench (Adjustable)
1 person
found this instruction helpful.
Was this instruction helpful to you?
Thank you for voting!
GAS OVEN WOULD NOT HEAT - NO FLAME AT BURNER
Could not have been easier. All screws are 1/4 inch. Oven door can be removed to make it easier to get to screws in back of oven,but igniter can be installed with door in place. Remove bottom panel then remove four screws on flame spreader. Remove trwo screws that hold igniter in place. Replace with new igniter, it may be necessary to remove the clip on new igniter and splice the two leads. Now your cooking with gas.
Parts Used:
-
BOB from BURBANK, CA
-
Difficulty Level:Really Easy
-
Total Repair Time:15 - 30 mins
-
Tools:Nutdriver
1 person
found this instruction helpful.
Was this instruction helpful to you?
Thank you for voting!
Oven lamp globe shattered . Needed a replacement
-
Joan from SOUTHINGTON, CT
-
Difficulty Level:Very Easy
-
Total Repair Time:15 - 30 mins
1 person
found this instruction helpful.
Was this instruction helpful to you?
Thank you for voting!
Temp probe was defective
Threw the old one out - plugged the new one in. Steak came out just as ordered - medium rare.
Parts Used:
-
Eric from SOUTHBURY, CT
-
Difficulty Level:Very Easy
-
Total Repair Time:Less than 15 mins
1 person
found this instruction helpful.
Was this instruction helpful to you?
Thank you for voting!
Followed a GE Video on installation
-
Sarah from MONTGOMERY, TX
-
Difficulty Level:Very Easy
-
Total Repair Time:15 - 30 mins
-
Tools:Screw drivers
1 person
found this instruction helpful.
Was this instruction helpful to you?
Thank you for voting!
Oven meat probe broken
This item worked as described. I paid more for this 'oem' probe than the generic 1 because i didn't want to chance it not working as others have reported.
- works great. tested it....snaps in, reads correctly, snaps out.
- works great. tested it....snaps in, reads correctly, snaps out.
Parts Used:
-
robert from FAIRFIELD, OH
-
Difficulty Level:Very Easy
-
Total Repair Time:Less than 15 mins
1 person
found this instruction helpful.
Was this instruction helpful to you?
Thank you for voting!
door gasket was soiled
-
Joseph from Murrells Inlet, SC
-
Difficulty Level:Really Easy
-
Total Repair Time:Less than 15 mins
1 person
found this instruction helpful.
Was this instruction helpful to you?
Thank you for voting!
Not Reaching Temperature above 300 Degrees
Take off 6 screws of back cover of the range, unplug the white wire. Go to the inside of oven, pull out racks. At the top of the oven is your Broiler element, in the center you will see a rod sticking out with one screw holding it in place. Take out screw and pull temperature sensor out toward you. Reverse steps to put it back together.
Parts Used:

-
Ron from SAN TAN VLY, AZ
-
Difficulty Level:Very Easy
-
Total Repair Time:Less than 15 mins
-
Tools:Nutdriver
1 person
found this instruction helpful.
Was this instruction helpful to you?
Thank you for voting!
Replace the lower oven gas igniter
Flip toggles to release the oven door. Pull up on oven door to remove. Put door aside. Lift enamel bottom. Slide strait out. Remove aluminum shielding from around the igniter. Loosen igniter, unplug the igniter. Remove burner cowling. Plug in new igniter. Attach cowling to new igniter. Screw it all back in place. Stuff wiring connected back through the protective hole. Depress close door button and test. It takes about 10-15 seconds to ignite. Reinstall aluminum protector. Re install bottom enamel piece. Carfully slide oven door back on pegs and flip toggles to lock. Have a big glass of water and yell, Honey I fixed the oven!!
Parts Used:
-
Edward from New York, NY
-
Difficulty Level:A Bit Difficult
-
Total Repair Time:1- 2 hours
-
Tools:Nutdriver, Pliers, Screw drivers
1 person
found this instruction helpful.
Was this instruction helpful to you?
Thank you for voting!
The Grate foot is to big for the hole.
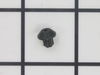
-
Harold from Broadalbin, NY
-
Difficulty Level:A Bit Difficult
-
Total Repair Time:15 - 30 mins
1 of 2 people
found this instruction helpful.
Was this instruction helpful to you?
Thank you for voting!
very easy
-
ROBERT from CYPRESS, TX
-
Difficulty Level:Really Easy
-
Total Repair Time:Less than 15 mins
1 of 2 people
found this instruction helpful.
Was this instruction helpful to you?
Thank you for voting!
bake cycle would not work
open the oven door (remove) ,disassemble the igniter ,replace the igniter .
Parts Used:
-
Jenn from FORT WORTH, TX
-
Difficulty Level:A Bit Difficult
-
Total Repair Time:30 - 60 mins
-
Tools:Screw drivers, Socket set
1 of 2 people
found this instruction helpful.
Was this instruction helpful to you?
Thank you for voting!
Light bulb went out,could not find replacement part.
Turn the glass enclosure counterclockwise to expose bulb.Turn the power off at circuit breaker panel.Handle the bulb carefully with paper towel covering the bulb.Push the bulb in socket.replace glass enclosure,turn power back on.
Parts Used:

-
Gregory from Pearl River, LA
-
Difficulty Level:Really Easy
-
Total Repair Time:Less than 15 mins
1 of 2 people
found this instruction helpful.
Was this instruction helpful to you?
Thank you for voting!
The Grate Foot was deteriorated on several sections for my cook top. The hardest part was finding the right part.
-
Chelagh from Fredericksburg, VA
-
Difficulty Level:Really Easy
-
Total Repair Time:Less than 15 mins
1 of 3 people
found this instruction helpful.
Was this instruction helpful to you?
Thank you for voting!
Oven will not heat
As many people have encountered, my oven would not heat but the igniter would be bright orange and glow! Over time, the igniter wears and degrades causing oxidation to the surface. This cause the igniter to fail and operate at a lower current level, below 2.8 amps! Normal igniters operator over 3.0 to 3.1 amps. When is happens, a low current igniter does not have enough input to the control valve to tell the valve to open to allow gas to flow over the igniter to light the oven, thus heat the oven! This has got to be the NUMBER one reason for an oven not heating!
Parts Used:

-
Joseph from Homosassa, FL
-
Difficulty Level:Easy
-
Total Repair Time:15 - 30 mins
-
Tools:Pliers, Screw drivers
1 of 3 people
found this instruction helpful.
Was this instruction helpful to you?
Thank you for voting!