This double inlet water valve has quick connections. This valve has 1/4 and 5/16 John Guest fittings for the outlet lines and a 1/4 compression fitting for the inlet line.
The interior light of your refrigerator is controlled by a switch that is activated when the door is opened and closed. If your refrigerator light will not turn on, there could be an issue with the sw...
This is a replacement evaporator fan grommet for your refrigerator. The fan grommet absorbs the vibration from the evaporator fan motor for quiet operation while it runs. If your evaporator fan is unu...
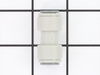
This is a replacement set screw for your refrigerator door. The set screw attaches the door handle to the stud on the refrigerator door. The screw is approximately ¼ of an inch in length and unlike so...
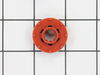
This plastic shelf support, or shelf stud connects the shelf to your refrigerator. To replace the shelf support first remove the shelves and drawers from your refrigerator, then remove the damaged or ...
The lid bumper or evaporator fan motor bumper in your refrigerator prevents the fan motor from scraping against the side bracket. If your refrigerator/freezer is noisy, the bumper could be worn down o...
This fan motor circulates the air through the refrigerator grille and cools the compressor and condenser coils. It also helps to evaporate extra water in the drain pan.
This inverter control board kit is a key component in modern refrigerators, responsible for managing the compressor’s motor and regulating its speed based on cooling demands. By modulating energy cons...
$501.02
Special Order
Questions And Answers for PGS25SKEAFSS
Be the first to ask our experts a question about this model!
✖
Ask a Question
Ask our experts a question on this model and we'll respond as soon as we can.
The very first symptom here is important! The door water dispenser is not working but the ice macine is working. You may only have a frozen water tube in the door so do the following before diagnosing that your solenoid valve is bad: 1) the tube usually runs under the front of the refrigerator and usually has a quick disconnect. Undo the connection and press the dispenser. If water comes out of the tube you have a frozen or blocked tube in the door. 2) Immediately adjust the temperature in the freezer and warm the freezer compartment as much as you can without destroying the freezer contents. Wait 24 hours. This will usually unfreeze the line. Do not waste your time with a hair dryer. NOW, if this doesn't work and you are convinced you need to order and replace the solenoid, follow these steps. Assemble your tools first. I needed a good ratchet set and a screwdriver. A shop towel is helpful for spilled water. A light is handy. Pull out the refreigerator to gain access to the rear of the unit. Unplug the power and close the water valve (older homes, you may need to actually shut the house water supply). Remove the screws which hold the cover over the lower half of the refrigerator. On the left you will see the solenoid. It's always good to see that your new part matches the one you feel needs replaced. They may not match perfectly due to changing design but they should be very similar. One screw holds this part in place and access is very simple. Now simply unplug the electrical connections. In my case, one blue "blade" type connection (powering the water) and one red "blade" type connection powering the ice maker. They are not the same size and this coupled with the coloring means you will not accidently switch them. pull the tubes clear of the solenoid. This is simple and needs no explantion. Grab your new solenoid and reattach both the electrical and water lines (two, remember, ice maker and drink dispencer). Replace the single screw. Re-attach the rear, lower refrigerator cover and go to the front of the unit to check the water. You can listen carefully and hear the power engage from the new part bringing you water. Clean up, replace the refrigerator back to its place and look really tired when your wife sees that you worked "so hard"! You probably saved at least $50-$80 from a service call which can now be used to take the family to dinner after your "exhausting" 15 minute workout of removing about 10 screws and wheeling the unit in and out of place. Writing this article took longer! My 4 year old worked harder holding the flash light!
Model includes filtered ice maker and water dispenser from front of unit. Water maker just suddenly stopped working but ice maker continued to work fine. After some phone calls to trouble shoot at a high level, I figured it was worth a try to buy the replacement part of the most likely culprit and see if it did the trick. Would have cost maybe $150 or more for service tech to make house call, provide the part and do the switch. Buying the part was only $40 and replacement was easy. Remove access panel from behind fridge and identify valve. It has intake water from the filter then has two outbound lines. One to ice maker, one to water dispenser. All function is in one part, but each outbound line has its own functioning valve. Unplug fridge, turn off water supply, disconnect all connections from old valve and reattach to new valve. When re-hooked, be patient in allowing water to re-fill line before coming out of dispenser in front. Likely to doubt it works, but surprised how long it took for water to fill line resevoir.
Unplugged the refrigerator, turned off the water supply, and then removed the back cover/access plate. Observed and made wiring notes to ensure I install the part correctly. Unscrewed the bracket holding the water valve assembly, and lifted it up to see and remove the three water lines (one input, two output). The input or supply line is a compression fitting...just use an adjustable wrench to loosen the nut and lift off the line. Then remove the two output lines by depressing or pushing in on the white plastic rings that surround those two holes ...the lines just slide out, but you have to push in on those rings. Remove the two electrical connectors...just wiggle them off One connector was very stubborn but it eventually came off. Try to be gentle, and pull on the connector heads...not on the electrical wires. Assemble the lines and electrical connectors on to the new part. The two output water lines just slide in...you dont need to push in on the rings. You'l feel them seat into the valve. Don't worry. Put it all back the way you found it, turn on the water supply, and plug in the power cord. Check for leaks. I had no leaks and was very pleased. This is so easy a chimp can do it, but let everyone think otherwise! No biggie.