




















PFRS5NBWASS General Electric Refrigerator - Instructions
Keep searches simple. Use keywords, e.g. "leaking", "pump", "broken" or "fit".
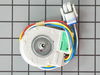
Loud knocking noise with the evaporator fan
I had taken the noise long enough and wanted to get this repaired. I didn't want to pay a repair man hundreds of dollars to do it so i decided to do it myself. I went on to YouTube and found a few videos that showed me how easy it was to do (very helpful).
I wasn't so sure all that noise would come from the Evaporator Fan motor so i ordered it and took the chance. For the small cost, it was worth the try.
All went well accessing the unit and removing the old part. Very fast indeed. However, the snag came when i went to plug in the new part electrical to the existing electrical adapters. The old part had 4 lead connections. The new part had 6. and the wires on the new part were different colors than the existing. I had to use some logic and courage to cut the wires on the new part and rewire the old adapter to this piece. Luckily, i wired everything correctly.
Calling Part Select got me a phone number for the parts manufacturer to help with the splicing but i opted to do it on my own.
The result is i have a noiseless refrigerator again. What should have taken 10 to 15 minutes took half an hour because of the wiring but overall, very easy.
I wasn't so sure all that noise would come from the Evaporator Fan motor so i ordered it and took the chance. For the small cost, it was worth the try.
All went well accessing the unit and removing the old part. Very fast indeed. However, the snag came when i went to plug in the new part electrical to the existing electrical adapters. The old part had 4 lead connections. The new part had 6. and the wires on the new part were different colors than the existing. I had to use some logic and courage to cut the wires on the new part and rewire the old adapter to this piece. Luckily, i wired everything correctly.
Calling Part Select got me a phone number for the parts manufacturer to help with the splicing but i opted to do it on my own.
The result is i have a noiseless refrigerator again. What should have taken 10 to 15 minutes took half an hour because of the wiring but overall, very easy.
Parts Used:
-
lk from carlsbad, CA
-
Difficulty Level:Easy
-
Total Repair Time:15 - 30 mins
-
Tools:Nutdriver, Pliers, Screw drivers
13 of 15 people
found this instruction helpful.
Was this instruction helpful to you?
Thank you for voting!
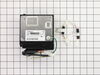
my refrgerator stopped cooling and freezing
Take the cardboard grill off the bottom of the back it is held on with 5-6 hex head screws. Located the voltage inverter on the tank. It's on the bottom left of the refrigerator. Removed the screw that holds it in place.Remove the jumper wires at the quick connect. Rotate the voltage inverter and removed it. Check the voltage at the plug in going to the voltage Inverter. It should be 115-125 volts. Plug in the voltage inverter to the Quick connect away from the tank check the voltage on the side that would be connected to the tank. If both sides don't read at least 115 volts the inverter is bad. Order a new on and reinstall in the reverse order.
Parts Used:
-
Mike from Aguilar, CO
-
Difficulty Level:Really Easy
-
Total Repair Time:15 - 30 mins
-
Tools:Nutdriver, Pliers, Screw drivers
12 of 12 people
found this instruction helpful.
Was this instruction helpful to you?
Thank you for voting!
Switch failed on which kept the refrigerator warm due to heat generatered by light bulbs.
While the switch did last for 9 years, the design is poor due to the failure mode. The failure should be to fail off or not able to turn on the lights which would be inconvenient but would not warm the refrigerator contents. Arcing at the contacts eventually caused the switch to "weld" closed. It is not obvious that this is occurring so it took some time to recognize why the temp inside the ref was high while the freezer was OK. Replacing the switch was easy once it was recognized as the problem. All that was required to replace the switch was to remove the screws holding a fiber cover and then pulling off the aluminum cap which covered the switches. Unplug the switch an squeeze the keeper on the switch to release it and pull down. Pop the replacement switch in place and plug the wires harness back in. All in all it took much less time to replace than it has to write this up. T Pope
Parts Used:

-
Terry from Simi Valley, CA
-
Difficulty Level:Really Easy
-
Total Repair Time:Less than 15 mins
-
Tools:Pliers, Screw drivers
19 of 33 people
found this instruction helpful.
Was this instruction helpful to you?
Thank you for voting!
Existing light switch was hard to remove.
The existing light switch was very hard to remove. I ended up having to grab it with a pair of pliers and pull it out. Once it was out, it was very easy to put in the replacement and it seems to be working fine.
Parts Used:
-
Stephen from Jupiter, FL
-
Difficulty Level:A Bit Difficult
-
Total Repair Time:Less than 15 mins
-
Tools:Screw drivers
14 of 19 people
found this instruction helpful.
Was this instruction helpful to you?
Thank you for voting!
Interior light needed replaced
Unplugged the appliance for safety. Removed two 1/4" screws that held the assembly in place. Carefully removed the wire guard that retains the glass shield. Unscrewed old light bulb and replaced with new part. Reversed the steps after cleaning glass cover.
Parts Used:

-
Leo from TWIN FALLS, ID
-
Difficulty Level:Really Easy
-
Total Repair Time:Less than 15 mins
-
Tools:Nutdriver
22 of 43 people
found this instruction helpful.
Was this instruction helpful to you?
Thank you for voting!
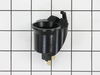
Light in the refrigerator went out
After I bought what I thought I needed for the repair. I asked a friend to come over and look at it. He changed the
the light socket and put the same light bulb in and it works great. I am returning the light switch but decided to keep the light bulb.
Getting on the internet was so easy. This was really very simple. Thank you for making what I thought would be a big ordeal into something very simple.
Paulette Johnson
the light socket and put the same light bulb in and it works great. I am returning the light switch but decided to keep the light bulb.
Getting on the internet was so easy. This was really very simple. Thank you for making what I thought would be a big ordeal into something very simple.
Paulette Johnson
Parts Used:
-
Paulette B. from Santa Ana, CA
-
Difficulty Level:Really Easy
-
Total Repair Time:15 - 30 mins
13 of 18 people
found this instruction helpful.
Was this instruction helpful to you?
Thank you for voting!
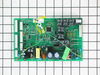
Overflowing ice maker creating glacier on back wall
No instructions came with the replacement control board. A notice that this part supercedes the original circuit board part number would have been helpful, although it is noted on the web site IF you drill into the parts list deep enough. Diagrams on the web site gave a general location for the circuit board.
Swap-out of the boards was relatively easy, although some of the connectors were reluctant to separate.
The new control board solved the overflowing ice maker issue.
Swap-out of the boards was relatively easy, although some of the connectors were reluctant to separate.
The new control board solved the overflowing ice maker issue.
Parts Used:
-
Richard from Florence, OR
-
Difficulty Level:Easy
-
Total Repair Time:30 - 60 mins
-
Tools:Nutdriver, Pliers, Screw drivers
14 of 22 people
found this instruction helpful.
Was this instruction helpful to you?
Thank you for voting!
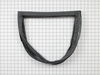
Old door gasket had deteriorated.
Easy repair. Old gasket removed by hand in about one minute. The new gasket was pressed in place by hand in about 3 more minutes.
Parts Used:
-
Anthony B from JOLIET, IL
-
Difficulty Level:Very Easy
-
Total Repair Time:Less than 15 mins
11 of 14 people
found this instruction helpful.
Was this instruction helpful to you?
Thank you for voting!
Switchlight was broken on tennant's refridge
as described, I used a thin screwdriver to wedge in and pull down existing, broken switch. I was able to pull it down about a 1/4 inch, but wasn't quit able to disegage it until I gripped it with pliers. I then pulled it out, unplugged the old switch, plugged in the new switch, and carefully tucked the wires back into the fridge and snapped the new switch into place.
10 minutes total.
10 minutes total.
Parts Used:
-
Mark from Somers Point, NJ
-
Difficulty Level:Easy
-
Total Repair Time:Less than 15 mins
-
Tools:Pliers, Screw drivers
10 of 12 people
found this instruction helpful.
Was this instruction helpful to you?
Thank you for voting!
Ice would melt intermittently creating an ice wall on the back or side of the freezer.
Replacement of the Main Control board was relatively easy, although some of the connectors were reluctant to separate.
The new control board appears to have solved the problem.
The new control board appears to have solved the problem.
Parts Used:
-
Don from Herndon, VA
-
Difficulty Level:Easy
-
Total Repair Time:15 - 30 mins
-
Tools:Nutdriver
12 of 19 people
found this instruction helpful.
Was this instruction helpful to you?
Thank you for voting!
Frig stopped working
Tested the circuits then the inverter and found that to be no good. There was no 277 voltage leaving the inverter. Ordered new and replaced. The frig is now working fine.
Parts Used:
-
Anthony from CAMBRIDGE, MA
-
Difficulty Level:Very Easy
-
Total Repair Time:1- 2 hours
-
Tools:Pliers, Screw drivers
10 of 14 people
found this instruction helpful.
Was this instruction helpful to you?
Thank you for voting!
Twice I ordered the oven light bulb & each time the light bulb was defected
I had to call for a appointment for repair with GE Appliance because I thought then it . .was something electrical. The technician came out & checked everything out, turned out it was not electrical, The technician went out to his truck got a light bulb from his truck, put it in & it worked. It cost me $121.00 for trip charge from GE appliance for a light bulb that worked, your light bulbs were defective twice. Very disappointed with your products, cost me alot of money for a good light bulb thru GE appliance
Parts Used:
-
Barbara from BELLEVUE, WA
-
Difficulty Level:Very Difficult
-
Total Repair Time:Less than 15 mins
15 of 32 people
found this instruction helpful.
Was this instruction helpful to you?
Thank you for voting!
Compressor would not kick on and condenser fan ran constantly
Remove back panel on bottom of fridge to access compressor area. Remove screws from water solenoid and water valve and push to the side so the side of the compressor can be accessed. Then locate the inverter box. You will find a Phillips head screw on the bottom of the inverter. This is the only screw that hold the inverter in place. Remove the screw and tilt the inverter box forward away from the compressor, then lift the box out of the the holder. You may have to wiggle it a bit to get it out. Remove the plug that attaches to the compressor and then with the power on check your voltage coming to the compressor. It should read 120 volt. If it doesn’t your inverter is bad. Remove the other plug on the inverter box and pull the box out.
Reinstall the unit in reverse order. Use the appropriate jumper to plug into the wire connection going to box and then plug it into the connection off the fridge.
Once everything is reinstalled and before you put the back panel on plug your refrigerator back in and you should be able to hear the compressor working or feel the top of it to make sure. If it’s working you are good and can reinstall the back panel.
It will take 4-5 hours to come back to temp if it’s been off for any length of time.
Reinstall the unit in reverse order. Use the appropriate jumper to plug into the wire connection going to box and then plug it into the connection off the fridge.
Once everything is reinstalled and before you put the back panel on plug your refrigerator back in and you should be able to hear the compressor working or feel the top of it to make sure. If it’s working you are good and can reinstall the back panel.
It will take 4-5 hours to come back to temp if it’s been off for any length of time.
Parts Used:
-
Charles from ORO VALLEY, AZ
-
Difficulty Level:Really Easy
-
Total Repair Time:15 - 30 mins
-
Tools:Nutdriver, Screw drivers, Socket set
6 of 6 people
found this instruction helpful.
Was this instruction helpful to you?
Thank you for voting!
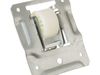
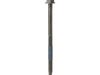
Stripped Front Leveling Roller & Screw
Raised side of fridge enough to get 1/4" ratchet with 1/4" socket under roller wheel assy. Removed three hex-head screws to separate damaged wheel assy from fridge frame. From panel below fridge compartment, backed-out stripped leveling screw. Mounted new roller assy and then threaded in new leveling screw from front. Lowered fridge and adjusted leveling screw for proper height. Suggest putting a 2x4 under fridge for safety when hands are under unit.
Parts Used:
-
George from ARLINGTON, VA
-
Difficulty Level:Easy
-
Total Repair Time:30 - 60 mins
-
Tools:Socket set
6 of 6 people
found this instruction helpful.
Was this instruction helpful to you?
Thank you for voting!
light not working
I used pliers to pull lightly on the head of the switch, while I inserted a small flat head screw driver into the base of switch and gently worked around the edges to free it from the panel.
Parts Used:
-
robert from FRANKLIN SQ, NY
-
Difficulty Level:Very Easy
-
Total Repair Time:Less than 15 mins
-
Tools:Pliers, Screw drivers
7 of 11 people
found this instruction helpful.
Was this instruction helpful to you?
Thank you for voting!