




















PFCA1NJZADSS General Electric Refrigerator - Instructions
Keep searches simple. Use keywords, e.g. "leaking", "pump", "broken" or "fit".
slow water flow in dispenser
opened refrigerator door located water filter location in right back corner unscrewd 1/2 turn and out it comes without shutting off water it is a snap to do by anyone and shipment was really quick thanks. People do not call a service tech for something this simple even a child tall enough can do it.
Parts Used:
-
dwight from phoenix, AZ
-
Difficulty Level:Really Easy
-
Total Repair Time:Less than 15 mins
14 of 21 people
found this instruction helpful.
Was this instruction helpful to you?
Thank you for voting!
Moving the refrigerator into my new (very old) house we had to remove the doors which resulted in a crimped hose and union
Remove lower front panel, disconnect damaged union from water hose under freezer door, replace with new union, tighten and reattach front panel. No more water coming from under the unit. Ice maker and dispenser features returned to working order!
Parts Used:
-
Laura from Manchester, NH
-
Difficulty Level:Really Easy
-
Total Repair Time:15 - 30 mins
-
Tools:Screw drivers
16 of 28 people
found this instruction helpful.
Was this instruction helpful to you?
Thank you for voting!
refrigerator and freezer stopped working
I replaced the three sensors, 2 in the freezer 1 in the refrigerator. This was rated as the most common problem. Did not fix the problem. I then checked the ohms on the new sensors then the old sensors they were all within .5 of each other. So I got smart and went down the list of causes on their list. I emailed partselect and asked what the parts should read. They replied with that information and it turned out to be the voltage converter on the compressor. I ordered the part on friday payed for overnight delivery and it arrived tuesday. This as you can imagine makes me angry. But the part was easy to install and my refrigerator started working right away. I would advise anyone with this problem to start at the top of the problem list use a multi meter check everything on the list and only replace part or parts that don't come up to standards. This will save time and money and hopefully fix the problem the first time as you are not switching out parts and hoping that it solves the problem.
Parts Used:
-
mike from Aguilar, CO
-
Difficulty Level:Really Easy
-
Total Repair Time:30 - 60 mins
-
Tools:Nutdriver
9 of 9 people
found this instruction helpful.
Was this instruction helpful to you?
Thank you for voting!
Switchlight was broken on tennant's refridge
as described, I used a thin screwdriver to wedge in and pull down existing, broken switch. I was able to pull it down about a 1/4 inch, but wasn't quit able to disegage it until I gripped it with pliers. I then pulled it out, unplugged the old switch, plugged in the new switch, and carefully tucked the wires back into the fridge and snapped the new switch into place.
10 minutes total.
10 minutes total.
Parts Used:

-
Mark from Somers Point, NJ
-
Difficulty Level:Easy
-
Total Repair Time:Less than 15 mins
-
Tools:Pliers, Screw drivers
10 of 12 people
found this instruction helpful.
Was this instruction helpful to you?
Thank you for voting!
Door gaskets rippef
Removed old gaskets, replaced with new gaskets. Using my fingers.
I let the gaskets relax overnight before installing
I let the gaskets relax overnight before installing
Parts Used:
-
Matty from CROTON HDSN, NY
-
Difficulty Level:Really Easy
-
Total Repair Time:Less than 15 mins
7 of 7 people
found this instruction helpful.
Was this instruction helpful to you?
Thank you for voting!
Refrigerator side freezing food
Replaced both temp sensors worked good for 2 days then began freezing food. Looked into it further on line. Found small motorized door broken that controls the cold air from the freezer
Parts Used:
-
M &M Aviation from ESCANABA, MI
-
Difficulty Level:Easy
-
Total Repair Time:15 - 30 mins
-
Tools:Screw drivers
7 of 8 people
found this instruction helpful.
Was this instruction helpful to you?
Thank you for voting!
light not working
I used pliers to pull lightly on the head of the switch, while I inserted a small flat head screw driver into the base of switch and gently worked around the edges to free it from the panel.
Parts Used:
-
robert from FRANKLIN SQ, NY
-
Difficulty Level:Very Easy
-
Total Repair Time:Less than 15 mins
-
Tools:Pliers, Screw drivers
7 of 11 people
found this instruction helpful.
Was this instruction helpful to you?
Thank you for voting!
union connector leaking
replaced with new connector and it worked great. also replaced the water filter and that was super easy!
Parts Used:
-
Amy from Bryan, TX
-
Difficulty Level:Really Easy
-
Total Repair Time:15 - 30 mins
-
Tools:Pliers
7 of 11 people
found this instruction helpful.
Was this instruction helpful to you?
Thank you for voting!
Noisey evap motor
I tried to quite the noisey evap motor with special liquid motor grease from Radio Shack. It did not work, so I ordered the evap motor. My freezer motor was wired slightly different than the motor I received. The replacement motor had a male plug attached to the four wires, the original motor was different, so I cut the wires and spliced them into the original freezer wires (colors were the same). Remounted motor. Works great, and no more groaning motor
Peter
Peter
Parts Used:
-
Peter from Kalispell, MT
-
Difficulty Level:Easy
-
Total Repair Time:30 - 60 mins
-
Tools:Nutdriver
7 of 11 people
found this instruction helpful.
Was this instruction helpful to you?
Thank you for voting!
plastic wall support ports broken Door closing hard to not at all.
replaced divider wall. Removed shelf and drawers from freezer unit.
Removed old screws. Attached shelf rail to new divider wall and reinstall. A magnetic nut driver helped a bunch. Did not need to remove the door. Still concerned about design of part but that is not due to parts select but rather to GE. Really should have a metal support where screws go into the top of the freezer. attached to the divider wall This will probably break again same place. Caused by overloading drawers or shelf such that they pull on the horizontal support bar when opening. breaks the plastic screw support brackets. This provides for horizontal support of the divider wall as does a small hole in the horizontal bar. I reinforced that with a zip tie and a hole in the divider wall made with drill before installation. the fit of the plastic was sloppy on the bottom of the divider wall.
Removed old screws. Attached shelf rail to new divider wall and reinstall. A magnetic nut driver helped a bunch. Did not need to remove the door. Still concerned about design of part but that is not due to parts select but rather to GE. Really should have a metal support where screws go into the top of the freezer. attached to the divider wall This will probably break again same place. Caused by overloading drawers or shelf such that they pull on the horizontal support bar when opening. breaks the plastic screw support brackets. This provides for horizontal support of the divider wall as does a small hole in the horizontal bar. I reinforced that with a zip tie and a hole in the divider wall made with drill before installation. the fit of the plastic was sloppy on the bottom of the divider wall.
Parts Used:
-
David from INDIANAPOLIS, IN
-
Difficulty Level:Really Easy
-
Total Repair Time:15 - 30 mins
-
Tools:Nutdriver
7 of 12 people
found this instruction helpful.
Was this instruction helpful to you?
Thank you for voting!
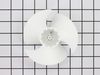
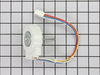
freezer drop temp to 12 degrees.recommended temp zero.
Replace the motor fan on condenser and clean the condenser
Parts Used:
-
clyde from RIALTO, CA
-
Difficulty Level:Difficult
-
Total Repair Time:30 - 60 mins
-
Tools:Nutdriver, Screw drivers
4 of 4 people
found this instruction helpful.
Was this instruction helpful to you?
Thank you for voting!
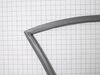
The gaskets do not fit. The magnet doesn’t catch and there is a wide gap in the side of refrigerator
A professional replaced the gaskets. (He has replaced many gaskets and he could not get them to work correctly.
I need a replacement and discount for my inconvenience.
I need a replacement and discount for my inconvenience.
Parts Used:
-
Carol from VESTAVIA HLS, AL
-
Difficulty Level:Very Difficult
-
Total Repair Time:More than 2 hours
4 of 4 people
found this instruction helpful.
Was this instruction helpful to you?
Thank you for voting!
refrigerator not cold
removed freezer door / shelf /ice maker pulled back panel off and removed fan
Parts Used:
-
Joseph from FARMINGVILLE, NY
-
Difficulty Level:Easy
-
Total Repair Time:30 - 60 mins
-
Tools:Nutdriver, Screw drivers
4 of 4 people
found this instruction helpful.
Was this instruction helpful to you?
Thank you for voting!
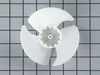
INTERMITENT LOUD NOISE FROM EVAPORATOR FAN IN FREEZER
The repair did not go exactly the way it was described in the YouTube video, but basically it was similar. After unplugging the power cord, emptying the freezer, removing the shelves and the ice reservoir, I removed the ice maker assembly by unscrewing a Philips head screw and unplugging the power connector. The connector had little retaining tabs on each side that I pried open with a straight blade screwdriver. Then the ice maker lifted right out. Next I removed one screw holding the auger motor assembly, unplugged the power connector, and lifted out the assembly. This where things got difficult. After flailing around a bit, I removed the panel on the back wall of the freezer below the evaporator fan assembly, exposing the evaporator coil. I saw that the fan assembly was attached with two screws at the top and two screws at the bottom. The top screws were easily removed, but when I removed the bottom screws, which were situated in very tight quarters, I DROPPED BOTH SCREWS DOWN BEHIND THE EVAPORATOR COIL. Be prepared with a magnetic nutdriver so this doesn't happen to you. I could not retrieve the lost screws, but fortunately it appears that the top screws hold the assembly securely enough. The assembly was loose, but it was still attached by a power cord that I could not disconnect. I removed the tracks on the side walls for the ice bucket, and then I could maneuver the fan motor assembly just enough that I could reach over the top of it, grab and pull off the old fan blade, and slide the new fan blade onto the shaft. Reassembly was straightforward, replacing each part (except two lost screws) in reverse order to disassembly. After getting everything put back in and plugging in the power cord, I was amazed at how quiet it ran.
Parts Used:
-
Bert from SAN JOSE, CA
-
Difficulty Level:A Bit Difficult
-
Total Repair Time:30 - 60 mins
-
Tools:Nutdriver, Screw drivers
4 of 5 people
found this instruction helpful.
Was this instruction helpful to you?
Thank you for voting!
Refrigerator light wouldn't come on.
After replacing the light bulb and still no light I manually pushed the light switch button. Intermittently the light would come on then go out. I removed the power plug from the power source then replaced the light switch. I plugged the refrigerator back in and now I open the door the light comes on and stays on until the door is closed.
Parts Used:
-
Daniel from Crown Point, IN
-
Difficulty Level:Easy
-
Total Repair Time:15 - 30 mins
-
Tools:Pliers, Screw drivers
4 of 5 people
found this instruction helpful.
Was this instruction helpful to you?
Thank you for voting!