This 18 ml bottle of white appliance touch-up paint is used to cover scratches or marks on your appliance. The white touch-up paint can be used on refrigerators, microwaves, ranges, clothes dryers, an...
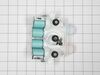
This washing machine inlet valve is a genuine OEM replacement part designed to regulate water flow during the fill cycle. Controlled by an internal solenoid, the valve opens and closes as needed to al...
Having a problem with a funky-smelling washing machine, or one that just doesnt seem to clean your clothes as well as it used to? Say hello to the Affresh Washing Machine Cleaner by Whirlpool. This po...
Are you dealing with a faulty washplate in your washing machine? Meet the Whirlpool Washer Washplate Screw, your personal helper for securing loose or broken washplates. This genuine OEM part is highl...
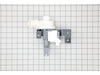
This lid lock assembly is designed for use in various top-load washing machines and serves as a critical safety feature. Located beneath the washer lid, it includes the locking mechanism and wiring ha...
If your washer isn’t spinning, agitating, or cleaning clothes like it used to, the gearcase might be the issue. This part powers the agitator and spin basket, helping your machine run smoothly. It fit...
This drain pump is engineered for top-load washing machines and plays a vital role in the appliance’s drainage system. During the drain cycle, it efficiently removes water from the washer tub and chan...
$176.95
In Stock
Questions And Answers for MVWB835DW3
Ask our experts a question about this model and we'll get back to you as soon as possible!
20 questions answered by our experts.
< Prev
1
2
3
Next >
Sort by:
Search filter:
Clear Filter
Your search term must have 3 or more characters.
Keep searches simple. Use keywords, e.g. "leaking", "pump", "broken" or "fit".
Sorry, we couldn't find any existing answers that matched.Try using some different or simpler keywords, or submit your new question by using the "Ask a Question" button above!
Justin
September 30, 2021
The washing machine has a burning rubber smell. I tried finding a belt but I can't find one on your website. Is there something else that could be causing the smell?
For model number MVWB835DW3
Hello Justin, Thank you for the question. Since this model does not use a Belt, we suggest checking the Stator for wear or damage. We hope this helps!
Washer shows error code F7 E8. When you press start, the lid will lock and the sensing light will come on, but then othering happens. How do you tell if its the clutch or stator?
For model number MVWB835DW3
Hi Todd, thank you for contacting us. Based on our understanding of the issue, we would recommend checking the control board, part number PS12745279, as it is most likely faulty and may need to be replaced. We hope this solves your problem!
My washer will not power up. I see a Green flashing led on the main board. When i first plug in the washer it blinks faster and then slows down after a little bit of time. There are no lights on the console
For model number MVWB835DW3
Hello Douglas,
Thank you for your question. We suggest replacing the electronic control board under part PS12348153 for your model. Hope this helps!
I get a code f6e2 or f6e3, what part do I need? It does not break every time I use the washing machine. Thank you
For model number MVWB835DW3
Hello Bob, Thank you for the great question. These error codes normally indicate a communication error with the Main Control Board. This error can be caused by faulty wiring or loose connectors at one the board. I suggest checking the wiring and connections and if this did not fix the issue, the board may need to be replaced. Good luck with this repair!
1.) disconnect power to your washer. Turn off water supply and disconnect from the washer.
open the washer top and remove plastic cap from the wash plate
2.) using 7/16 socket, remove bolt from the wash plate. If you can't remove it with a socket , I recommend using impact wrench.
3.) remove wash plate ( you might need to spray penetrating oil or wd40 inside the bolt hole to loosen it. Check to make sure the wash plate gear grooves are not worn down, if they are, replace it.
4.) using your Maytag specific spaner nut wrench, remove the spaner nut from the shaft of the gear case. This should be right underneath where the wash plate was. If you can't turn it by hand , use a rubber mallet or hammer to encourage it.
5.) some people remove the wash basket at this point. I don't think it is necessary.
6.) close your washing machine. Tape the top closed to keep it from flying open. Tilt your washer back and prop it up where you have access to the underside of the washing machine.
7) remove motor rotor bolt and pull rotor off of the motor.
8.) disconnect the two wire connectors that supply power to motor. using a socket, remove bolts that are keeping motor attached to the gear case.
9.) Now that the gear case is all the is remaining on the underside, you can remove the 4 bolts that are holding the gear case to the washer. Now try to pull gear case out.
10.) if gearcase will not pull out, lower washer back to upright position. Spray penetrating oil or wd40 around the shaft of the gearcase and allow it to sit for 5-10 minutes. Using a hammer, lightly tap on the shaft of the gearcase and it should now fall out. ( you might have to apply penetrating oil again, or apply more force with the hammer.
11.) reinstall motor to new gearcase. Insert new gear case to the washer. Reinstall bolts and reconnect power supply wires.
12. ReInstall spaner nut inside the washer, reinstall wash plate.
Raised lid to remove two Torx head screws from each hinge. Lid will then lift off of hinges. Installation of new lid was the reverse of the removal procedure. It is best to install one hinge to the lid by removing that hinge from the washer. The lid can then be installed by inserting that hinge into it's spot and then over the other hinge. Install the hinge screws into the second hinge and the job is complete. The lid now closes properly allowing the automatic lid lock to function properly.
Removed the old lid by removing the two screws on both sides of the lid holding it to the hinge. Then pull upon the lid to remove. Slide the new lid back on the hinges being careful to slide in the right slot in the lid. Replace the screws through the lid into the hinges and your done


 Diagram and Parts List for Whirlpool Washer")