


MVWB835DC5 Maytag Washer - Overview
Sections of the MVWB835DC5
[Viewing 5 of 5]

 Diagram and Parts List for Maytag Washer")


Keep searches simple, eg. "belt" or "pump".

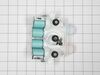
Water Inlet Valve
PartSelect #: PS12348013
Manufacturer #: W11165546
This washing machine inlet valve is a genuine OEM replacement part designed to regulate water flow during the fill cycle. Controlled by an internal solenoid, the valve opens and closes as needed to al...
$113.43
In Stock

Affresh Washing Machine Cleaner - 3 pack
PartSelect #: PS1960673
Manufacturer #: W10135699
Having a problem with a funky-smelling washing machine, or one that just doesnt seem to clean your clothes as well as it used to? Say hello to the Affresh Washing Machine Cleaner by Whirlpool. This po...
$25.31
On Order

Washer Drain Hose
PartSelect #: PS12578897
Manufacturer #: W11244231
The drain hose carries used water from the washer to your house drain.
$33.95
In Stock

Hose Clamp
PartSelect #: PS11740613
Manufacturer #: WP285655
This hose clamp is sold individually.
$14.95
In Stock

Wash Plate
PartSelect #: PS11769534
Manufacturer #: W10902814
This wash plate is for washers
Unplug the washer and shut off the water supply before installing this part
$133.26
In Stock

Dryer Screw
PartSelect #: PS11746840
Manufacturer #: WP90767
This screw is sold individually.
$9.85
In Stock

Washer Washplate Screw
PartSelect #: PS10064547
Manufacturer #: W10752187
Are you dealing with a faulty washplate in your washing machine? Meet the Whirlpool Washer Washplate Screw, your personal helper for securing loose or broken washplates. This genuine OEM part is highl...
$10.59
In Stock

Gearcase
PartSelect #: PS12741641
Manufacturer #: W11393685
If your washer isn’t spinning, agitating, or cleaning clothes like it used to, the gearcase might be the issue. This part powers the agitator and spin basket, helping your machine run smoothly. It fit...
$369.78
In Stock

Washer Hose Clamp
PartSelect #: PS11741854
Manufacturer #: WP356138
This clamp helps to prevent leaking by holding the end of water hose in place.
$14.37
In Stock

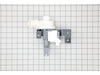
Water-Pump
PartSelect #: PS11738156
Manufacturer #: W10876600
This drain pump is engineered for top-load washing machines and plays a vital role in the appliance’s drainage system. During the drain cycle, it efficiently removes water from the washer tub and chan...
$176.95
In Stock


SLIDER
PartSelect #: PS10060062
Manufacturer #: W10734521
This clutch slider kit is part of the transmission system in select washing machines, helping control the movement and speed of the agitator during wash and spin cycles. The kit includes a clutch band...
$58.25
In Stock
Common Symptoms of the MVWB835DC5
[Viewing 14 of 14]Leaking
Fixed by
these parts
these parts


Show All
Will not agitate
Fixed by
these parts
these parts


Show All
Water Filling Issues
Fixed by
these parts
these parts
Show All
Spinning Issues
Fixed by
these parts
these parts


Show All
Lid or door won’t close
Fixed by
these parts
these parts


Show All
Will not drain
Fixed by
these parts
these parts
Show All
Shaking and Moving
Fixed by
these parts
these parts


Show All
No hot or cold water
Fixed by
these parts
these parts
Show All
Noisy and Marks Left on Clothes
Fixed by
these parts
these parts
Show All
Draining Issues
Fixed by
these parts
these parts
Show All
Will Not Start
Fixed by
these parts
these parts

Show All
Locking Issues
Fixed by
these parts
these parts
Show All
Cycle Not Advancing
Fixed by
these parts
these parts
Show All
Spins slowly
Fixed by
these parts
these parts
Show All


Keep searches simple. Use keywords, e.g. "leaking", "pump", "broken" or "fit".
Loud grinding noise when the washer was in use.
1.) disconnect power to your washer. Turn off water supply and disconnect from the washer.
open the washer top and remove plastic cap from the wash plate
2.) using 7/16 socket, remove bolt from the wash plate. If you can't remove it with a socket , I recommend using impact wrench.
3.) remove wash plate ( you might need to spray penetrating oil or wd40 inside the bolt hole to loosen it.
Check to make sure the wash plate gear grooves are not worn down, if they are, replace it.
4.) using your Maytag specific spaner nut wrench, remove the spaner nut from the shaft of the gear case. This should be right underneath where the wash plate was. If you can't turn it by hand , use a rubber mallet or hammer to encourage it.
5.) some people remove the wash basket at this point. I don't think it is necessary.
6.) close your washing machine. Tape the top closed to keep it from flying open. Tilt your washer back and prop it up where you have access to the underside of the washing machine.
7) remove motor rotor bolt and pull rotor off of the motor.
8.) disconnect the two wire connectors that supply power to motor. using a socket, remove bolts that are keeping motor attached to the gear case.
9.) Now that the gear case is all the is remaining on the underside, you can remove the 4 bolts that are holding the gear case to the washer. Now try to pull gear case out.
10.) if gearcase will not pull out, lower washer back to upright position. Spray penetrating oil or wd40 around the shaft of the gearcase and allow it to sit for 5-10 minutes. Using a hammer, lightly tap on the shaft of the gearcase and it should now fall out. ( you might have to apply penetrating oil again, or apply more force with the hammer.
11.) reinstall motor to new gearcase. Insert new gear case to the washer. Reinstall bolts and reconnect power supply wires.
12. ReInstall spaner nut inside the washer, reinstall wash plate.
Parts Used:
-
Charles from STARKVILLE, MS
-
Difficulty Level:Easy
-
Total Repair Time:1- 2 hours
-
Tools:Nutdriver, Screw drivers, Socket set
67 of 82 people
found this instruction helpful.
Was this instruction helpful to you?
Thank you for voting!
Faulty fill valve
Did troubleshooting after code LF showed on indicator window. Did troubleshooting; checked hoses for obstructions and small filters on inlets. All good. Ordered new fill valve. Came in a few days, good service.
Removed control panel top by removing screws on back of control panel, then by pushing putty knife under each side to release spring clips. Carefully lifted cover and set onto lid. Photographed fill valve at left side as you are standing in front of machine. Removed screws with small ratchet. Carefully removed wires via clips. Lifted out valve.
Attached wires to new, set back into its place, replaced screws, tightened but not too tight so as to break part. Replaced control panel, pushing downward to engage spring clips, then replace screws on back.
Re attached hoses, ensuring they were on the correct sides, plugged machine into power, ran through cycle and VIOLA!! Worked perfectly!! After a couple weeks, still working perfectly! Was VERY happy it was only fill valve and not mother board as the cost was a fraction.
I found trouble shooting videos to be very helpful. Your service quite good.
Parts Used:
-
Marian from GREYBULL, WY
-
Difficulty Level:Really Easy
-
Total Repair Time:30 - 60 mins
-
Tools:Nutdriver
18 of 22 people
found this instruction helpful.
Was this instruction helpful to you?
Thank you for voting!
Washer making noise on spin cycle
Removed two screws on back of lid to raise top removed tub one bolt and one spanernut pulled tub lowered top reinstalled screws laid washer down to get to bottom of washer unplugged wiring removed four bolts pulled gear box and motor removed motor from gear box installed motor on new gear box reassemble washer
Parts Used:
-
Roy from MAYNARDVILLE, TN
-
Difficulty Level:Really Easy
-
Total Repair Time:30 - 60 mins
-
Tools:Nutdriver, Pliers, Screw drivers
20 of 29 people
found this instruction helpful.
Was this instruction helpful to you?
Thank you for voting!