




















MMV5165AAS (10) Maytag Microwave - Overview
Sections of the MMV5165AAS
[Viewing 1 of 1]
Keep searches simple, eg. "belt" or "pump".
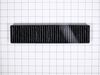
Charcoal Filter
PartSelect #: PS3527523
Manufacturer #: 5230W1A003A
This is an authentic LG charcoal filter for your microwave, sourced directly from the manufacturer. It is designed to remove odors from the air that circulate through your microwave vent. It measures ...
$50.55
In Stock
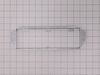
Air Duct Bracket
PartSelect #: PS3523851
Manufacturer #: 4810W1A151A
This bracket holds the metal or plastic flapper that closes off the exhaust duct when the fan is not running and opens when the fan turns on. If the exhaust fan on your microwave does not appear to be...
$24.15
In Stock

Microwave Damper
PartSelect #: PS3524148
Manufacturer #: 4900W1A001B
This metal vent damper door closes off the exhaust duct when the fan is not running to stop outside air from entering the microwave unit, and opens when the fan turns on to allow air to vent away from...
$17.55
In Stock
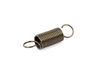
Spring
PartSelect #: PS3524607
Manufacturer #: 4970WRA001G
This spring provides tension or controlled movement within the appliance mechanism. Engineered for durability, it supports smooth operation and helps maintain proper alignment of connected components.
$13.15
In Stock

Microwave Motor Ac Synchronous
PartSelect #: PS3529216
Manufacturer #: 6549W1S013H
If the turntable on your microwave does not rotate, or you can hear a grinding noise, the problem may be with the motor. The motor is typically located below the floor of the oven, and is accessed thr...
$50.55
In Stock
Hardware Mounting Kit
PartSelect #: PS3522503
Manufacturer #: 3861W1A043C
Are you looking to get your LG microwave back up and running smoothly? You're in the right place! With our LG Hardware Mounting Kit, you'll have everything you need for a straightforward, fuss-free in...
$48.35
In Stock

Holder Assembly,Locker
PartSelect #: PS3519053
Manufacturer #: 3501W1A019D
Are you struggling with a faulty microwave door? Introducing the Locker Door Latch Housing Assembly, a crucial part specifically crafted for LG microwaves. This essential component guarantees that you...
$55.94
Special Order

Mounting Plate
PartSelect #: PS3518617
Manufacturer #: 3300W0A030A
Struggling to keep your LG microwave oven securely in place? We have an easy, effective solution for you - our authentic LG Microwave Oven Mounting Bracket Plate. This isn't just another part, but a v...
$56.05
In Stock
Common Symptoms of the MMV5165AAS
[Viewing 6 of 6]No heat
Fixed by
these parts
these parts

Show All
Won’t turn on
Fixed by
these parts
these parts
Show All
Tray won’t turn
Fixed by
these parts
these parts

Show All
Door not closing properly
Fixed by
these parts
these parts

Show All
Doesn’t shut off
Fixed by
these parts
these parts
Show All
Noisy
Fixed by
these parts
these parts
Show All
Keep searches simple. Use keywords, e.g. "leaking", "pump", "broken" or "fit".
Broken door micro switch. (unit does not start heating)
Unplug the unit before servicing. Need phillips screwdriver. Open door. Use step ladder to access and remove 2 small screws from top of the room air diffuser at top of unit. Slide diffuser slightly to the left to align the diffuser's plastic tab on the left side to rotate toward you. (The wires for the front control panel are at the far left side of this difuser, but difuser is slotted for easy removal). Once the difuser is removed you will see 1 screw at the top that secures the pannel cover on the left side of the unit. Remove screw and slide this panel slightly up and out. This exposes the plastic frame that holds the upper and lower door switches. To locate the door switches and observe how they work, close and open the door and watch the door (bayonets) open and close the micro switches. Do the (red) buttons on top of the switches move up and down when the door bayonets push and release? If the buttons do not "pop" up when opened the switch is defective. The switch frame is secured with 2 screws. Remove screws and rotate the unit out for easy access to the micro switch(s). The internal (spring?) on my unit that is suposed to allow the red (visible) button on top of the switch to "pop" up when the door is opened was broken. Carefully pry the switch outward while being careful to lift the plastic holder-piece that holds the switch in place. Be careful, there is a small pin on the frame, so rotate the switch OUT toward you while lifting (carefully) the plastic holder-piece (you will see it on top of the switch). You can use an ohm meter to test the continuity of the switches. But if the buttons don't "pop" they are defective. Replace switch and reassemble.
Parts Used:
-
JAMES from BILLINGS, MT
-
Difficulty Level:Very Easy
-
Total Repair Time:30 - 60 mins
-
Tools:Screw drivers
37 of 68 people
found this instruction helpful.
Was this instruction helpful to you?
Thank you for voting!
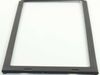
The major plastic frame was broken at the screw hole support. I was sent the wrong part and found out the part I needed was no longer made and would have to buy a new door for $150.
The wrong part was under $20. When I found out I had to replace the whole door for $150. I decided DYI was the way to go. I used JB weld and the door looks and works like a charm. Give plenty of time to cure all water needs to be cured out if exposed to microwaves. No problems so far.
Parts Used:
-
Kyle from LANCASTER, CA
-
Difficulty Level:Really Easy
-
Total Repair Time:30 - 60 mins
-
Tools:Screw drivers
10 of 11 people
found this instruction helpful.
Was this instruction helpful to you?
Thank you for voting!
One of the switches in a component that door activates when shut.
I replaced the whole component with all three switches in it even though only one switch was bad . Taking out one switch out of the holder unit would probably have damaged the unit that was holding the switches. Easy install and it works great again .
Parts Used:
-
Jimmy from OZARK, MO
-
Difficulty Level:Easy
-
Total Repair Time:30 - 60 mins
-
Tools:Pliers, Screw drivers
9 of 11 people
found this instruction helpful.
Was this instruction helpful to you?
Thank you for voting!