




















MEP5775BAF19 Maytag Range - Instructions
Keep searches simple. Use keywords, e.g. "leaking", "pump", "broken" or "fit".
burned out element
slide stove all the way out. Remove front, then top, unhooking two wiring harnesses. Took pictures of existing wires to make sure to get back in same place. Pull element wire connections off. Replaced element and reconnected. Fairly easy.
Parts Used:

-
David from Millville, UT
-
Difficulty Level:Easy
-
Total Repair Time:30 - 60 mins
-
Tools:Pliers, Screw drivers
4 of 6 people
found this instruction helpful.
Was this instruction helpful to you?
Thank you for voting!
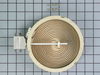
Right Side Rear Burner Not Working
Only hitch I experienced was identifying the correct replacement. The original diagram presented the accurate shape of the element my range required. However a different shaped element was displayed when I noted my unit is a series 12 serial number. I ordered it (with reservations) and as it turned out the replacement was identical to mine. Next time I will have a lil more confidence in the instructions given.
Parts Used:
-
WILLIAM from TAMPA, FL
-
Difficulty Level:Easy
-
Total Repair Time:Less than 15 mins
-
Tools:Screw drivers
3 of 3 people
found this instruction helpful.
Was this instruction helpful to you?
Thank you for voting!
Gasket was worn out.

-
Michael from VALLEJO, CA
-
Difficulty Level:Really Easy
-
Total Repair Time:Less than 15 mins
-
Tools:Pliers
3 of 3 people
found this instruction helpful.
Was this instruction helpful to you?
Thank you for voting!
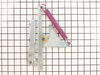
Oven door hinge was broken.
1. Open oven door to first detent, then pull it up off the hinges.
2. Pull oven out from counter 10-12 inches.
3. Hinges are accessible from the outside of the oven.
4. Remove 2 screws on each hinge and remove old hinges.
5. Put new hinges in place and try to insert mounting screws.
6. Wonder why screws won't start in threads.
7. Examine new hinges and notice they are not threaded for the screws.
8. Screws are not self-tapping, so go to basement and get tap & die set.
9. Use 10-24 tap to make threads in new hinges.
10. Put new hinges in place and insert mounting screws. Tighten.
11. Pull hinges to first detent and put oven door on hinges.
12. Push oven back into place in counter.
2. Pull oven out from counter 10-12 inches.
3. Hinges are accessible from the outside of the oven.
4. Remove 2 screws on each hinge and remove old hinges.
5. Put new hinges in place and try to insert mounting screws.
6. Wonder why screws won't start in threads.
7. Examine new hinges and notice they are not threaded for the screws.
8. Screws are not self-tapping, so go to basement and get tap & die set.
9. Use 10-24 tap to make threads in new hinges.
10. Put new hinges in place and insert mounting screws. Tighten.
11. Pull hinges to first detent and put oven door on hinges.
12. Push oven back into place in counter.
Parts Used:
-
Jim from INDIANAPOLIS, IN
-
Difficulty Level:A Bit Difficult
-
Total Repair Time:15 - 30 mins
-
Tools:Nutdriver
3 of 3 people
found this instruction helpful.
Was this instruction helpful to you?
Thank you for voting!
back R burner of ceramic top stove went out - died
1st - UNPLUGGED appliance from electrical source!! then removed screws to open ceramic stove top, disconnected wires from dead element, plugged in wires to new element, closed stove top, turned on burner - it worked!!
only problem is that "hot burner indicator" does NOT stay lit after burner is turned off!
only problem is that "hot burner indicator" does NOT stay lit after burner is turned off!
Parts Used:
-
gayleana from spokane, WA
-
Difficulty Level:Easy
-
Total Repair Time:15 - 30 mins
-
Tools:Screw drivers
4 of 6 people
found this instruction helpful.
Was this instruction helpful to you?
Thank you for voting!
bake element non operational
No instructions with part, so I had to look up on internet. This took more time than installing it. Think basic instructions should come with the expensive part.
Parts Used:

-
Charles from Sneads Ferry, NC
-
Difficulty Level:Easy
-
Total Repair Time:15 - 30 mins
-
Tools:Pliers, Screw drivers
3 of 3 people
found this instruction helpful.
Was this instruction helpful to you?
Thank you for voting!
The electric element in the oven broke
Shut off breaker, assure zero energy. Using phillips screwdriver remove old element, unplug wires from element. Reconnect wires to new element, secure screws. Assure all tools removed and people are clear before re-energizing power to range. I was not happy with the packaging, the new element came in a box with no protective packing material!
Parts Used:
-
richard from hamilton, NJ
-
Difficulty Level:Easy
-
Total Repair Time:Less than 15 mins
-
Tools:Socket set
3 of 3 people
found this instruction helpful.
Was this instruction helpful to you?
Thank you for voting!
Oven erratic, not heating correctly, timer beeper sounding
The video indicating •unscrew old sensor, •pull wiring, •unplug old sensor, and •plug in replacement was good until I pulled the old one and saw wire nuts behind the small square hole! After some research, I learned that the nuts COULD come through that small hole with use of needle nose pliers. One of the wire nuts had the edges pinched off (chipped) in the process. Then I learned about ceramic wire nuts, which I'd never previously encountered. Very important if you don't want to melt your nuts! I cut and stripped the end of a disconnect plug to the stove wiring and now I have a plug in place; which, hopefully, I'll never need to use.
Parts Used:

-
Dave from SANTA BARBARA, CA
-
Difficulty Level:A Bit Difficult
-
Total Repair Time:30 - 60 mins
-
Tools:Pliers, Screw drivers
3 of 3 people
found this instruction helpful.
Was this instruction helpful to you?
Thank you for voting!
Oven heat loss, door gasket needed replacement
The entire "project" took me less than 3 minutes, and required no tools at all! First, the saleswoman over the phone pointed me to the correct product for my problem ($30 less than what I thought I needed), and it arrived at my home within 4 days. Then, it was just a matter of pulling off the old gasket, and snapping the new one in place! Simple!
Parts Used:
-
Stephen from Chapell Hill, NC
-
Difficulty Level:Really Easy
-
Total Repair Time:Less than 15 mins
3 of 4 people
found this instruction helpful.
Was this instruction helpful to you?
Thank you for voting!
Inner glass pane broke during self-cleaning operation
I removed all the screws that held the trim and inner frame to the outside window unit first. Then, I removed a protective glass from over the two inner panes. Next after removing the frame that held the two inner glass panes together, I took the broken inner glass pane out and replaced it with the new one. Then basically I just retraced my steps and had the door put back together in about 45 minutes. You just need to pay close attention to your disassembly so that you are able to put the pieces back together quickly.
Parts Used:

-
Mark from Abingdon, VA
-
Difficulty Level:Easy
-
Total Repair Time:30 - 60 mins
-
Tools:Screw drivers
4 of 7 people
found this instruction helpful.
Was this instruction helpful to you?
Thank you for voting!
Indicator Lens melted and fell back into the control panel
I took the back panel off, removed the old lens, installed the new lens. How easy to order from home, receive the part, do the repair and pay less than it costs to simply drive to the parts house. Cool....
Parts Used:

-
Philip from Houston, TX
-
Difficulty Level:Really Easy
-
Total Repair Time:Less than 15 mins
-
Tools:Screw drivers
3 of 4 people
found this instruction helpful.
Was this instruction helpful to you?
Thank you for voting!
handle broke on one side
The best I can say is to remove door. take screws out from the bottom and sides first. Clean all layers of glass before installing handle.
Parts Used:
-
Howard from Ticonderoga, NY
-
Difficulty Level:A Bit Difficult
-
Total Repair Time:1- 2 hours
-
Tools:Screw drivers
4 of 7 people
found this instruction helpful.
Was this instruction helpful to you?
Thank you for voting!
ovens wouldn't maintain temperature after preheat cycle
unplugged oven. removed 2 screws that hold the sensor in place, then removed the dozen or so screws that hold on the rear panel, unplugged sensor and fed wire through insulation. identified and installed correct harness adapter then fed new wire and connecter through insulation and connected to adapter. installed sensor retaining screws.plugged oven back in and tested function.no dice. unplugged oven once again. removed oven control panel and upon inspection of printed circuit board discovered 3 solder joints had failed. dang. resoldered failed joints and also sweetened up a few others that looked suspect. reinstalled controller, replaced all retaining hardware, and plugged in the oven. tah-dah!! works like a charm now. moral of the story is check the pc board first and save $50 for unneeded pats!!! or buy the controller from parts direct for $260ish. btw a roll of solder and soldering iron from an auto parts store cost around $10, learned to solder on you-tube $0. amazing all the home appliances yo can fix if you're not afraid to take a few screws out and poke around a bit. CHEERS!
Parts Used:
-
sherri from elk horn, IA
-
Difficulty Level:A Bit Difficult
-
Total Repair Time:30 - 60 mins
-
Tools:Screw drivers
3 of 4 people
found this instruction helpful.
Was this instruction helpful to you?
Thank you for voting!
Bake element blew up
took the old one out (two phillips head screws)and put the new one in. done. took about 5-6 minutes.
Parts Used:
-
Kevin from Norfolk, VA
-
Difficulty Level:Easy
-
Total Repair Time:Less than 15 mins
-
Tools:Screw drivers
4 of 7 people
found this instruction helpful.
Was this instruction helpful to you?
Thank you for voting!
Bottom oven door handle broke when someone tried to open door too soon following self-cleaning cycle.
We removed the door from the hinges by sliding it up. Then we removed all the screws holding the door together. We had to remove the screw securing the trim. Next we removed the screws inside the trim holding the old handle. We replaced the handle and trim and screws in reverse order. Finally, we re-attached the door by sliding it onto the hinges.
Parts Used:
-
ROY LYNN from SEMINOLE, TX
-
Difficulty Level:Easy
-
Total Repair Time:30 - 60 mins
-
Tools:Screw drivers
4 of 7 people
found this instruction helpful.
Was this instruction helpful to you?
Thank you for voting!