This dryer repair kit consists of five commonly replaced dryer parts: one multi-rib belt (part #661570V and measures 93 1/2 inches long), four drum support rollers, one idler assembly, nine tri-rings,...
$56.05
In Stock
Order within the next 7 hrs and your part ships today!
The drum support roller kit (Dryer Repair Kit) allows the dryer to tumble properly by supporting the drum cylinder. The idler pulley provides the tension required for a multi-ribbed belt. The belt att...
$51.13
In Stock
Order within the next 7 hrs and your part ships today!
This 240V/5400W heating element is strung with a coiled wire made of a nickel and a chrome alloy. This wire receives, but resists, a controlled electric current, causing the wire to heat up. The heat ...
$78.84
In Stock
Order within the next 7 hrs and your part ships today!
This thermal cut-off kit for a dryer includes one high limit thermostat with a limit of 250 degrees Fahrenheit, and one thermal cut-off fuse (309 degrees). This kit also includes flat heaters with jumper wires.
$58.59
In Stock
Order within the next 7 hrs and your part ships today!
If you notice that your dryer is noisy or will not tumble, you may need to replace the tri ring. This part is triangular, and is less than an inch in size. Tri rings can be found both on the idler pul...
$17.01
In Stock
Order within the next 7 hrs and your part ships today!
This 18 ml bottle of white appliance touch-up paint is used to cover scratches or marks on your appliance. The white touch-up paint can be used on refrigerators, microwaves, ranges, clothes dryers, an...
$17.95
In Stock
Order within the next 7 hrs and your part ships today!
This high-limit thermostat with Terminal Extension Arm acts as as safety mechanism that keeps the dryer from overheating. Once the dryer temperature reaches 221 degrees Fahrenheit, this piece will shu...
$29.65
In Stock
Order within the next 7 hrs and your part ships today!
This manufacturer-certified dryer lint filter is used to collect lint during the dryer cycle, to prevent damage to the machine and to prevent lint from sticking to clothes. This model comes in white a...
$64.85
In Stock
Order within the next 7 hrs and your part ships today!
Questions And Answers for MEDC215EW1
Ask our experts a question about this model and we'll get back to you as soon as possible!
59 questions answered by our experts.
< Prev
1
2
3
Next >
Sort by:
Search filter:
Clear Filter
Your search term must have 3 or more characters.
Keep searches simple. Use keywords, e.g. "leaking", "pump", "broken" or "fit".
Sorry, we couldn't find any existing answers that matched.Try using some different or simpler keywords, or submit your new question by using the "Ask a Question" button above!
Jim
February 8, 2020
I put a new dryer timer in and also a new timer and timer still won’t advance. It just runs and runs.
For model number MEDC215EW1
Hello Jim,
Thank you for your question. Our sources suggest replacing the dryer cycling thermostat under part PS11741405 for your model to fix the timers issues. We hope this helps.
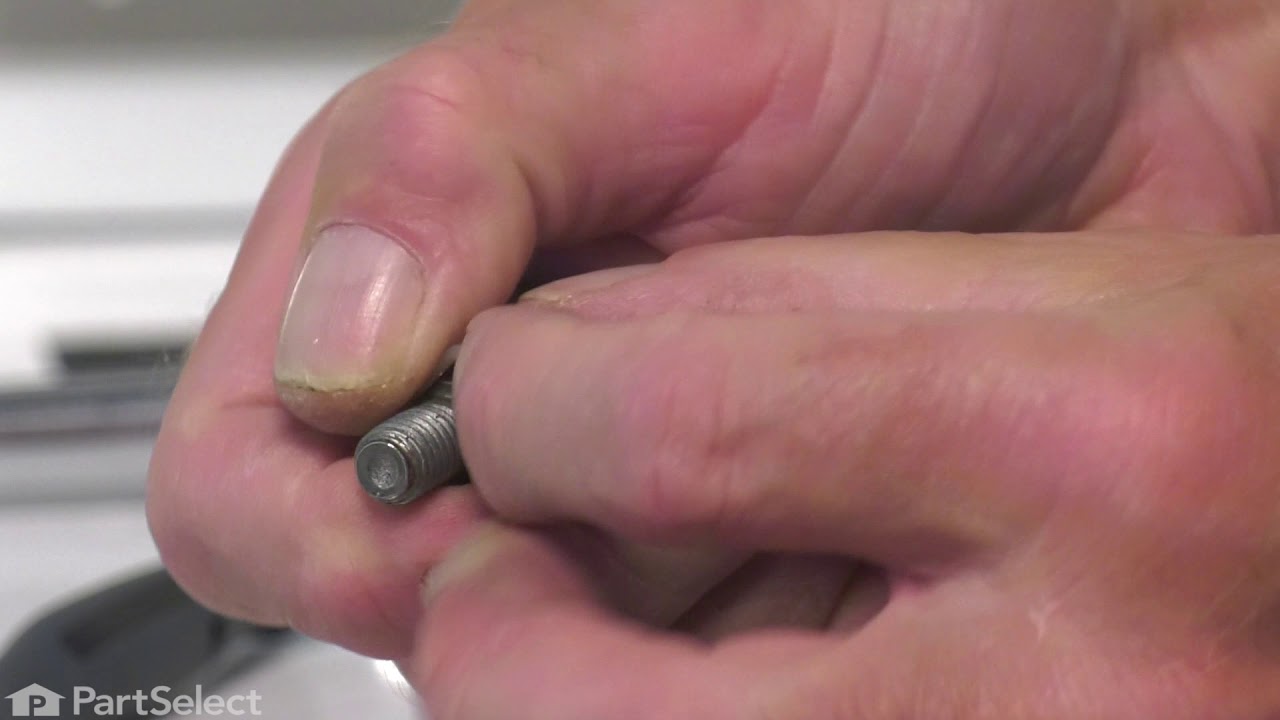
How do I access the right roller shaft nut on my dryer?
For model number MEDC215EW1
Hi Tony, thank you for reaching out to PartSelect. We have included a video that help your to access and replace the right drum support roller shaft. The dryer in the video may appear different from yours, but it will give you a general idea of how to install the part. We hope this helps with the repair.
4 peoplefound this helpful.
Was this helpful?
Thank you for voting!
Doug
November 22, 2023
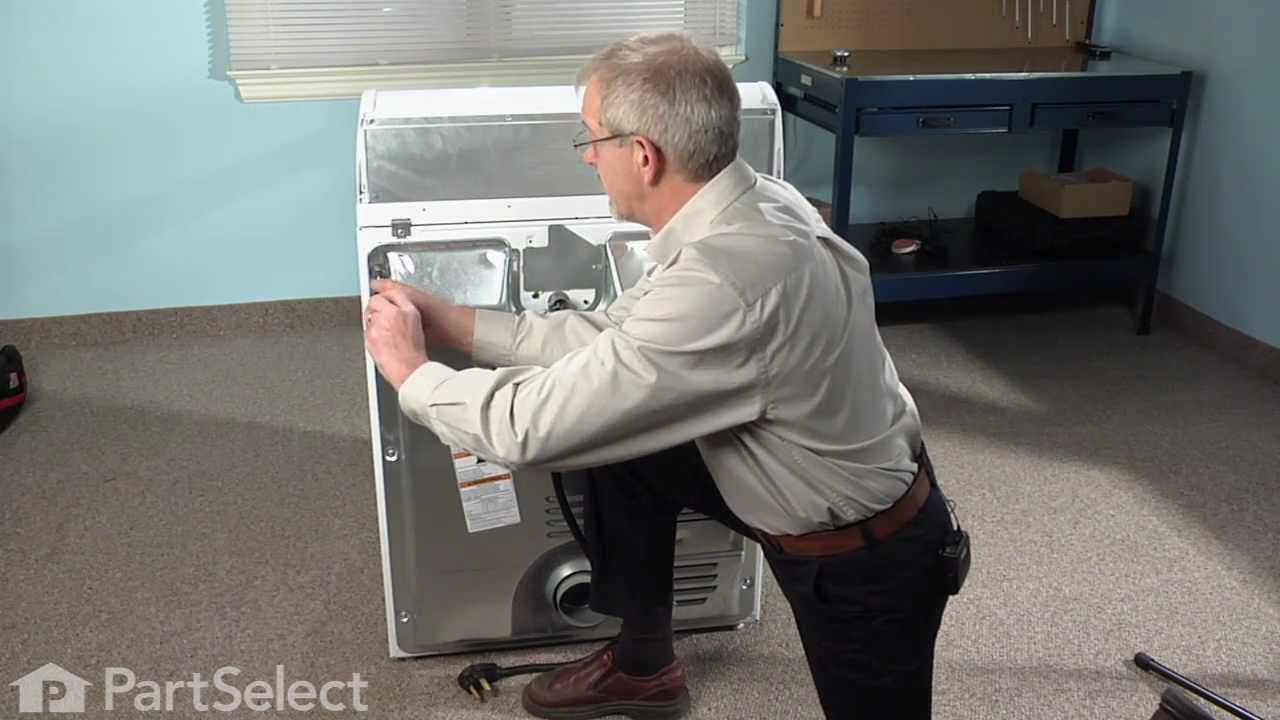
Does the heating element come with everything I need to replace it.
For model number MEDC215EW1
Hi Doug, thank you for your inquiry. The heating element, part number PS334313, does not come with any other tools or parts. You will just need a nut driver and pliers to replace it. We have included a video that you may reference on how to replace the heating element. The dryer in the video may appear different from yours, but it will give you a general idea of how to install the part. We hope this helps with the repair.
To reach the heating element you only need to open the back cover of the dryer (about 8 nut-head screws). Remember to disconnect the power.
To remove the heating element there are two small nut-head screws. Remove the two electric wires. Then you can pull the heating element away.
You can check the heating element with an ohm-meter or visually inspect it to see if the heating element spiral wire is broken.
Don't hurry to dispose the old element. My model includes a small electric safety part. You'll need to transfer it to the new heating element (that comes without it)..
First tried heating element and thermal fuse with no luck. Ordered thermal cutoff and fixed problem. Had I used an ohm meter first I would have determined problem before having ordered heating element and fuse, as both had resistance. I wast just lazy and ordered the took the most common failed components first before taking dryer back off.


 Diagram and Parts List for Maytag Dryer")