




















MDE14PDACL Maytag Dryer - Instructions
Keep searches simple. Use keywords, e.g. "leaking", "pump", "broken" or "fit".
Fixing a squeaky dryer
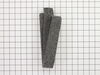
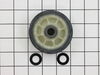
There are several parts that will cause the dryer to squeak, drum roller, idler pully and the drum slides. To start, remove the door and the two opposite screws. Pull the front cover down and remove, no screws to remove, this is a snaped on piece. Next, remove the two screws holding the dryer top bracket and lift the top. Take drum support by removing the screws and then remove the belt from the motor and remove the drum. The hardest part was removing the C clips from the roller axle even with the snap ring pliers. Replace the drum rollers and reverse the process to re-assemble. Of course, the rollers weren't the problem even though they were worn out from 20 years of service. I ended up replacing the idler pully and and the idler pully support arm. If I had all of the parts prior to starting, the total time would have been about an hour. I did watch several YouTube videos before attempting the repair. That helped me understand the "how" and made it easy once I started the repair.
Parts Used:
-
David from LINCOLN UNIV, PA
-
Difficulty Level:Really Easy
-
Total Repair Time:30 - 60 mins
-
Tools:Nutdriver, Screw drivers
2 of 2 people
found this instruction helpful.
Was this instruction helpful to you?
Thank you for voting!
worn out bearing
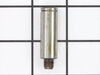
Unplug the dryer and pull it away from the wall so front and back can be accessed. Remove front panel. Remove front drum support. Remove rear access panel. Disengage drive belt from idler wheel. Make careful note of course of belt and which side is "outward". Remove drum through front. Remove Rollers using circlip pliers. Remove nuts behind shafts. Remove shafts. Clean-up area and parts before re-install.
Install new Shafts and nuts. Grease shafts. Install new Rollers, washers and clips. Drape drive belt over drum while reinstalling from front. Remount drive belt over drive and idler pullies from the rear access. During this step it helps to have a helper to position the belt around the drum in correct fore/aft position, lying flat and without twists, smooth side against drum. Install front drom support. Rotate drum to seat belt before closing up. Install rear panel cover. Install Front panel. Plug it in and turn it on for a test.
Install new Shafts and nuts. Grease shafts. Install new Rollers, washers and clips. Drape drive belt over drum while reinstalling from front. Remount drive belt over drive and idler pullies from the rear access. During this step it helps to have a helper to position the belt around the drum in correct fore/aft position, lying flat and without twists, smooth side against drum. Install front drom support. Rotate drum to seat belt before closing up. Install rear panel cover. Install Front panel. Plug it in and turn it on for a test.
Parts Used:
-
Chris from Truckee, CA
-
Difficulty Level:A Bit Difficult
-
Total Repair Time:1- 2 hours
-
Tools:Nutdriver, Screw drivers, Wrench set
2 of 2 people
found this instruction helpful.
Was this instruction helpful to you?
Thank you for voting!
No heat
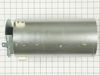
I watched Steve the repairman on u tube then opened up the front of the dryer and noticed the part in my dryer was a little different than the one on the video. So I called in and I was reassured it was what I wanted. When I got the replacement part and before I removed the old part I took pictures of the wiring noticing the wires where changed from left to right I had to make up one of the 12 gauge wires and connectors with parts from the hardware store and the new part was shorter than the old part, but the machine all ready had screw holes where I needed them. I looked at my photos and wired the new part the same way I took the wires off the old part and put it back together and it works like new! saved money! the local guy is $150 to show up and start the clock. I also fixed the blower,EASY!
Parts Used:
-
Steve from MENDOCINO, CA
-
Difficulty Level:Easy
-
Total Repair Time:1- 2 hours
-
Tools:Nutdriver, Socket set
2 of 2 people
found this instruction helpful.
Was this instruction helpful to you?
Thank you for voting!
Dryer Was Making A Very Loud Screching Sound
I looked on line and found a scematic from your web site to determine how to dismantel the dryer. Once I was inside I was able to determine that the drum roller was making the noise. I decided to replace the other moving part while I was inside just in case. . . Pretty easy job
Parts Used:

-
Mitch from Ripin, CA
-
Difficulty Level:Easy
-
Total Repair Time:1- 2 hours
-
Tools:Nutdriver, Pliers, Screw drivers
3 of 5 people
found this instruction helpful.
Was this instruction helpful to you?
Thank you for voting!
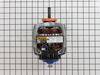
motor hummed but wouldn't turn drum
Unplugged dryer and removed screws that hold door in place. removed screws that hold front panel. removed front panel. took drum belt off idler pulley. pulled drum out of dryer cabinet. unhooked wiring harness and removed motor. replaced motor and reversed steps to put back together. Thanks to partselect for getting me the parts so quickly. I ordered the motor on line on Friday and it was at my house on Saturday.
Parts Used:
-
Yvonna from Mulberry Grove, IL
-
Difficulty Level:Easy
-
Total Repair Time:1- 2 hours
-
Tools:Nutdriver, Screw drivers, Wrench set
3 of 5 people
found this instruction helpful.
Was this instruction helpful to you?
Thank you for voting!
squeaky sound when drying
Removed front panel and tumbler, replaced roller axle,
wheel, and front glides. Anybody can do this.
wheel, and front glides. Anybody can do this.
Parts Used:
-
Chris from Sherman, TX
-
Difficulty Level:Easy
-
Total Repair Time:30 - 60 mins
-
Tools:Pliers, Screw drivers, Wrench set
3 of 5 people
found this instruction helpful.
Was this instruction helpful to you?
Thank you for voting!
Noisy tub rollers
By watching a video I disassembled the front and took the dryer tub out and replace the two rollers and it took about 60 minute.
Parts Used:
-
Johnny from MUNCIE, IN
-
Difficulty Level:Really Easy
-
Total Repair Time:30 - 60 mins
-
Tools:Nutdriver, Screw drivers
2 of 2 people
found this instruction helpful.
Was this instruction helpful to you?
Thank you for voting!
Broken Baffle in Dryer
Removed Dryer Door and front face of dryer, total of 4 screws, turn dryer drum to position broken baffle screws, remove screws, install new baffle, attach front face of dryer and reattach dryer door. Time 15-30 min. total. Real easy. Thank You PartSelect. Maytag told me my part was no longer available, but I fold it at PartSelect.com.
Parts Used:

-
Brian from Warsaw, IN
-
Difficulty Level:Really Easy
-
Total Repair Time:15 - 30 mins
2 of 2 people
found this instruction helpful.
Was this instruction helpful to you?
Thank you for voting!
Long baffle had broken off inside the dryer drum.
Removed four screws from the door hinges and front panel. Removed the front panel by pulling forward from the top and found two screws. The part does not come with screws which are #10 x 1 and 1/4" long hex head sheet metal screws. I believe that the screw size is critical as the part may break loose again if the screws width is too large or small for the predrilled holes in the baffle. One set of holes in the drum had slotted screw holes which would allow for installing the baffle with the screws partially installed in the baffle. I would recommend washers for that installation. Check all three baffles to ensure that all screws are tight.
Parts Used:
-
James from REVERE, MA
-
Difficulty Level:Easy
-
Total Repair Time:15 - 30 mins
-
Tools:Socket set
2 of 2 people
found this instruction helpful.
Was this instruction helpful to you?
Thank you for voting!
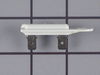
Dryer would not run; blown thermal fuse
unplug dryer; remove dryer door; remove front cover; thermal fuse located on heater underneath and beside drum; remove two electrical leads on fuse; remove two screws holding fuse in place; install new fuse and do the above in reverse; clean lint from duct; plug dryer into
Parts Used:
-
Michael from OAKWOOD, OH
-
Difficulty Level:Easy
-
Total Repair Time:15 - 30 mins
-
Tools:Nutdriver, Screw drivers
2 of 2 people
found this instruction helpful.
Was this instruction helpful to you?
Thank you for voting!
baffles broke
take screws out of front of dryer, pull front off to expose drum and replace baffle
Parts Used:
-
Melissa from CLAY, KY
-
Difficulty Level:Very Easy
-
Total Repair Time:15 - 30 mins
-
Tools:Screw drivers, Socket set
2 of 2 people
found this instruction helpful.
Was this instruction helpful to you?
Thank you for voting!
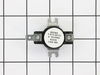
dryer not getting hot enough
my son did the installation according to your excellent video instructions
Parts Used:
-
RON from VIENNA, VA
-
Difficulty Level:Very Easy
-
Total Repair Time:15 - 30 mins
-
Tools:Nutdriver, Pliers, Screw drivers
2 of 2 people
found this instruction helpful.
Was this instruction helpful to you?
Thank you for voting!
front glides wore out
-
james from WOODBURN, IN
-
Difficulty Level:Really Easy
-
Total Repair Time:15 - 30 mins
-
Tools:Nutdriver, Screw drivers
2 of 2 people
found this instruction helpful.
Was this instruction helpful to you?
Thank you for voting!
noisy

-
Ray from MUKWONAGO, WI
-
Difficulty Level:A Bit Difficult
-
Total Repair Time:More than 2 hours
-
Tools:Nutdriver, Socket set
2 of 3 people
found this instruction helpful.
Was this instruction helpful to you?
Thank you for voting!
Dryer emitted a squeaky noise every time it started
We inherited this dryer three years ago upon purchasing our current house. At that time I found this website to purchase and install a couple of the baffles that were missing. This time, I checked the troubleshooting for my current problem and ordered all of the parts I felt I needed to resolve the problem. Once I received the parts, I followed the great how-to videos by Steve to disassemble the front of the dryer and remove the drum. I could not get to the repairs right away since the interior of the dryer was quite dirty and I took a lot of time to clean it out. Once I got to removing and replacing the drum rollers, idler pulley, rear drum felt shaft, and drum belt, everything went smoothly and was just as easy as Steve described in the videos. If I didn't have such a dirty machine interior, removing the old parts and installing the new parts would have taken less than an hour. I had to hold off on installing the front glide kit and front drum felt seal since I forgot to order two of each (I'll install these at a later date. I proceeded to putting everything back together and testing the dryer. The dryer now runs quietly and works great.
Parts Used:



-
Robert W from OTSEGO, MI
-
Difficulty Level:Easy
-
Total Repair Time:More than 2 hours
-
Tools:Nutdriver, Screw drivers, Socket set, Wrench (Adjustable)
2 of 3 people
found this instruction helpful.
Was this instruction helpful to you?
Thank you for voting!