This temperature sensor, also referred to as a thermistor, is a genuine replacement component compatible with various appliance models. It works in coordination with the control board to monitor inter...
$59.35
In Stock
Order within the next 57 mins and your part ships today!
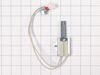
This gas range oven igniter is compatible with various models of LG gas ranges. It is made up of the igniter element, wire harness, connector and mounting bracket. The igniter is responsible for gener...
$317.43
In Stock
Order within the next 57 mins and your part ships today!
Having trouble with your LG range oven's burner? Our genuine LG Cooktop Burner is just what you need to get your oven working like new. This part plays a crucial part in ensuring that gas evenly distr...
Help your LG gas range get back to peak performance with the LG Valve Assembly. Designed just for gas ranges, this genuine LG part controls the gas flow to your right rear burner, ensuring the flame i...
$60.45
In Stock
Order within the next 57 mins and your part ships today!
Ask our experts a question about this model and we'll get back to you as soon as possible!
1 question answered by our experts.
< Prev
1
Next >
Sort by:
Search filter:
Clear Filter
Your search term must have 3 or more characters.
Keep searches simple. Use keywords, e.g. "leaking", "pump", "broken" or "fit".
Sorry, we couldn't find any existing answers that matched.Try using some different or simpler keywords, or submit your new question by using the "Ask a Question" button above!
Jeremy
May 13, 2026
It heats up to 120 and throws an F9 code
For model number LRG4115ST
Hi Jeremy, thank you for your inquiry. Based on the description of the issue, you will need to replace the oven igniter, part number PS3535362, to fix the issue. The igniter may still glow red, but it must draw enough amperage to open the safety gas valve. If it is weak, the oven will not light, or it will light too slowly. Glad to be of help!
Unplugged oven electric and turned gas off. Removed all back covers from the unit. Removed the cover on the inside covering the burner and fan in the back of the convection oven. Removed the nut securing the fan to motor shaft with helper holding the motor. Removed the three electrical wires attached to motor, making note where they go. Removed screws mounting the motor to oven. Removed motor cooling fan and shaft spacer from old motor. Fit in same orientation on new motor. Replace all parts in reverse order, restore gas and electric, turn on and test.
Took off the oven door then took out the racks and two screws in the oven bottom and removed it . Then removed the heat deflector. Then un plugged the old igniter and removed the burner to make it easier to remove the old igniter. Then installed the new igniter and reversed the process
As soon as my husband put it in the oven, the very thin prongs broke. There was no guard on either side of the prongs for protection like the one that had been in there. Very costly to us of $185 with no fix. Very disappointed in that ignitor. It would have been an easy fix. Had replaced one previously but it only lasted 6 months. Now we have a new stove